44 Scanning and Enumeration – Sniffing Basics
Dante Rocca
Sniffing is an important task for any hacker or network administrator. It allows one to see the traffic going across the network and pick out important details such as active machines, IP and MAC addresses, and sometimes even passwords if unencrypted traffic is being sent.
Learning Objectives
- Learn the basics of Wireshark filtering
Prerequisites
Deliverables
- Screenshot of Wireshark filtered to only TCP and FTP
- Screenshot of tcpdump capture on the command line
Resources
- “Lab 51 – Packet Capture with tcpdump” – https://www.101labs.net/comptia-security/lab-51-packet-capture-with-tcpdump/
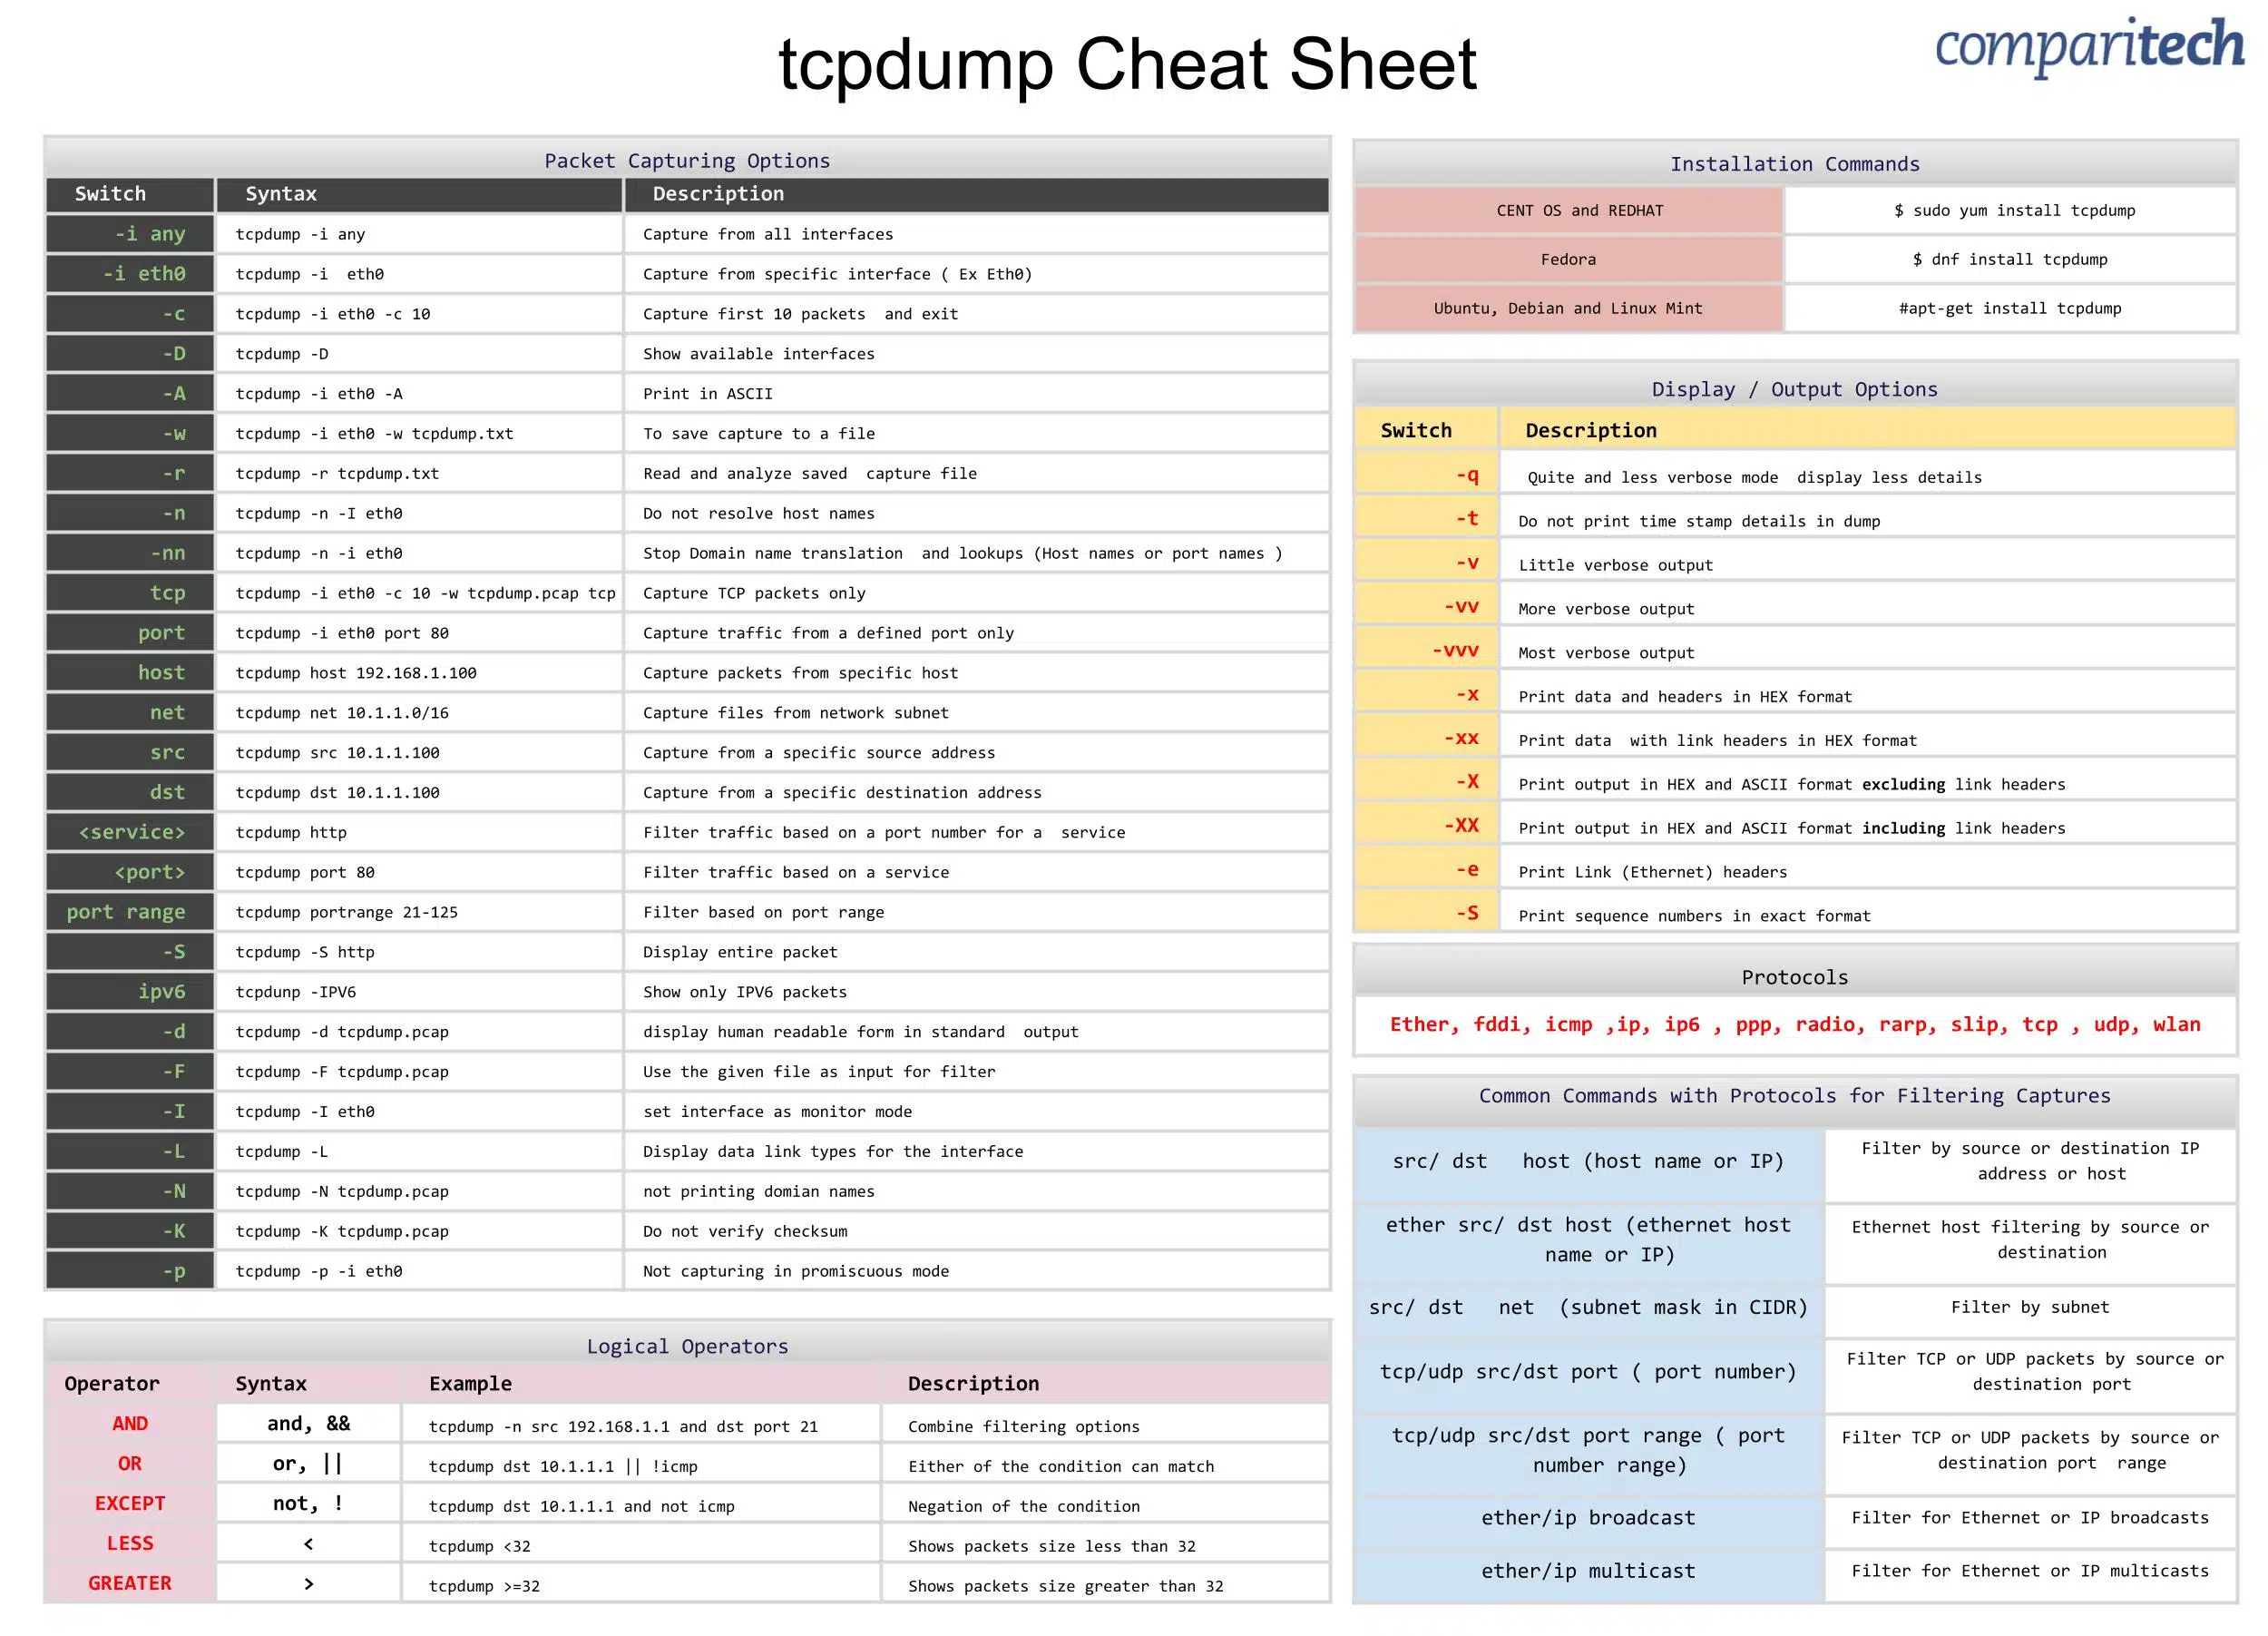
- comparitech – tcpdump Cheat Sheet – https://cdn.comparitech.com/wp-content/uploads/2019/06/tcpdump-cheat-sheet-1.jpg.webp
Contributors and Testers
- Mathew J. Heath Van Horn, PhD
- Jacob M. Christensen, Cybersecurity Student, ERAU-Prescott
Phase I – Generating Traffic to be seen on WireShark
To begin the lab we’ll use Wireshark, which learners should already be familiar with. After generating some traffic, we’ll show how to use some basic filters.
- Open a Wireshark capture between the router and the switch on the network containing the Metasploitable VM
NOTE: Keep Wireshark running in the background. This section is all about generating interesting network traffic to examine later.
- Navigate to the Kali Linux VM
- Open the terminal and check its IP address
NOTE: In this example, our Kali IP address is 100.100.100.5.
> ip address show
- Perform an Nmap scan on the 200.200.200.0/24 network
> nmap 200.200.200.0/24
- In our example, we can see that our Metasploitable3-linux machine has an IP address of 200.200.200.7 and has FTP running on port 21
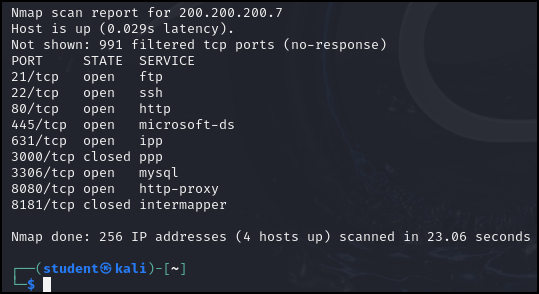
Figure 1 – Nmap scan results - Connect to the FTP service running on the Metasploitable VM
> telnet 200.200.200.7 21
- In the telnet terminal, log into the FTP server
user vagrant
pass vagrant
- Exit the FTP session
quit
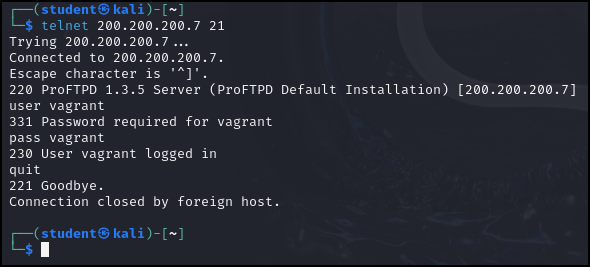
Figure 2 – FTP login - Open Firefox and go to the following URL:
http://200.200.200.7/
- You can see that there are four web pages you can click on: Three folders and a Hypertext Pre-processor (PHP) file
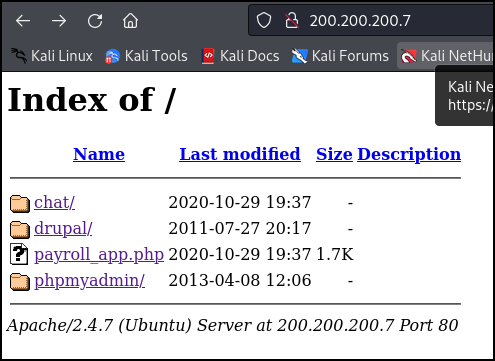
Figure 3 – Results of Browser Visit - Click around on some of the various tabs on the webpage to generate traffic, then close the browser
- Open the terminal and check its IP address
Phase II – View traffic on wireshark and practice using filters
If you have ever observed Wireshark packet capture on a live connection you can be easily overwhelmed by the thousands of data packets. In this book, we generally use a ‘closed’ system so you may have only seen the packets of the tools we are using at the time. To separate the weeds from the wheat in a live environment, we need to learn to use filters. The most common filter on Wireshark is the display filter. We can use a combination of expressions and logical operators to filter which packets appear to us. The following are just some examples so you can gain practice using various display filters.
| Command | Meaning |
| != | Not equal |
| == | Equal |
| || | OR |
| && | AND |
Don’t worry about each packet type; you can Google that information and gain knowledge as you gain experience. However, don’t be afraid to click on any packet and explore.
- Now that some traffic has been generated, switch to the Wireshark window that was opened earlier. We’re going to apply some filters to look for certain kinds of traffic
- First, we’ll filter the capture to only show packets that involve the Kali VM (100.100.100.5)
ip.addr==100.100.100.5
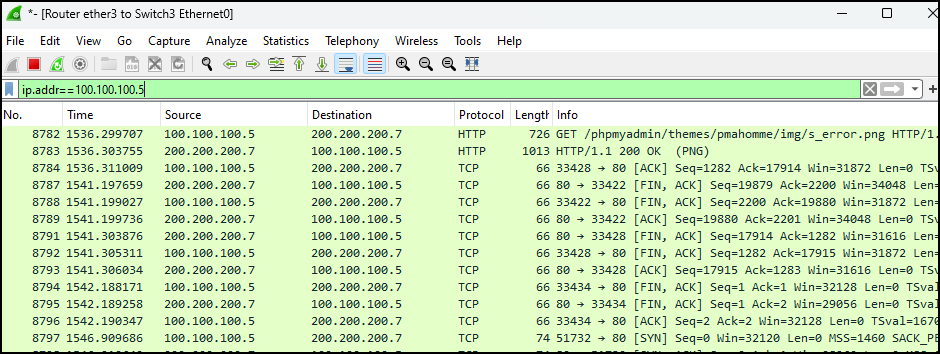
Figure 4 – Filtering out all packets not from the Kali VM - That is too many packets for us to sift through. Let’s add to our current filter to only show HTTP traffic
ip.addr==100.100.100.5 && http
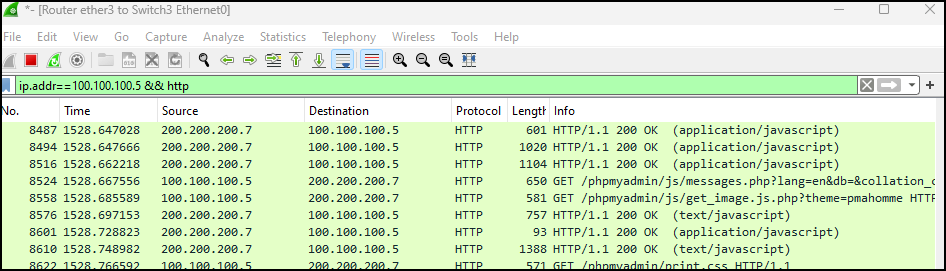
Figure 5 – Filtering on HTTP packets from the Kali VM - Now, we’ll use an “OR” operation to show both FTP and HTTP traffic
ip.addr==100.100.100.5 && http || ftp
- You can also see that the FTP login and passwords were passed in the clear
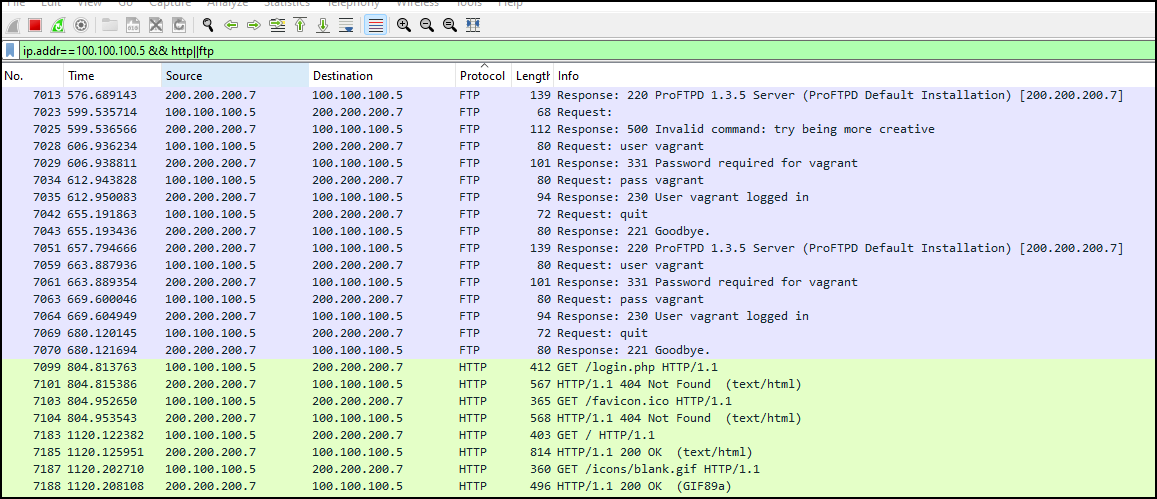
Figure 6 – Applying an HTTP or FTP filter to our target VM - Lastly, we’ll use practice using a NOT operator to display all traffic not involving the Kali VM
ip.addr!=100.100.100.5
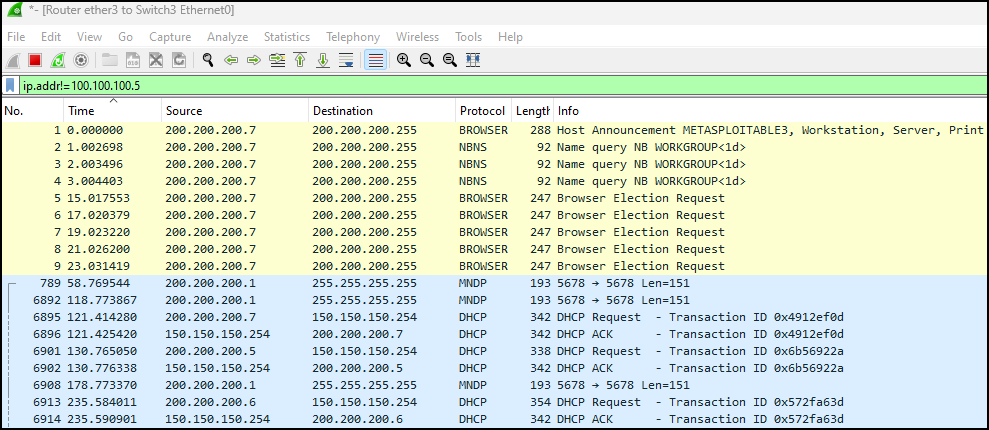
Figure 7 – All network traffic not used by our target machine
- First, we’ll filter the capture to only show packets that involve the Kali VM (100.100.100.5)
Phase III – tcpdump
While Wireshark is the tool of choice for sniffing, a wide variety of command line sniffers exist too. Tcpdump is the tool of choice in this category.
- Switch to the Kali VM and open the terminal
- To start tcpdump we need to know the different interfaces on our computer. Use the following command and take note of the interface connected on the GNS3 network
> ip address show
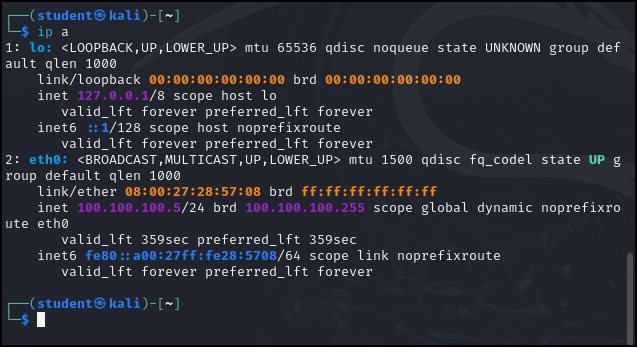
Figure 8 – Results of ip a - We can see there are two interfaces: Local (lo) and the ethernet (eth0). Use this information to start a basic tcpdump session
> sudo tcpdump -n -i eth0
Switch Description -i Specify the interface name we want to use. -n Do not convert addresses to names. - While tcpdump is running, generate traffic by opening a second terminal and connecting to the ftp server over telnet as we did in Phase I
- Once traffic has been generated, return to the original terminal and use Ctrl+C to stop tcpdump
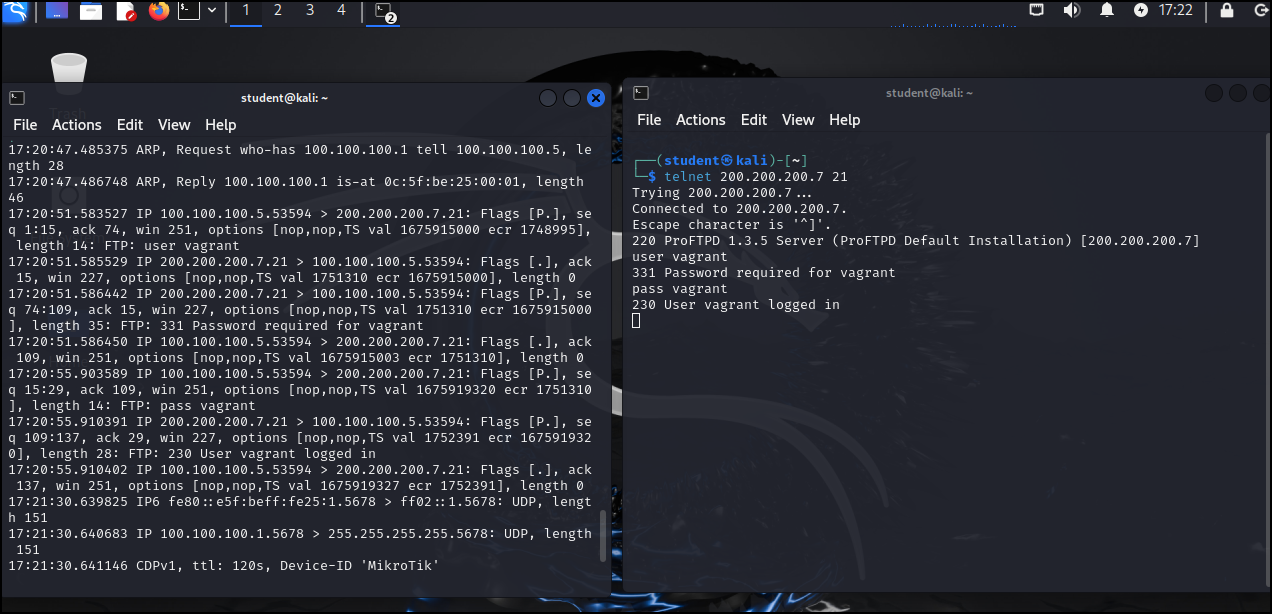
Figure 9 – Results of tcpdump - Similar to Wireshark, we can use filters with tcpdump. To filter to only port 80 during a capture use the following command and then generate traffic again by using Firefox to visit the same URL as in Phase I
> tcpdump -n -i eth0 port 80
- Use Ctrl+C to end the capture
- You can see the information is rather difficult to read at first, but after a minute you can see that it is very similar to the information we obtained from Wireshark
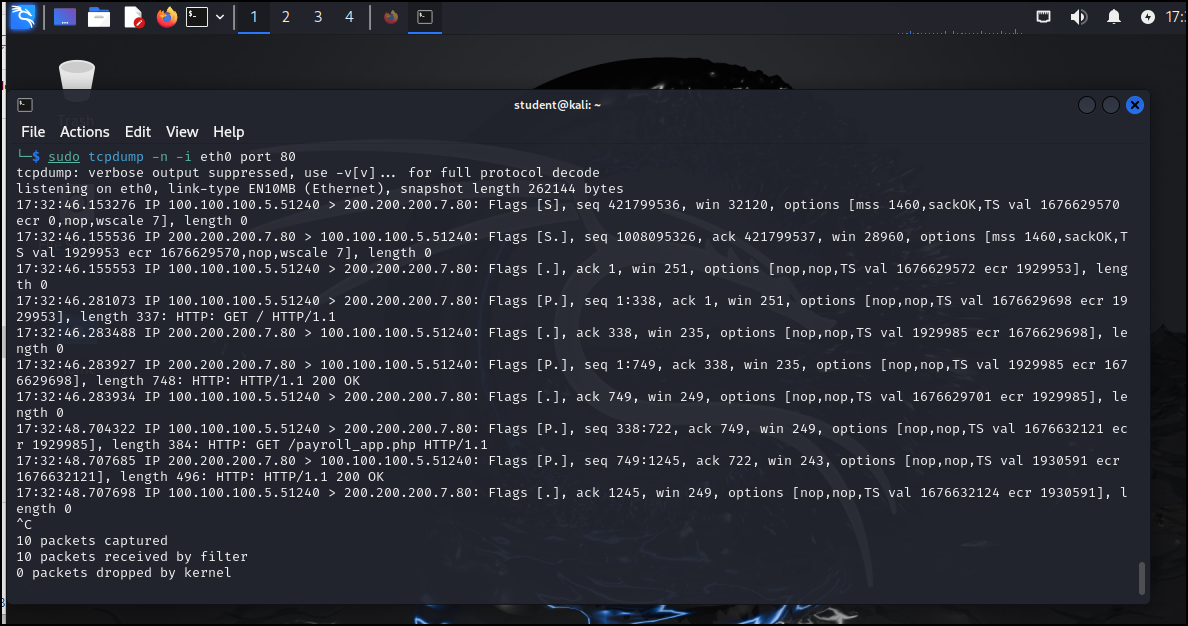
Figure 10 – Results of TCP dump filtered for HTTP traffic - One of the most important things to know is how to write a packet capture file with tcpdump. Use the following command to write a capture to a file. Use either the telnet connection or the browser to generate traffic
> tcpdump -n -i eth0 -w ~/Documents/CaptureFile.txt
- To view the saved file type cat ~/Documents/CaptureFile.txt. You can see the information is a little better since it is formatted for easy reading
End of Lab
Deliverables
2 screenshots are needed to earn credit for this exercise:
- Wireshark filtered on Metasploitable target machine showing only TCP and FTP
- TCPdump capture of Metasploitable target machine showing HTTP traffic
Homeworks
There is no homework for this chapter. It is a primer to expand student knowledge for use in other assignments.