19 Dynamic Host Configuration Protocol – Windows
Raechel Ferguson
Dynamic Host Configuration Protocol (DHCP) is an interacting client-server protocol that automatically provides a host (PC, Laptop, Phone, etc) with an Internet Protocol (IP) address upon request. The purpose of this activity is for learners to see DHCP in action instead of just reading about the DHCP handshake theory. A secondary purpose is for learners to experience frustration when hosts do not get a DHCP IP address. Learners can see how the packets move and where they may get hung up while working on making DHCP function correctly on their network. Finally, learners will be able to see Address Resolution Protocol (ARP) in action. While DHCP occurs when a host requests an IP address for an existing MAC address, ARP is when a host has an IP address, but is unsure what MAC address it belongs to.
Estimated time for completion: 20 minutes
Learning objectives
- Successfully deploy a DHCP solution using Windows on an enterprise network
- Capture and Observe DHCP packets using Wireshark
- Capture and Observe ARP packets using Wireshark
- Successfully add hosts to an enterprise network and receive IP addresses automatically
Prerequisites
- Chapter 6 – Adding a Virtual Machine to GNS3
- Chapter 8 – Create a Windows Server
- Chapter 17 – IPv4 Addressing
Deliverables
- 4 Screenshots:
- Wireshark – DHCP Packets for PC2
- Wireshark – DHCP Packets for PC3
- GNS3 Workspace
- Configuration of Windows Server
Resources
- NOTE: Each source will referenced with its corresponding number in superscript (EX: 1 ) at the end of a step
- 1. MSFT WebCast. “Basic Configuration Tasks in Windows Server 2019.” YouTube, January 25, 2019. https://www.youtube.com/watch?v=1nxYJSV7-u8&list=PLUZTRmXEpBy32NP6z_qvVBOTWUzdTZVHt&index=5.
- 2. MSFT WebCast. “Install and Configure DHCP Server in Windows Server 2019 Step by Step Guide.” YouTube, February 3, 2019. https://www.youtube.com/watch?v=fUK6d3s1Im4&t=414s.
Contributors and testers
- Mathew J. Heath Van Horn, PhD, ERAU-Prescott
- Julian Romano, Cybersecurity Student, ERAU-Prescott
- Dante Rocca, Cybersecurity Student, ERAU-Prescott
- Jacob M. Christensen, Cybersecurity Student, ERAU-Prescott
Phase I -Build the Network Topology
The following steps are to create the baseline for completing the lab. It makes assumptions about learner knowledge from completing previous labs. By the end of this lab, your network should look like the following:
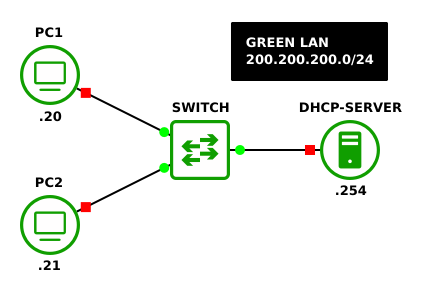
- Open GNS3 and start a new workspace
- Create a new project: LAB_05
- Create the baseline network with an address space of 200.200.200.0/24
NOTE: This example uses the same network topology that was created in the previous chapter: DHCP using Linux.
- Use two VPCS devices for PC1 and PC2
- Add an Ethernet switch
- Add a Windows Server VM and rename it to “DHCP-server”
NOTE: Ensure that the Allow GNS3 to use any configured VirtualBox adapter check box is selected for all VMs added to GNS3. Refer to step 6.2 in Chapter 11 for more information.
- Connect the server and PCs to the switch
- Label and organize your network as necessary
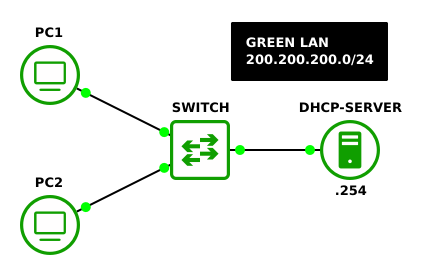
Figure 2 – GNS3 network environment
Phase II – Configure the Network Interface of the Server
In order for the server to act as a DHCP server we will need the server to be properly attached to the network. Without giving it the proper network information our server will be unable to talk with any other computers on the network.
- Start the server and login
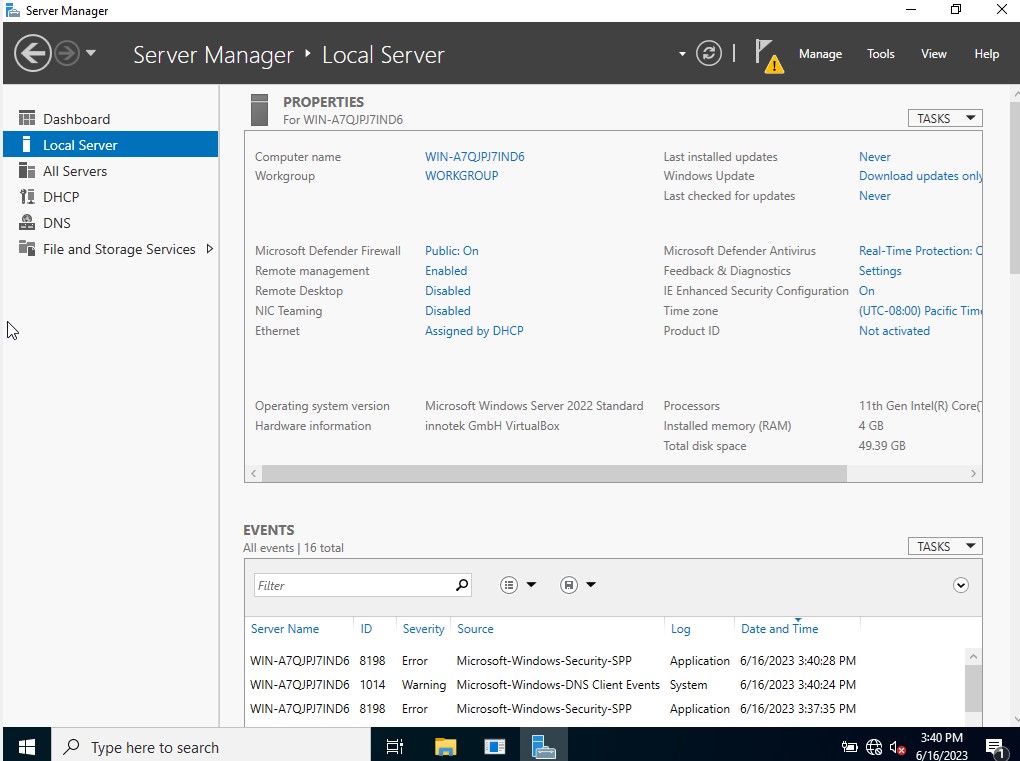
- Focus on the Server Manager dashboard window 1
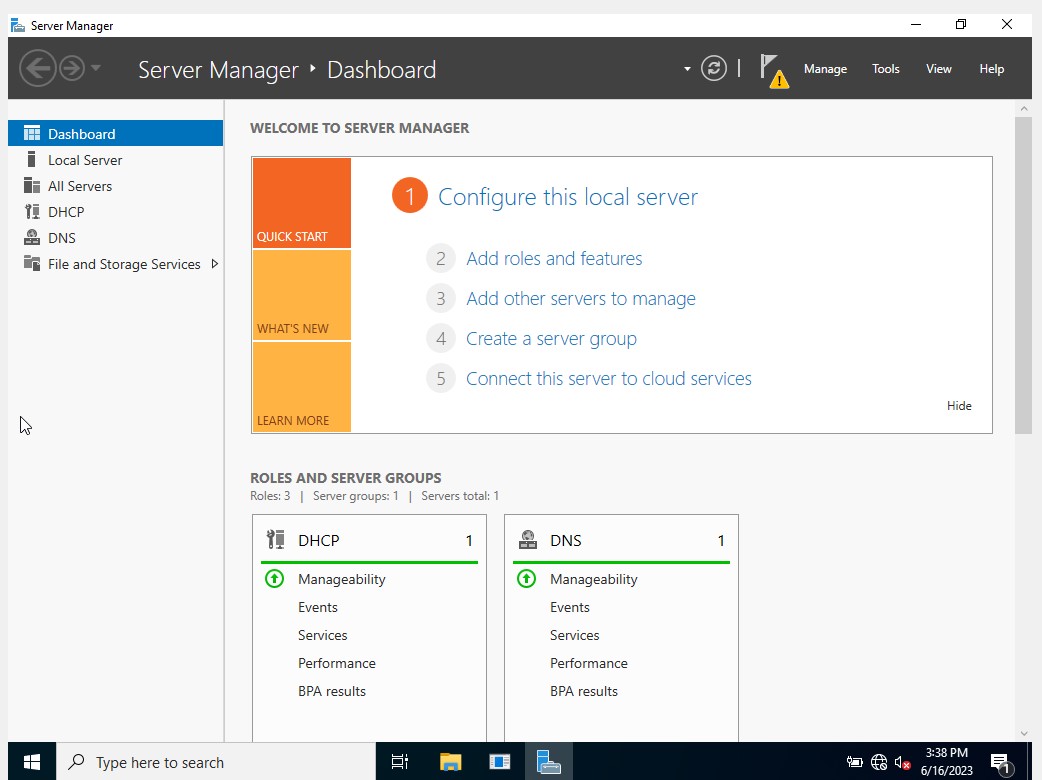
Figure 3 – Windows Server Manager Dashboard NOTE: If the Server Manager does not start on boot, can open it via the Windows Start menu.
- On the left side of the page, select the Local Server option
- Assign the IP address 200.200.200.254 to the local ethernet interface
- Under the PROPERTIES table, left-click on the Ethernet option (Figure 4) 1
NOTE: This is located beneath NIC Teaming and above Operating system version.
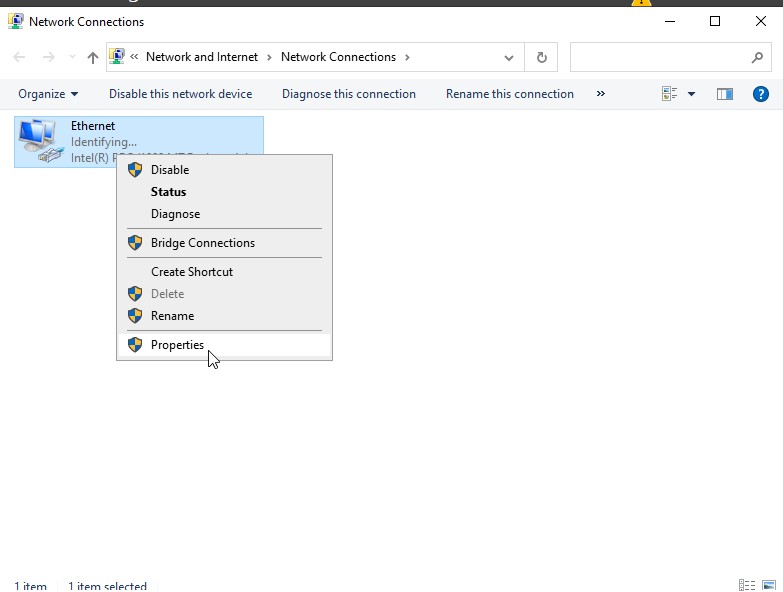
- Right-click on the network interface you want to use (e.g. “Ethernet”) and select Properties in the context menu (Figure 5) 1
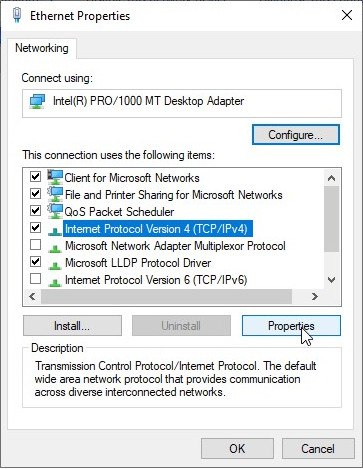
- A new sub-window labeled Ethernet Properties should appear
- Uncheck Internet Protocol Version 6 (TCP/IPv6) 1
- Check and highlight the Internet Protocol Version 4 (TCP/IPv4) option 1
- On the bottom right corner, click on Properties (Figure 6) 1
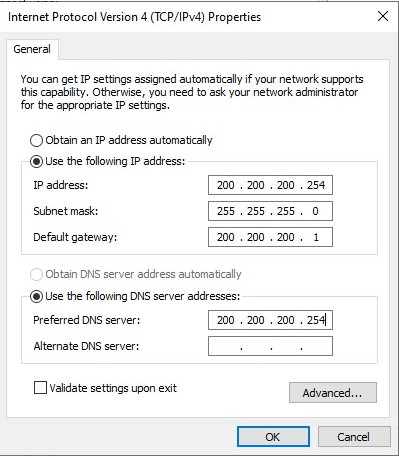
- A new sub-window labeled Internet Protocol Version 4 (TCP/IPv4) Properties should appear (Figure 7) 1
- Select Use the following IP address
- Enter 200.200.200.254 as the IP address 1
- Enter 255.255.255.0 as the Subnet mask 1
- Enter 200.200.200.1 as the Default gateway 1
- Select Use the following DNS server addresses
- Enter 200.200.200.254 as the Preferred DNS server 1
- Leave the Alternate DNS server blank 1
- Click OK to apply these settings 1
- Click Close to return to the Network Connections window
- Select Use the following IP address
- Close the Network Connections window
- Under the PROPERTIES table, left-click on the Ethernet option (Figure 4) 1
- Restart Windows Server
Phase III – Setup the DHCP Server
Windows Server is capable of many functions and is very customizable. Therefore, to minimize installation times, Windows Server on initial installation does not come with many features activated. We will need to activate and configure Windows Active Directory and DHCP services.
- Focus on the Server Manager dashboard window 2
- In the top right-hand corner of the screen, select Manage 2
- Select Add Roles and Features from the context menu 2
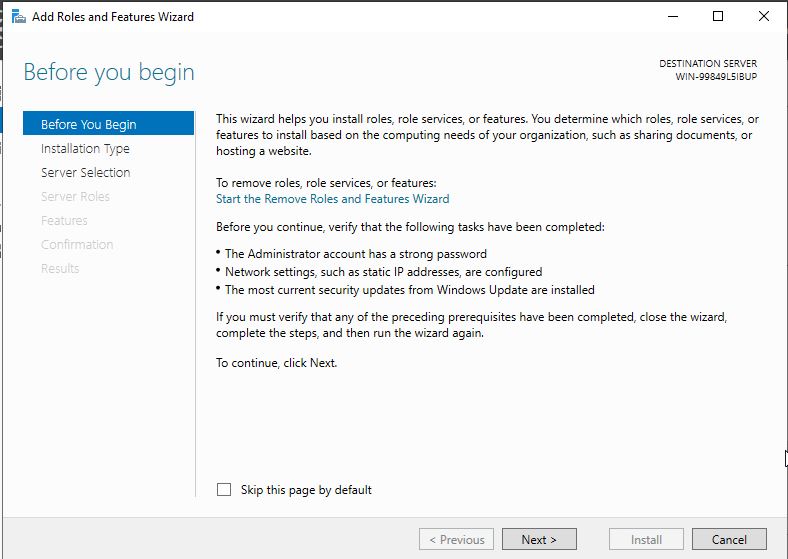
- A popup window labeled Add Roles and Features Wizard will open (Figure 8)
- Before you Begin – Click Next 2
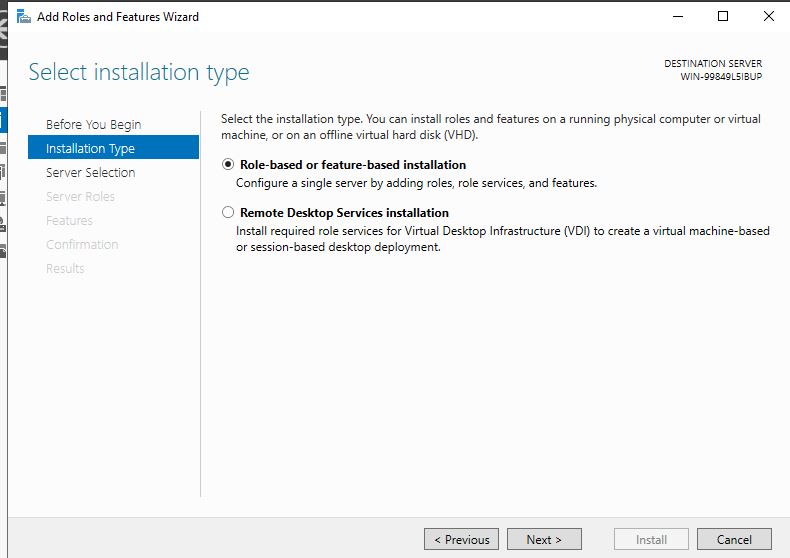
- Installation Type – Select the Role-Based option – then click Next (Figure 9) 2
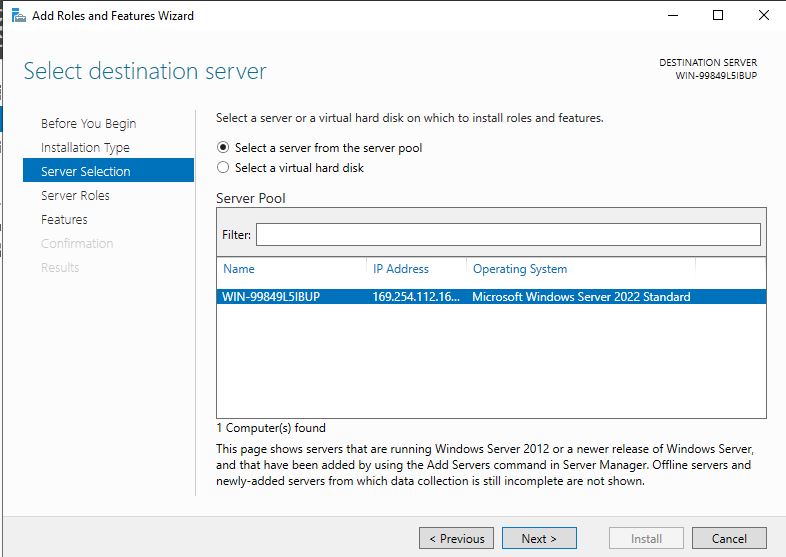
- Server Selection – Select your local server (this should be the only option) then click Next (Figure 10) 2
- Server Roles – select DHCP Server 2
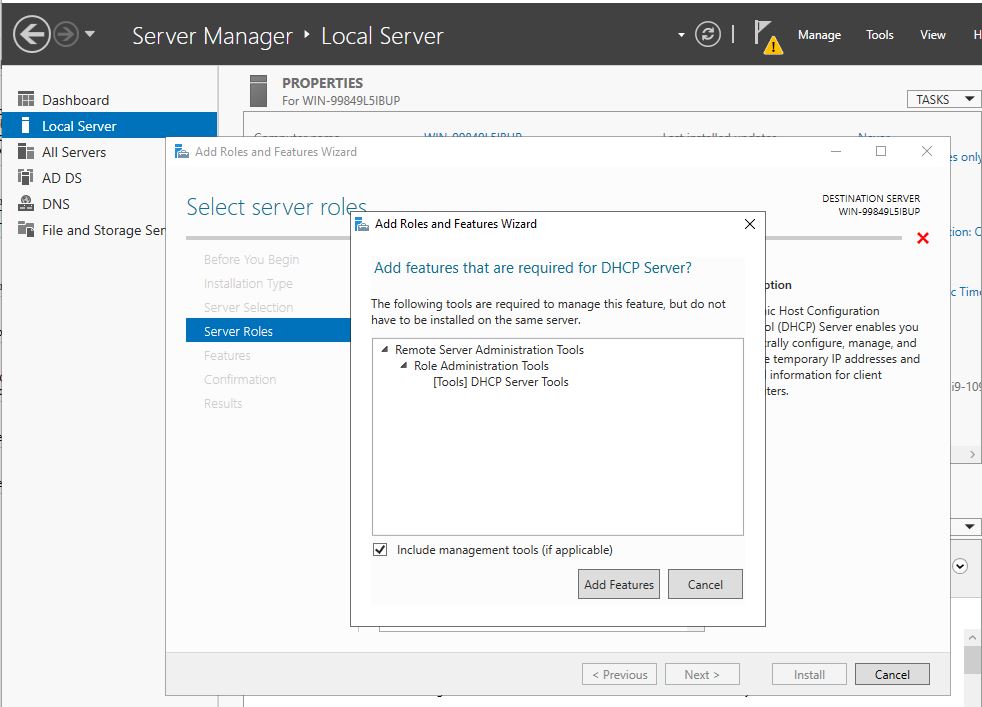
- POP-UP – Add Features – Select Add Features towards the bottom of the new screen (Figure 11) 2
- Return back to Server Roles – Click Next 2
- Features – Click Next 2
- DHCP Server – Click Next 2
- Confirmation – Click Install 2
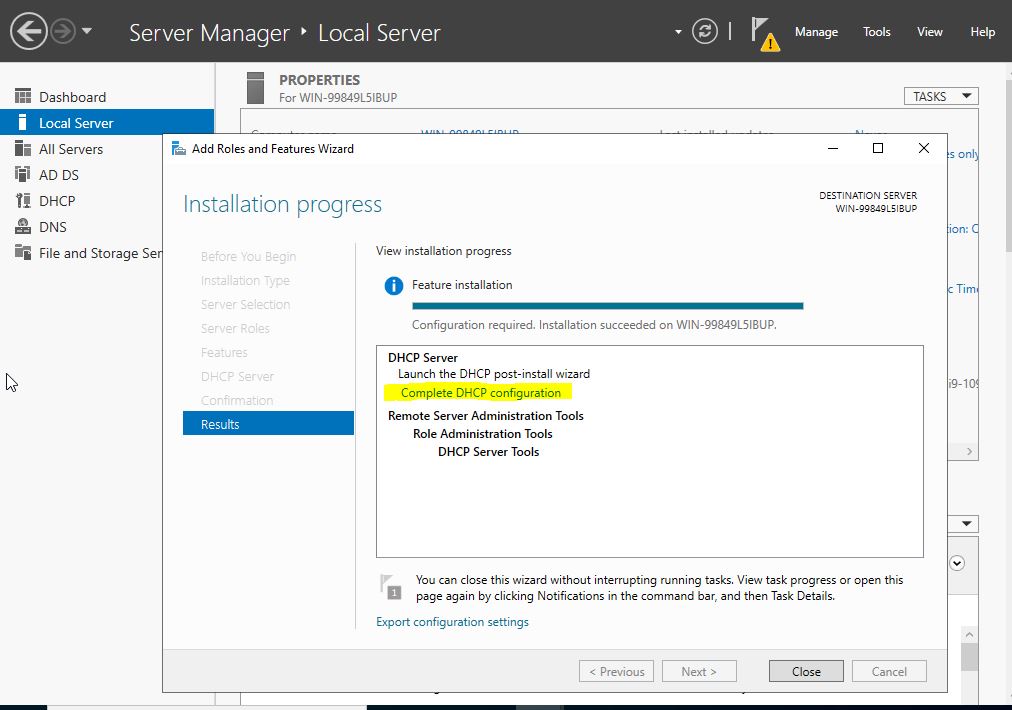
- Once installation is complete click on the blue text that states Complete DHCP Configuration (Figure 12) 2
- POP-UP – DHCP Post-Install Configuration Wizard
- Description – Click Next 2
- Authorization – Click Commit 2
NOTE: The default authorization should be set to use Administrator credentials. If it doesn’t, you’ve done something wrong and need to restart.
- Summary – Click Close 2
- Return to Rolls and Features Wizard
- Results – Click Close 2
- Restart Windows Server
Phase IV – Configure DHCP
DHCP is widely flexible. In this lab, we are going to assign a range of IP addresses that can be used by end devices connecting to our network without a manually configured IP address.
- Focus on the Server Manager dashboard window
- In the top right-hand corner of the screen, select Tools 2
- From the drop-down menu, select DHCP 2
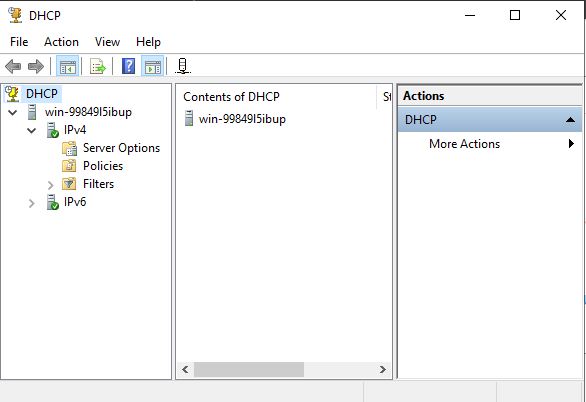
- A new sub-window labeled DHCP should appear
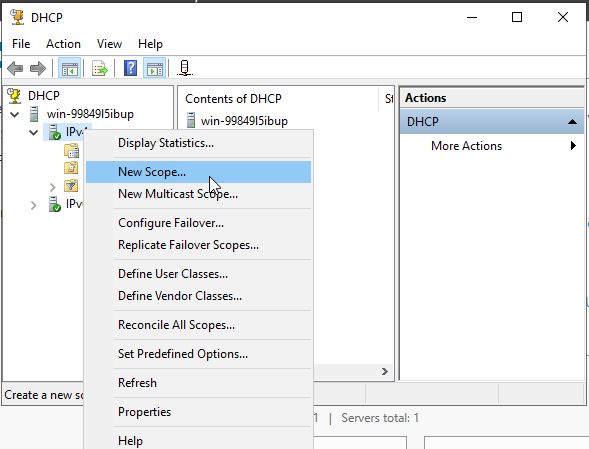
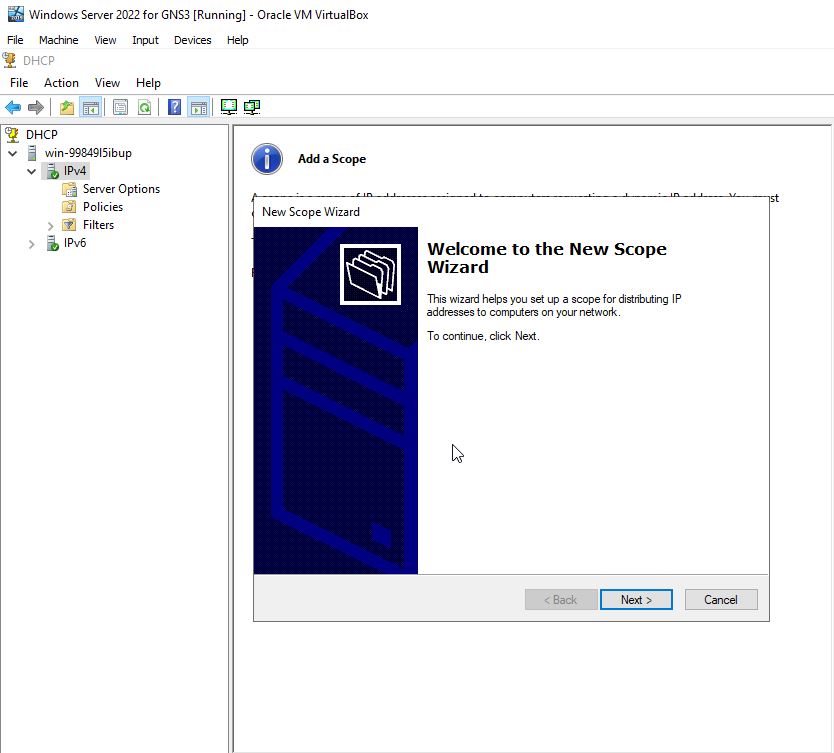
- The New Scope Wizard window will open
- Scope Wizard Welcome – Click Next (Figure 15) 2
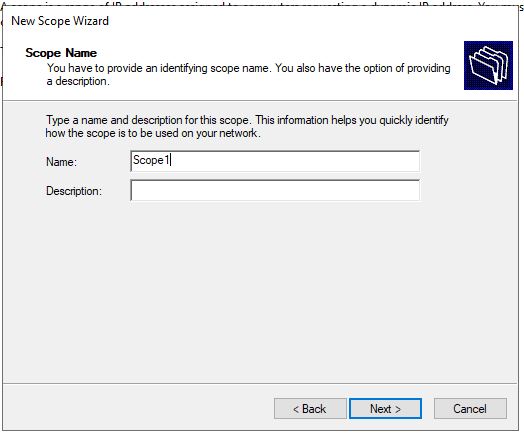
- Scope Name (Figure 16)
- Add a name such as Scope1 2
- The description field can be left blank
- Click Next 2
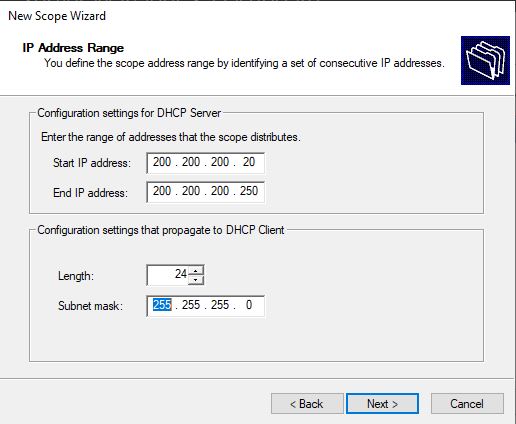
- IP Address Range (Figure 17) 2
- Start IP address – 200.200.200.20
- End IP address – 200.200.200.250
- Length – 24 2
- Subnet mask – 255.255.255.0 2
- Click Next
- Add Exclusion and Delay – Click Next 2
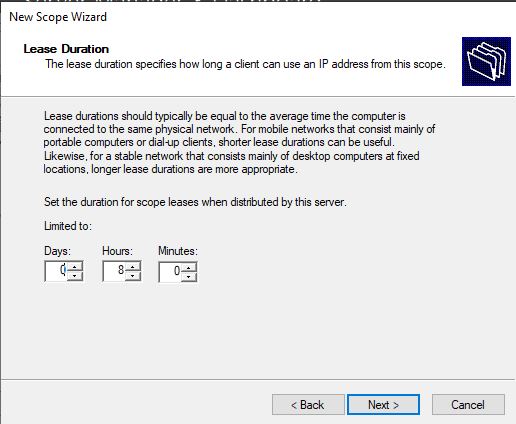
- Lease Duration (Figure 18) 2
- Limited to 8 hours 2
- Click Next
- Configure DHCP 2
- Select Yes
- Click Next
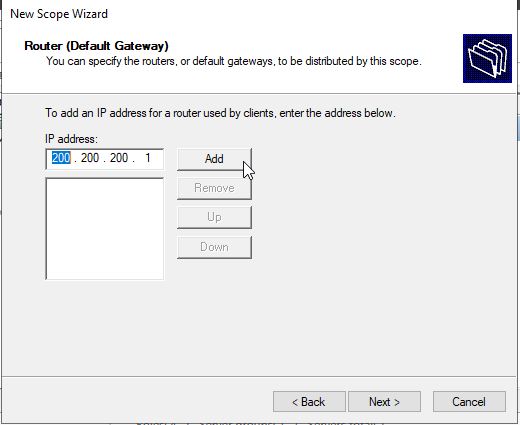
- Router (Default Gateway) (Figure 19) 2
- IP address – 200.200.200.1
- Click Add
- Click Next
- Domain Name and DNS Servers – Click Next 2
- WINS Servers – Click Next 2
- Activate Scope
- Click Yes 2
- Click Next 2
- Click Finish
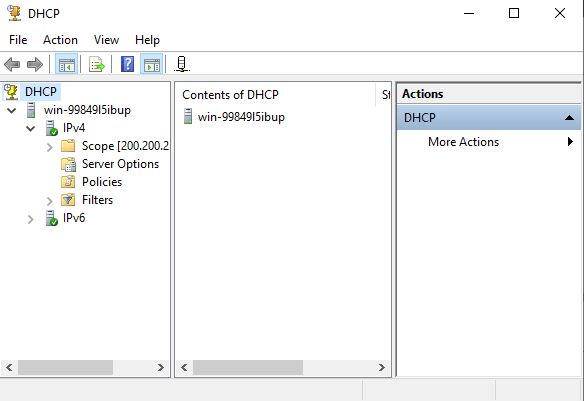
- Notice that Scope now appears under the DHCP>machine_name>IPv4 tree (Figure 20)
- Close the DHCP window
Phase V – Watch DHCP in Action
This lab is an opportunity for you to see these activities in action without the chaff that exists on an existing enterprise network.
- DHCP automatically assigns an IP address to interfaces requesting one.
- ARP is for interfaces that already have an IP address, but the interface needs to tell all of the other interfaces on the network.
- Navigate back to GNS3
- Start a Wireshark capture on the Server-Switch link
- Start PC1 and open its console
- Request a new IP address
> ip dhcp
- Notice the four main DHCP packets being exchanged in Wireshark that were discussed in the previous chapter: Discover, Offer, Request, Accept
- Request a new IP address
- Start PC2 and open its console
- Request a new IP address
> ip dhcp
- Request a new IP address
- Ensure that PC1 is able to ping PC2
- Congratulations! You now know how to configure a basic DHCP server on both Linux and Windows machines
End of Lab
Deliverables
4 screenshots are needed to receive credit for this exercise:
- Wireshark – DHCP Packets for PC2
- Wireshark – DHCP Packets for PC3
- GNS3 Workspace with 2 PCs, switch, and DHCP server – all devices labeled with their IP addresses
- Configuration settings of Windows Server DHCP
Homeworks
Assignment 1 – Combined network traffic watching
- Turn off all devices
- Replace the switch with a hub and reconnect all devices
- Monitor any of the PCs with Wireshark and capture ARP, DHCP, and ICMP packets for all three PC’s as you turn devices back on
- RECOMMENDED GRADING CRITERIA
- Screenshot of GNS3 environment with everything labeled
- Screenshot of DHCP for one PC
- Screenshot of ICMP for one PC
Assignment 2 – Reconfigure the DHCP server
- Figure out the number of devices that can be attached to the switch
- Generate a random IP address and choose a subnet that will allow the use of all the switch connections with as few wasted IP addresses as possible
- Reconfigure the network to use these new network addresses
- Reconfigure the DHCP settings to issue IPv4 address in this new space
- RECOMMENDED GRADING CRITERIA
- Screenshot of the DHCP configuration
- Screenshot of the GNS3 workspace
- Screenshot of DHCP of one PC
- Screenshot of ICMP of one PC
Figures for Printed Version