14 Making GNS3 Portable
Mathew J. Heath Van Horn, PhD
GNS3 is designed for large corporations running it on a server. These corporations build their entire infrastructure on the GNS3 platform and analyze its performance before deploying the real-world configurations. We are using GNS3 on a desktop, which limits the number of devices we can deploy in our environment. However, it also makes the GNS3 environment portable. You might have multiple environments (home desktop, school desktop, and laptop) that you want to move your GNS3 environment between. This chapter will explain how to make your GNS3 environment portable.
Learning Objectives
- Successfully migrate your GNS3 environment to a portable drive
- Successfully migrate your GNS3 environment to your local system.
Prerequisites
Deliverables
- None – this is for learners who want to make their GNS3 environment portable
Resources
- https://www.partitionwizard.com/partitionmagic/usb-3-0-speed.html
- https://learn.microsoft.com/en-us/windows/client-management/client-tools/change-default-removal-policy-external-storage-media
- https://usbdeview.com/
Contributors and Testers
Alec Parish, Student, ERAU
Phase I – Selecting a portable drive.
With the advent of USB 3.0, users can run virtual machines (VM) right off their thumb drive at the same speed as a hard drive. However, many sellers of thumb drives advertise ‘possible speeds’ instead of actual speeds. We tested six different thumb drives and found only one that was fast enough to run virtual machines on the drive. This phase covers how to test a thumb drive.
- The first thing to do is to check your system parameters:
- Starting with Windows 10, the default policy for removing USB drives has been set to “quick remove.” This policy remains in Windows 11. If you need to improve your USB performance, you can change the policy to “better performance”. However, do not forget to use the Windows “Safely Remove Hardware” process, or all your drive data could be lost! Windows default media removal policy | Microsoft Learn
- Use the most current drivers for your portable storage device
- Convert the file system on the portable drive to NTFS
- Starting with Windows 10, the default policy for removing USB drives has been set to “quick remove.” This policy remains in Windows 11. If you need to improve your USB performance, you can change the policy to “better performance”. However, do not forget to use the Windows “Safely Remove Hardware” process, or all your drive data could be lost! Windows default media removal policy | Microsoft Learn
- Check the speed of your device using a USB speed tester such as MiniTool Partition Wizard https://www.partitionwizard.com/partitionmagic/usb-3-0-speed.html or https://usbdeview.com/
- USBDeview instructions
- Download the app from https://usbdeview.com/
- Navigate to your downloads and extract all the files
- Click on the USBDeview application to start it
- Find the USB device in the list of devices
NOTE: Plug your device in and then out to see what has changed. That is your USB device
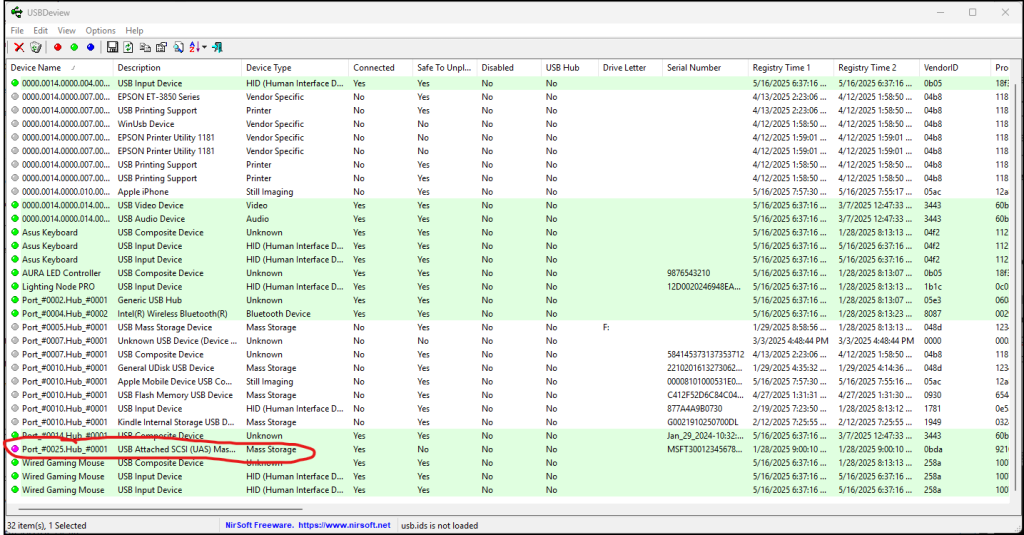
Figure 1 – Selecting the USB drive in USBDeview - Right-click the USB drive and select Speed Test
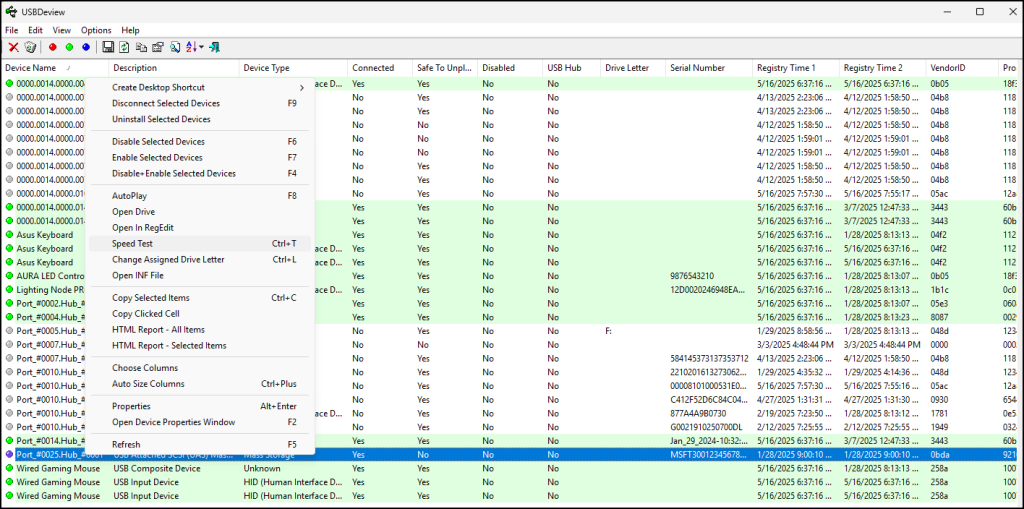
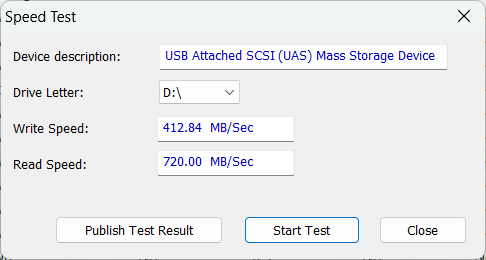
Figure 2 – Starting a speed test - Press the “Start Test” button
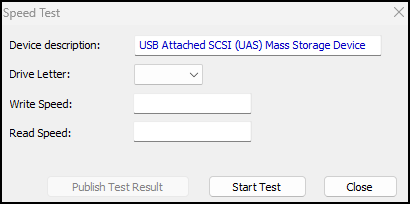
Figure 3 – Speedtest
- MiniTool Partition Wizard
- Download the tool from https://www.partitionwizard.com/partitionmagic/usb-3-0-speed.html
- Double-click on the pw-demo application in your downloads to install and start the program
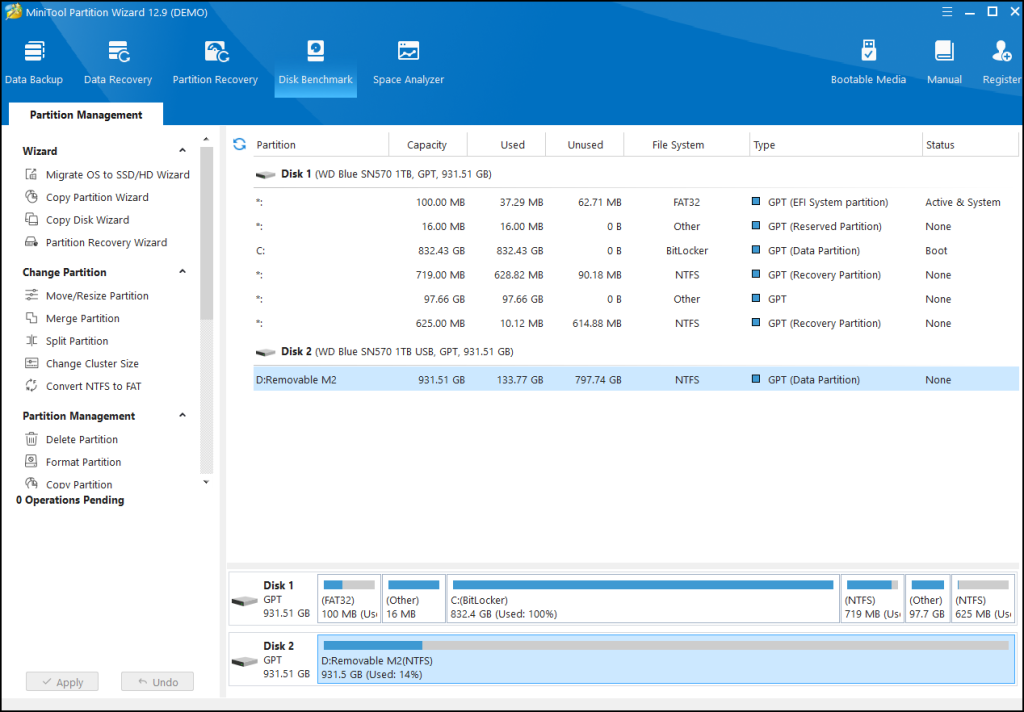
Figure 4 – MiniTool Partition Wizard - Select the thumb drive, then click on Disk Benchmark
- Change the transfer size from 32 KB to 128 KB
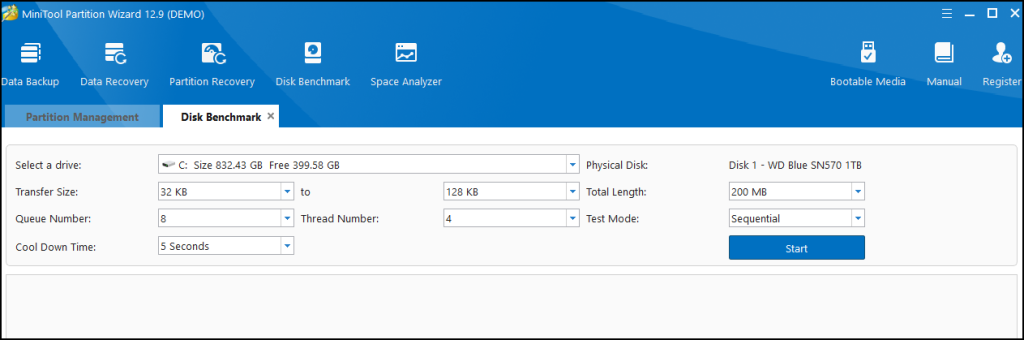
Figure 5 – MiniTool Disk Benchmark - Press “Start”
- Change the transfer size from 32 KB to 128 KB
- USBDeview instructions
- The benchmark MUST BE at least 300 MBps for reading chunks of 128MB of data to achieve non-laggy speeds
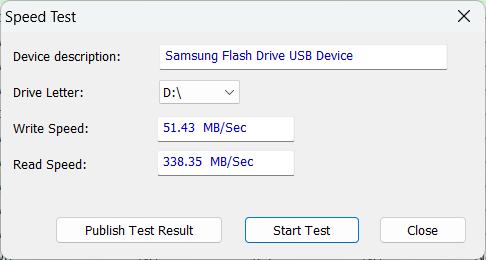
Figure 6 – USB speed test using USBDeview 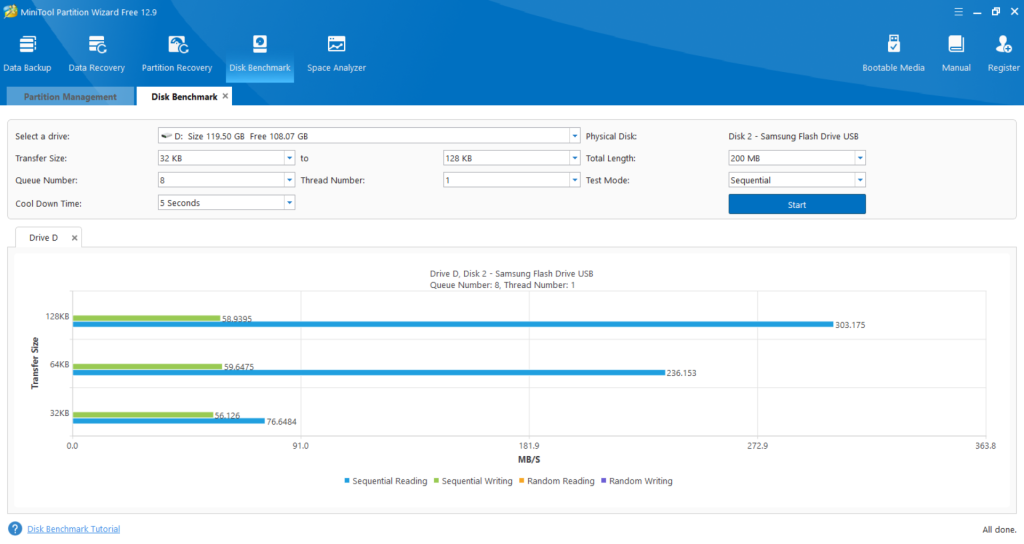
Figure 7 – USB speed test using Partition Wizard
-
-
- Dr. Heath Van Horn uses a motherboard’s M2 SSD Hard Drive mounted in a USB 3.2 enclosure, which turns the SSD into a thumb drive. This setup offers ample storage but is limited by the maximum USB 3 speeds. However, unlike other USB drives, the M2 Drive consistently exceeds the 300 Mbps threshold.
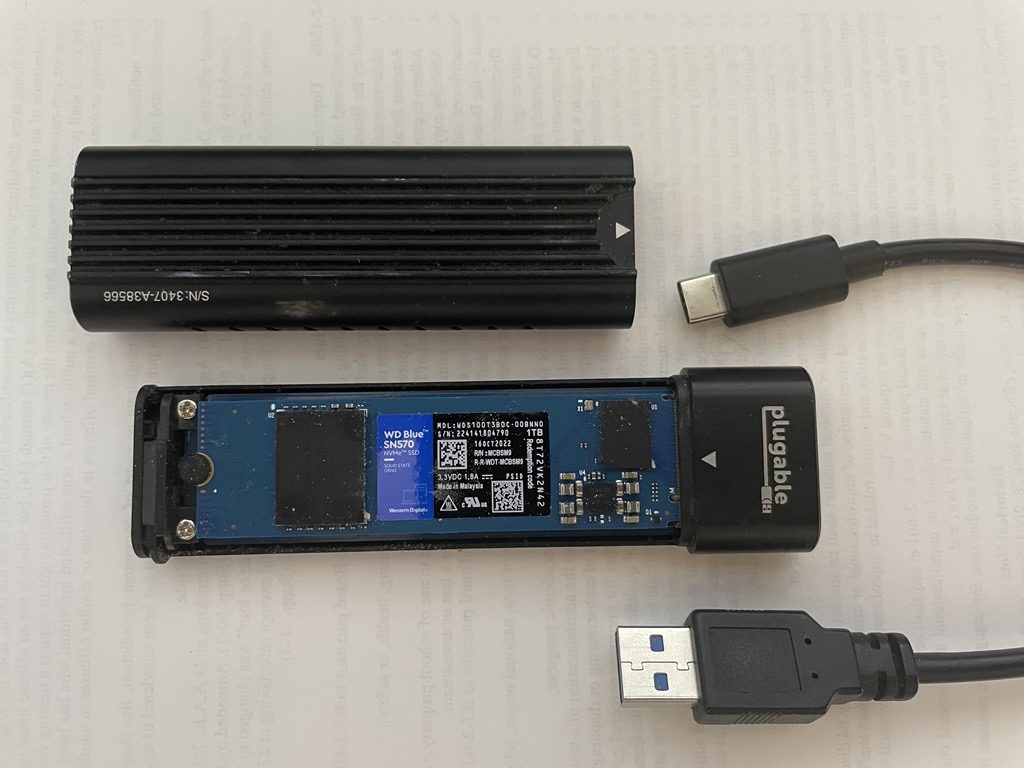
Figure 8 – SSD drive in a USB 3.2 cage (picture taken by Dr. Heath Van Horn and used with permission) However, unlike other USB drives, the M2 Drive consistently exceeds the 300 Mbps threshold.
- Dr. Heath Van Horn uses a motherboard’s M2 SSD Hard Drive mounted in a USB 3.2 enclosure, which turns the SSD into a thumb drive. This setup offers ample storage but is limited by the maximum USB 3 speeds. However, unlike other USB drives, the M2 Drive consistently exceeds the 300 Mbps threshold.
-
Final note. We don’t recommend products. However, we have noticed that sticking with well-known name brands and spending a little bit more (e.g., $30 instead of $20), it is likely that the device will yield actual USB 3.0 drive speeds. Ensure that you test the drive to verify its functionality.
Phase II – Setting up the portable device to run GNS3
Having GNS3 run on a portable device can be very handy if you move your environment between two or more PCs (home, work, school, etc.). However, you have to do a bit of prep work.
- The GNS3 VM and the other VMs are portable features,
- The GNS3 base must be installed on every PC – this is NOT portable
- All GNS3 versions must be the same (each GNS3 base and the portable GNS3 VM)
- Any project you create cannot go backward in GNS3 versions
- Install the GNS3 VM (Chapter 2) as you usually would
- Insert your portable drive
- Create folders on the portable drive:
- projects
- configs
- appliances
- symbols (if you use anything not provided by GNS3 defaults)
- Clone the GNS3 VM to the portable drive
- Right-click on the GNS3 VM and select clone

Figure 10 – Clone the GNS3 VM - Change the VM’s name to something meaningful. We used “GNS3 VM Portable.” Select the removable drive in the path, then hit “Next.”
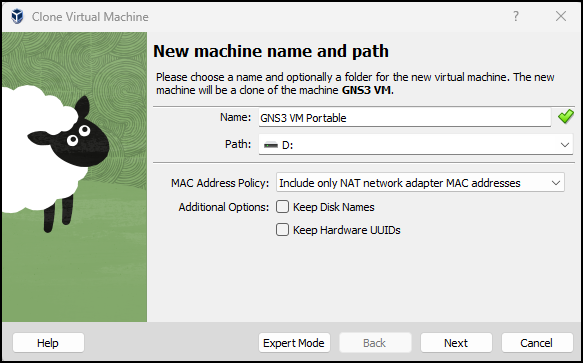
Figure 11 – Name the VM and select the removable drive - Select “Full Clone” then hit “Finish”
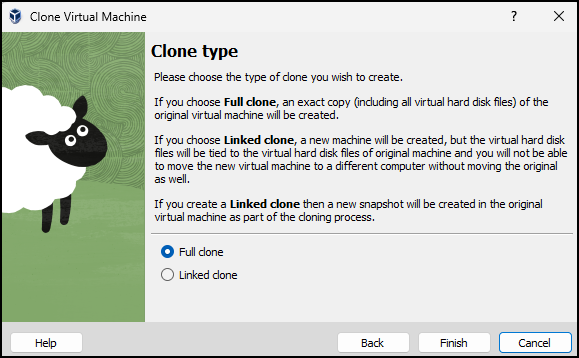
Figure 12 – Select Full Clone
- Right-click on the GNS3 VM and select clone
- Configure GNS3 on each PC you want to use in the portable environment
- Start GNS3 and close the project Window. Please do not open a project, we have some settings to modify and will have to restart
- Select Edit –> Preferences
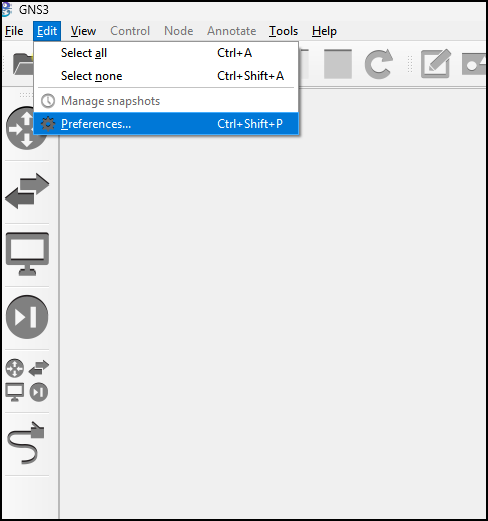
Figure 13 – Select edit, then preferences - You can change the general preferences to folders on the portable drive
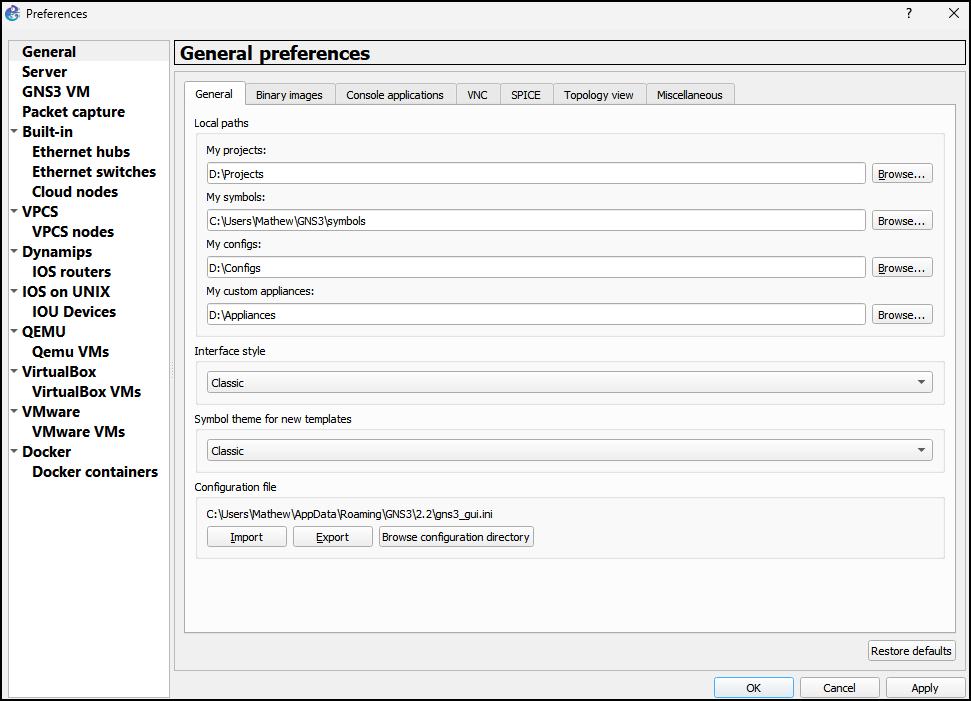
Figure 14 – Change default folders - Change the GNS3 VM to the clone we created on the portable drive
NOTE: VMs will only show the VMs within the local VirtualBox manager. This will become more important later.
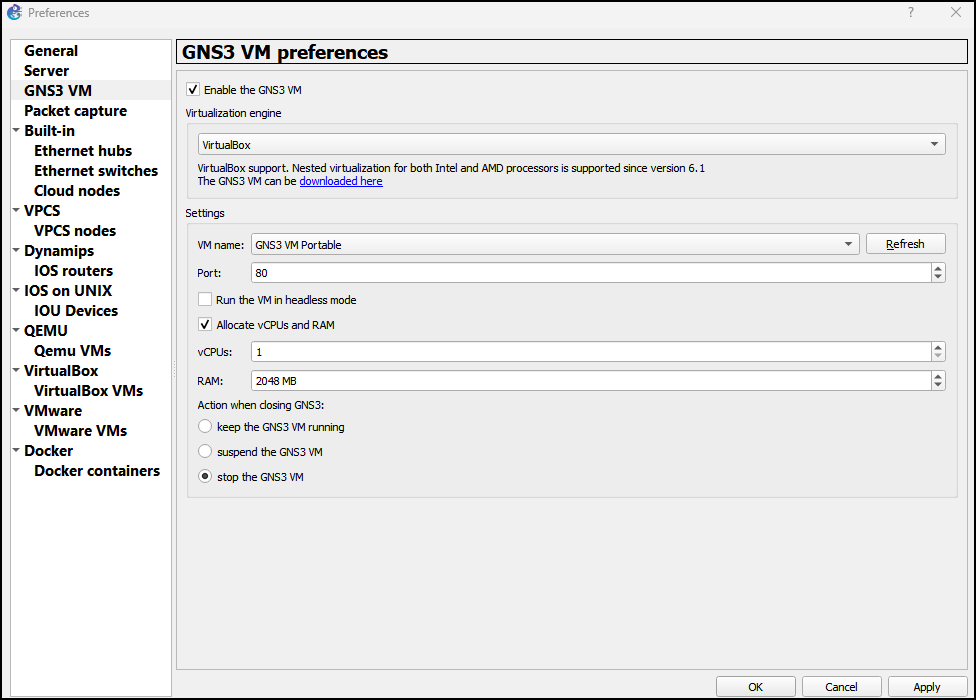
Figure 15 – Change default GNS3 VM - Press “Apply”
- Restart GNS3 for the changes to take effect
- Select Edit –> Preferences
- Start GNS3 and close the project Window. Please do not open a project, we have some settings to modify and will have to restart
- So long as you apply the above steps to every PC or laptop you intend to use with your portable environment, you can keep every project, VM, and appliance on the portable device. Essentially, you can have your work product anywhere you are working
Phase III – Using the portable device on a new PC
When you create new VMs on one PC and then try to use them on another, there is a process that must be followed. It isn’t complicated, but you need to remember some things. Remember, the new PC doesn’t know what you did on the other PC. Sure, some information will transfer, but the addition of new VMs will not be known on the new machine.
- Ensure compatibility between the new PC and the one you use. Nothing will work if these versions are different
- GNS3 base environment must be the same version
- VirtualBox 7.0.x is installed
- Navigate to your portable USB drive
- Double-click on the GNS3 Portable VirtualBox Machine file to import it into the new PC’s VirtualBox manager
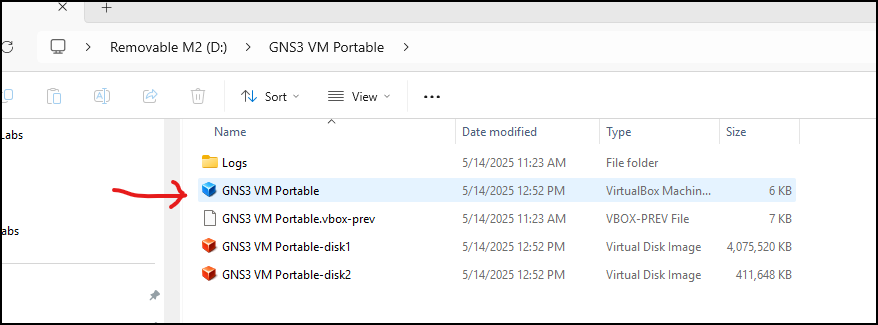
Figure 16 – Importing the GNS3 VM into VirtualBox NOTE: Repeat the double-click import for every VM stored on the thumb drive. This action will open a new instance of VirtualBox Manager, leaving you with several running instances. After importing every VM, close them all and restart the VirtualBox Manager to have one instance open.
- Start GNS3 and close the Project window that always appears on startup. We aren’t ready for projects yet
- Follow the Step 5 procedures in Phase II above to add the GNS3 VM and file locations to the new PC’s GNS3 settings. Make sure to apply the settings
- Reboot GNS3 and wait for the lights to turn green
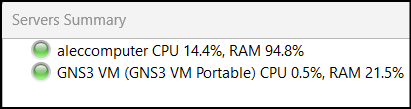
Figure 17 – Lights turn green - Navigate to the Project Library tab and press Refresh List
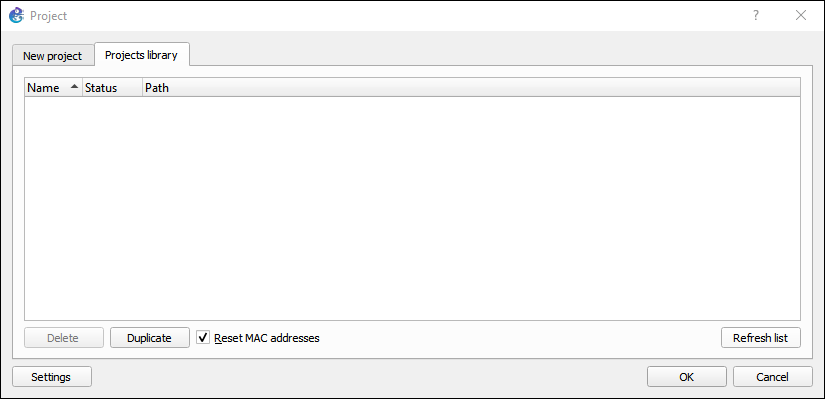
Figure 18 – Open projects on the thumb drive NOTE: Once you have changed the project path direction in Phase II above, your projects should automatically save to the external drive. However, when you create new projects, you can specify the portable drive so they will appear in the projects library.
Figure 19 – Saving projects - You should now see the projects stored on your thumb drive. Select one and press OK
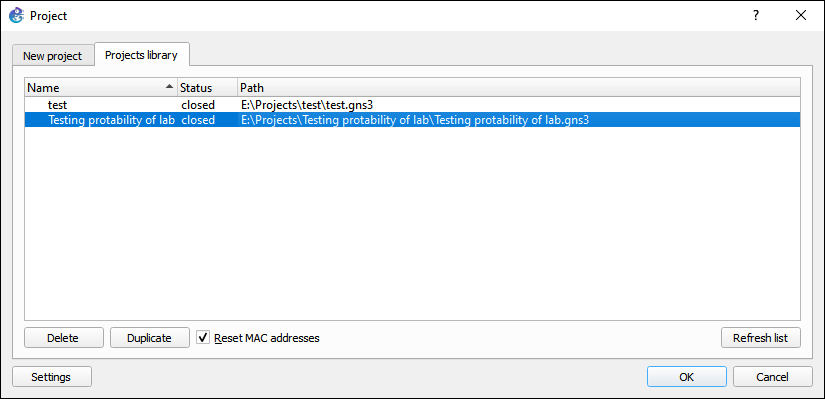
Figure 20 – The projects stored on the thumb drive are now available - Your project will work, with all the settings from the previous PC on which you ran it
- Some important notes
-
- ALWAYS turn off all devices before turning off GNS3 – this action saves the settings of each device
- It is highly recommended that you use Windows’ “Safely Remove Hardware” feature when removing your thumb drive to prevent data loss
- Backup your thumb drive often
- If you start the project and you get an error, READ the error. Most likely, you failed to import a VM from the thumb drive, such as Kali, Ubuntu, etc. If this happens
- Close GNS3
- Navigate to your thumb drive and repeat Step 3 above
- If you don’t have the VM on your thumb drive, you have really jacked yourself up. However, you can sometimes fake it
- In VirtualBox, create a new VM with the same name as the VM you are missing
- This doesn’t always work, but it works often enough that it can save your bacon
- Remember, the VPCSs will only save their settings if you type ‘save’ when you are in the console
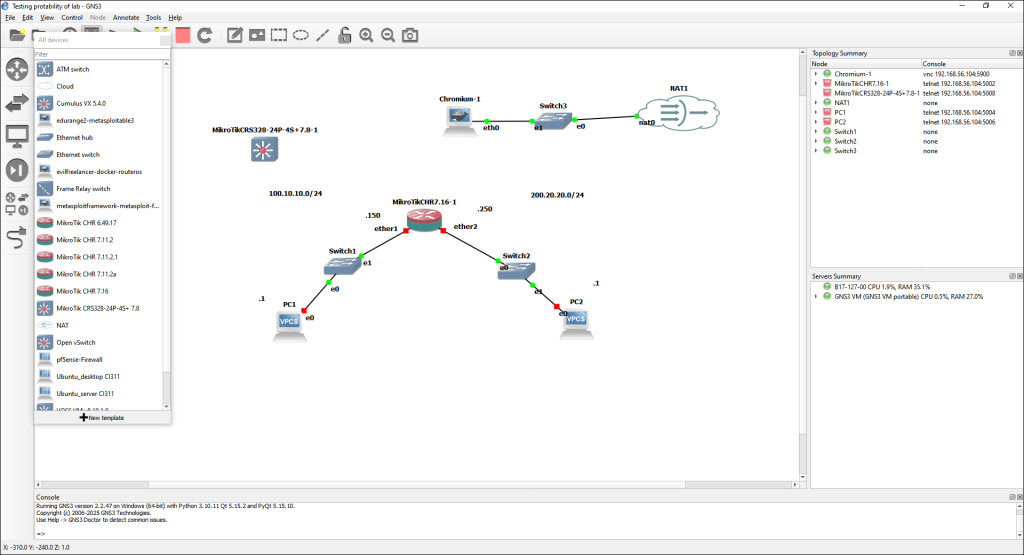
- Your project will work, but it does not automatically bring in every appliance. Take a look at the figure below; Chromium works just fine, yet it is not listed in the All Devices menu
End of Lab

