36 Network Monitoring – Snort Network IDS/IPS
Julian Romano and Jacob Christensen
This chapter will guide learners to install and configure Snort as an Intrusion Detection System (IDS) and an Intrusion Prevention System (IPS) for their enterprise network. Many companies may spend upward of tens of thousands of dollars on IDS and IPS devices for their security needs. Luckily for us, Snort is free to use and experiment with.
Estimated time for completion: 60 minutes
Learning Objectives
- Install the Snort Package into the pfSense Server
- Configure Snort to be an effective IDS and IPS
- Trigger alerts to test Snort rules against threats
Prerequisites
Deliverables
4 screenshots are needed to earn credit for this exercise:
- Screenshot of GNS3 Working environment once everything works
- Screenshot of the pfSense GUI page after signing in
- Screenshot of alert notifications through Snort
- Screenshot of blocking notifications through Snort
Resources
- Special thanks to
Contributors and Testers
- Calvin Lindeman, Cybersecurity Student, ERAU-Prescott
- Morgan Finch, Cybersecurity Student, ERAU-Prescott
- Sarah Davis, Cybersecurity Student, ERAU-Prescott
- Eliana Seitz, Cybersecurity Student, ERAU-Prescott
- Tyler Jane McClure, Cybersecurity Student, ERAU-Prescott
Phase I – Setting up the Lab
The following steps are to create a baseline environment for completing the lab. It makes assumptions about the learner’s knowledge from completing previous labs.
This lab is an extension of Chapter 33:
- Open GNS3
- Open the lab made in Chapter 33
- Save it as a new project with a name of your choice
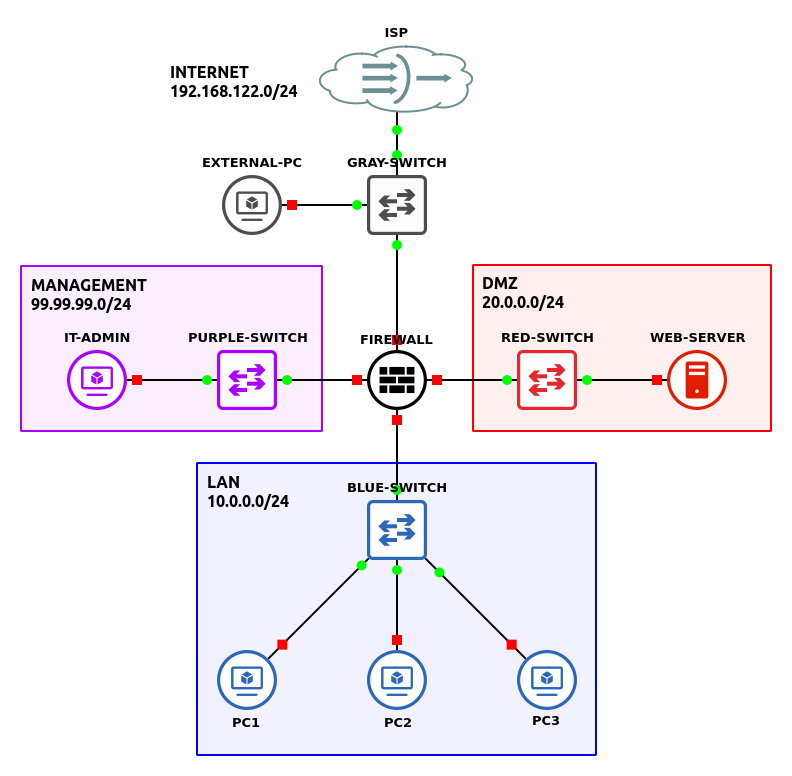
- Set up GNS3 as shown in the network diagram above
NOTE: This example uses version 2.7.2 of pfSense Community Edition.
- Start and login to the PC on the Management LAN
- Open a browser and type in https://99.99.99.1/ to connect to the pfSense web configuration page
NOTE: Remember to use the default creds to login:
– Username: admin
– Password: pfsense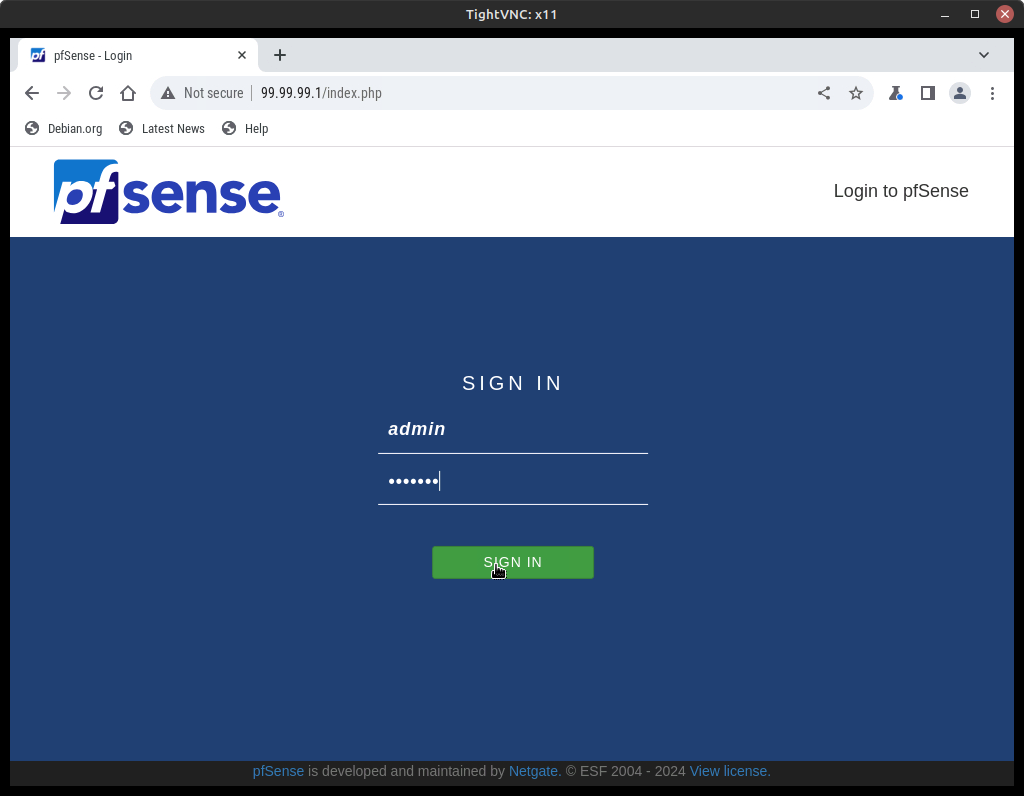
Figure 2 – pfSense web configurator login page
- Open a browser and type in https://99.99.99.1/ to connect to the pfSense web configuration page
- In the pfSense GUI, navigate to System–>Package Manager to install Snort
- Click on Available Packages, search for “snort”
NOTE: If you are having trouble getting this to work, ensure that pfSense is fully updated (System–>Update) and that its WAN interface (ISP) is receiving a DHCP address from the NAT cloud.
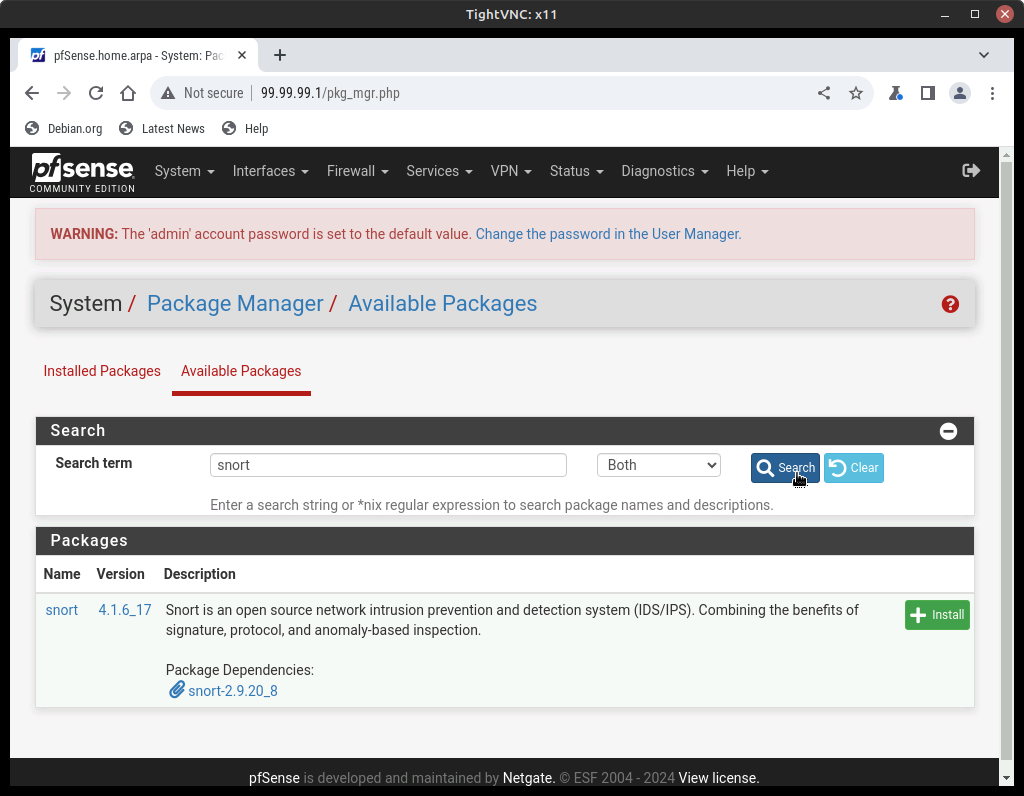
Figure 3 – pfSense package manager - Click Install and Confirm to begin the Snort installation process
- Once completed, you should now see Snort listed under the Installed Packages tab
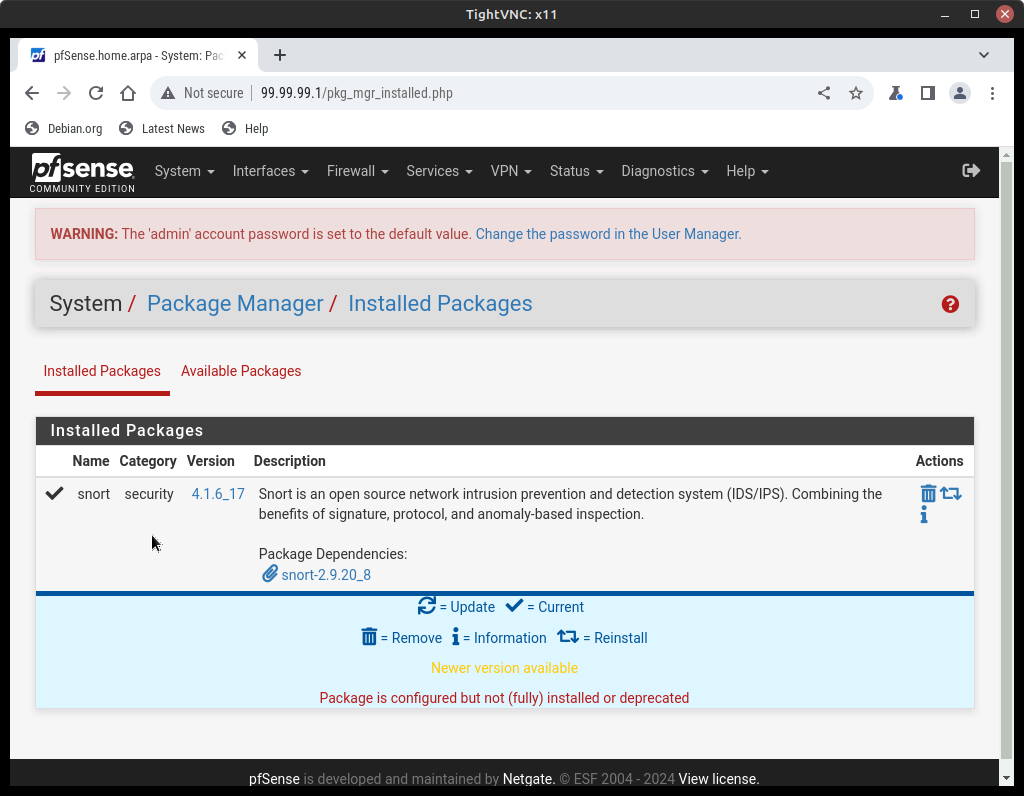
Figure 4 – Snort package installed on pfSense server
- Click on Available Packages, search for “snort”
Phase II – Enable and Configure Snort in pfSense
This section will set up Snort and configure the rules needed to make our IDS effective.
- Navigate to Services-->Snort
- Select the Global Settings tab and enable the download of various pre-configured rule sets
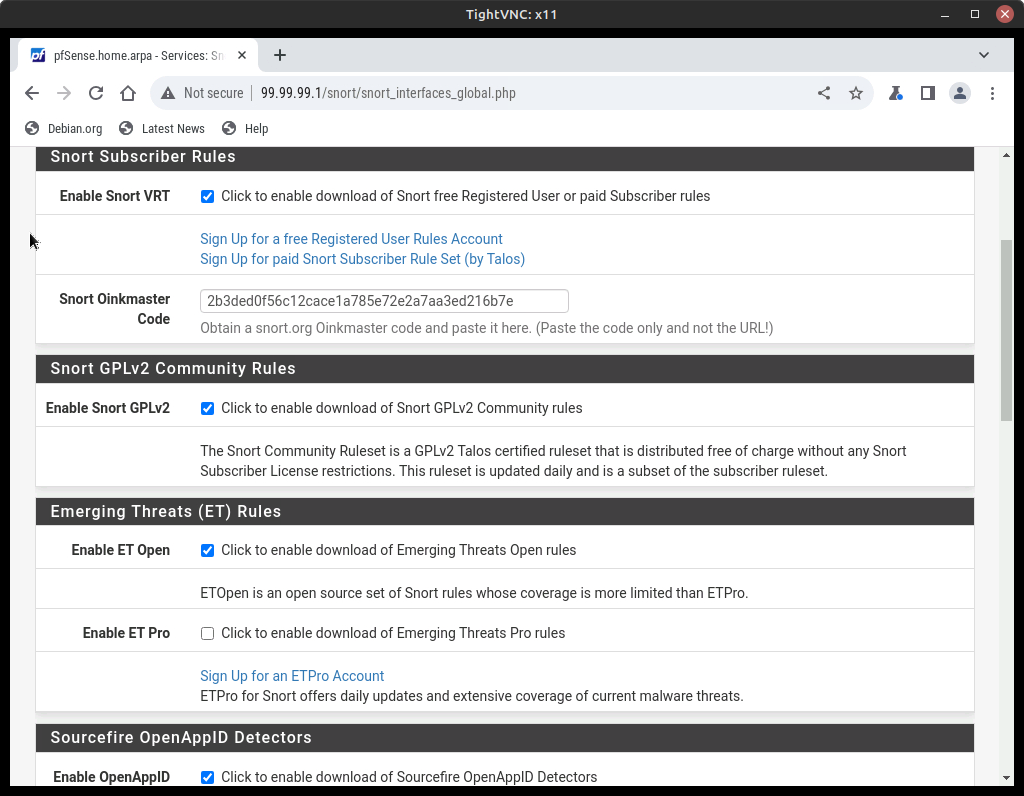
Figure 5 – Snort rules - Click on Enable Snort VRT is selected
- Enter the Snort Oinkmaster Code associated with your snort.org account
NOTE: If you do not have a Snort account, click Sign Up for a free Registered User Rules Account. You may not have internet access on your VM, so navigate to this location on your host machine. Once taken to the sign up page, provide an email and password for your free Snort account. You can find your Oinkcode on the left-hand navigation bar, which can be copied/pasted in the VM
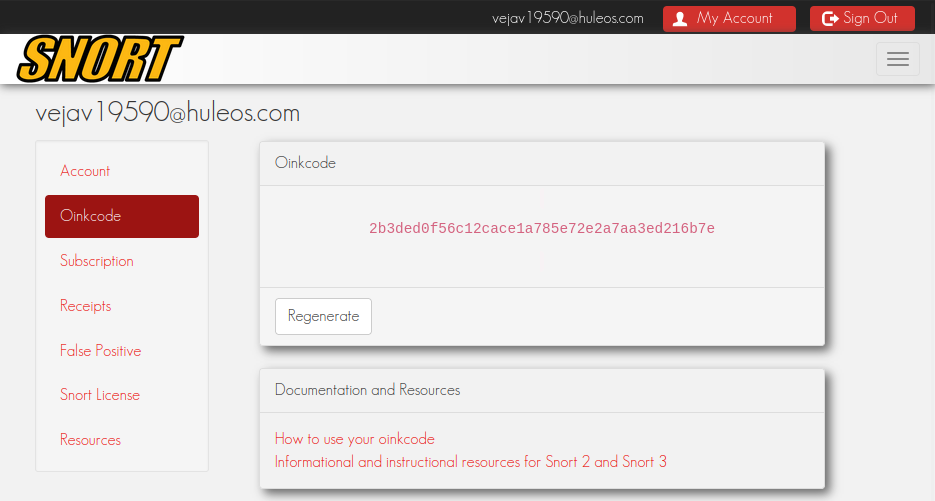
Figure 6 – Snort oinkcode - Click on Enable Snort GPLv2
- Click on Enable ET Open
- Click on Enable OpenAppID
- Scroll down to the bottom of the page and click Save
- Select the Updates tab

Figure 7 – Snort updates page - Under the Update Your Rule Set section, click Update Rules
- This should take a few minutes to complete…

- Click on the Snort Interfaces tab
- Click Add and make the following changes to allow Snort to monitor the ISP interface
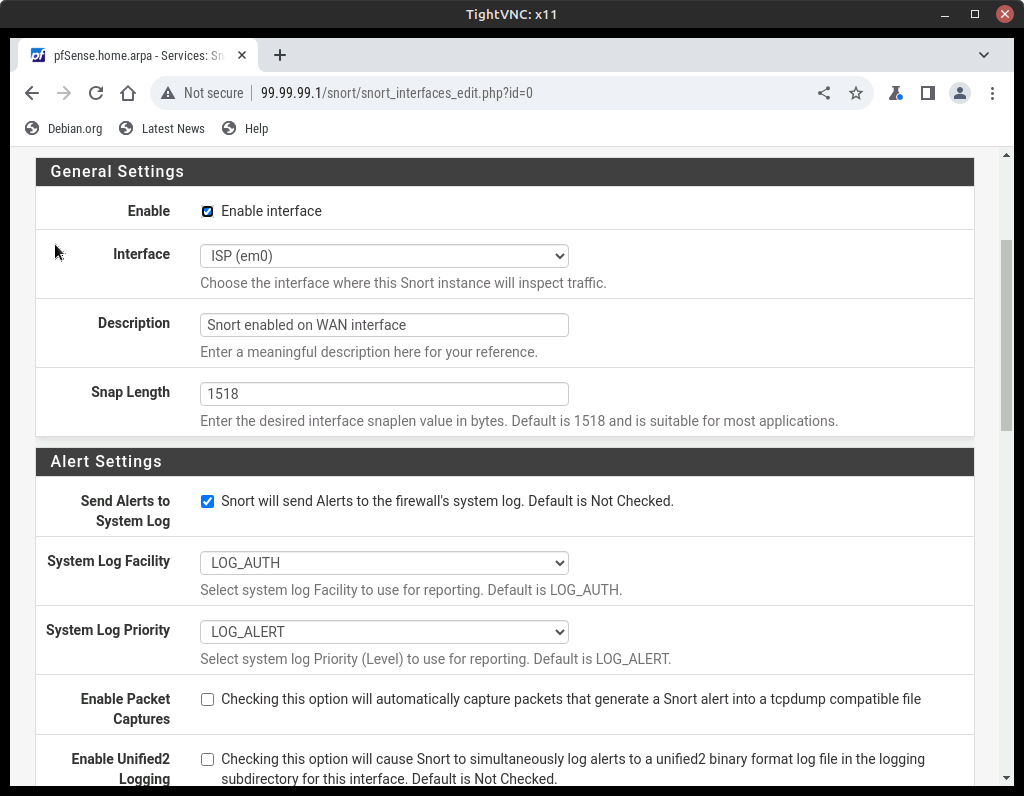
Figure 8 – Setup the interface settings Option Value Interface ISP (em0) Description Snort enabled on WAN interface Send Alerts to System Log Selected (checked/enabled) - Scroll to the bottom and click Save
- Select ISP Categories and make the following changes
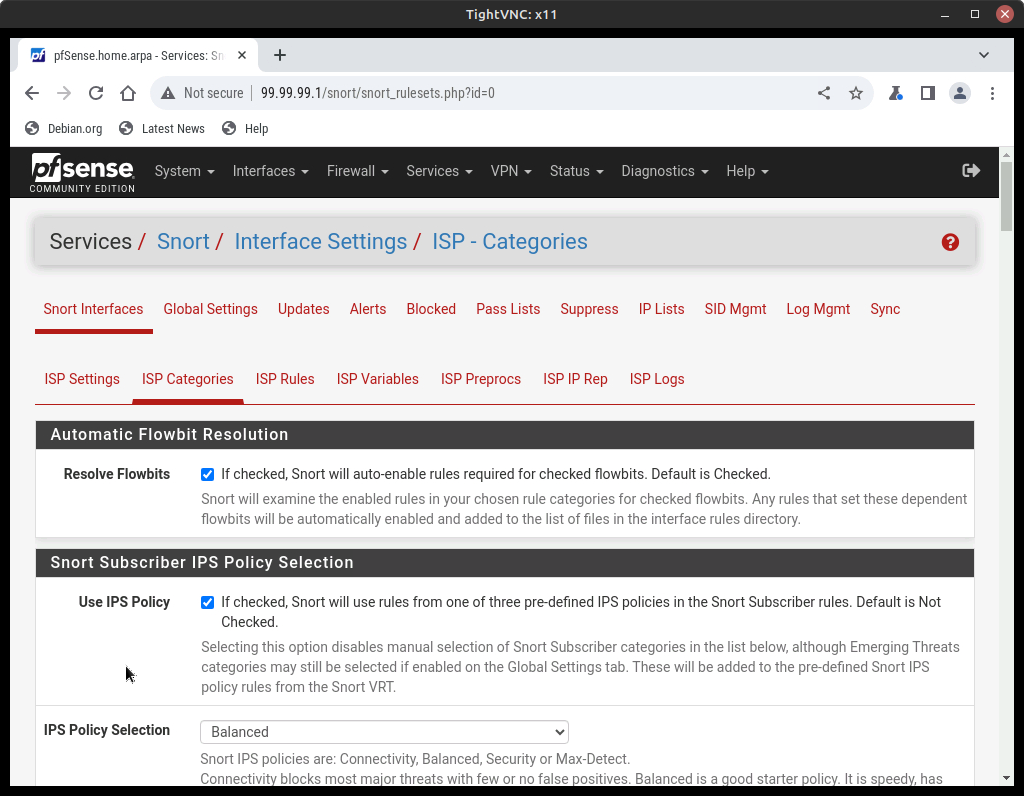
Figure 9 – ISP categories - Click on Use IPS Policy
- In the IPS Policy Selection drop-down menu, choose Balanced
- Under Select the rulesets Snort will load at startup, click Select All and then Save
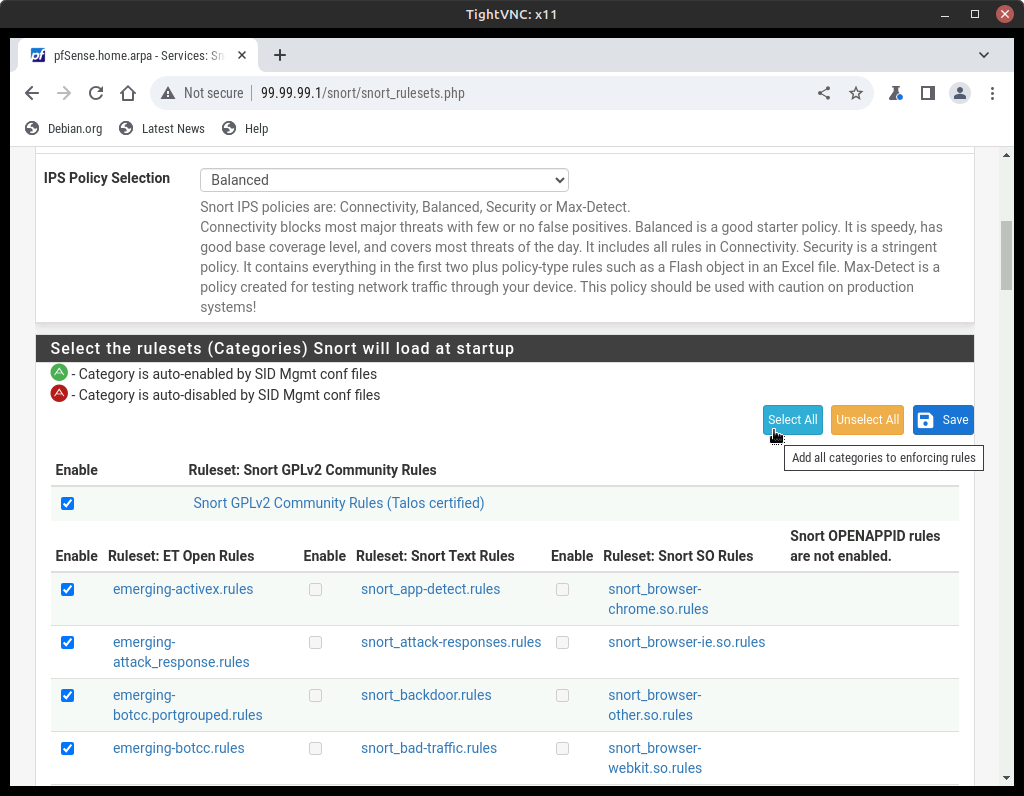
Figure 10 – ISP rulesets
- Repeat the above (Step 4.1) and install/configure Snort on pfSense’s Management interface
- Click Add and make the following changes to allow Snort to monitor the ISP interface
- Return the Snort Interfaces tab and select Start next to ISP (em0) and MANAGEMENT (em1)
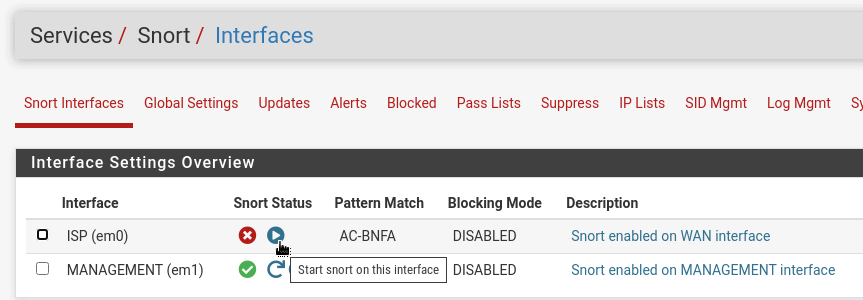
Figure 11 – Starting Snort service on pfSense interfaces
Phase III – Testing Snort’s IDS
Once it starts, you will see a green check mark. MAKE SURE SNORT IS RUNNING before moving on! This textbook section will focus on testing our system (although not necessarily attacking it). It is essential to note that we are not testing the software itself, but rather the rules that govern it.
- To simulate a malicious intruder breaching your network, place a Kali Linux VM within the Management LAN
NOTE: Ensure it receives an IP address from the pfSense DHCP server!
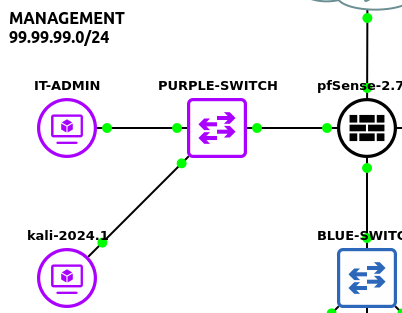
Figure 12 – Adding a Kali box to the Management subnet - In the pfSense GUI, navigate to Services–>Snort–>Alerts
- In the Interface to Inspect drop-down menu, select MANAGEMENT (em1)
- Select Auto-refresh view and click Save
- You should see log entries below warning you of a potential security breach due to the “Kali Linux” hostname found in its DHCP requests. Due to Kali’s multitude of pre-installed penetration software tools, it should be concerning to see it suddenly appear on your network if you know it shouldn’t be there
NOTE: Your pfSense server might run low on RAM and will turn off the Snort monitoring. If this happens, unplug the cable to your Linux machine and restart the Snort monitoring for the management interface. Once it is running (green arrow) then, plug the Linux machine in. It should get the alerts before it turns off again.
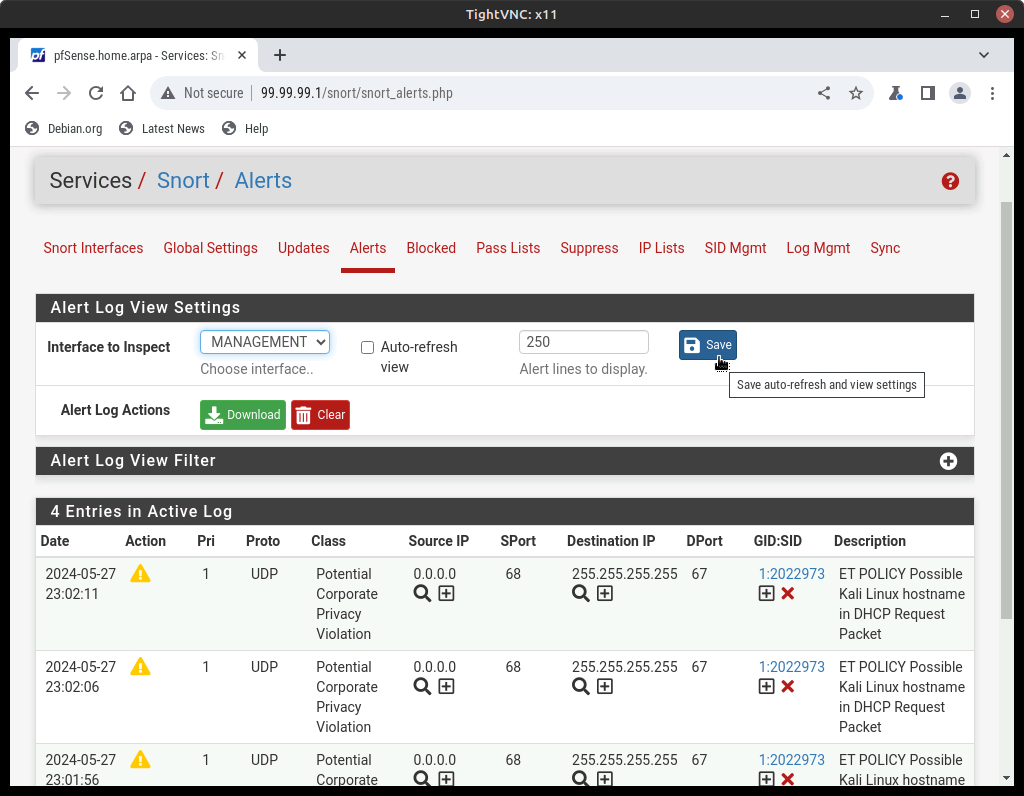
Figure 13 – Snort IDS alerts
Phase IV – Intrusion Prevention System
- In the pfSense GUI, navigate to Services–>Snort–>Interfaces
- Next to Management, under Actions, select Edit
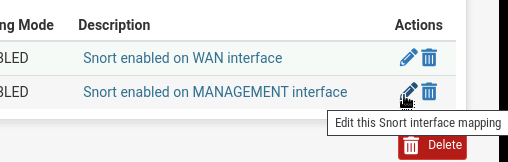
Figure 14 – Changing from IDS to an IPS - Scroll down to Block Settings and select Block Offenders
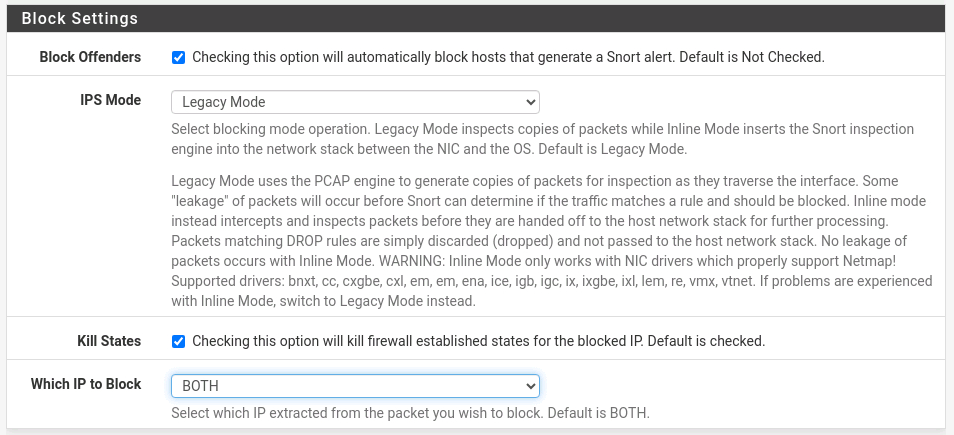
Figure 15 – Blocking sites - Save this configuration change and return to the Snort Interfaces list
- Next to Management, under Actions, select Edit
- Restart Snort on the Management interface
- Now, Snort will block machines from communication with the network once they are identified as threats
- Disconnect the cable from your Kali VM, wait for the green arrow to indicate the Management interface is running, then reconnect the network cable for the Kali VM
NOTE: The Kali VM connection may not be blocked depending on your RAM, but the alert will appear.
End of Lab
Deliverables
4 screenshots are needed to earn credit for this exercise:
- Screenshot of GNS3 Working environment once everything works
- Screenshot of the pfSense GUI page after signing in
- Screenshot of alert notifications through Snort
- Screenshot of blocking notifications through Snort
Homeworks
Assignment 1 – Add a new interface and ICMP-detected rule
- Add the LAN interface to Snort
- Add a snort rule creating an alert if ICMP from the new network is detected
- RECOMMENDED GRADING CRITERIA:
- Screenshot of GNS3 environment
- Screenshot of ICMP Detected from Snort Alerts Log
