15 Installing GNS3 on Linux
Calvin Lindemann
If you are not using Arch as your base OS, check out chapter 2: Setting Up a GNS3 Environment. This chapter covers getting GNS3 up and running on Arch Linux, caveats with running GNS3 on Arch, and some troubleshooting help. Most of the labs in the textbook can be completed fully on Arch with minimal issues or modifications.
Learning Objectives
- Create a working GNS3 learning environment on a computer running Arch Linux
Prerequisites
- Working Arch Linux install
Deliverables
- None – This is for student needs
Resources
- Official GNS3 Linux install information: https://docs.gns3.com/docs/getting-started/installation/linux/#arch-based-distributions
- ArchWiki page: https://wiki.archlinux.org/title/GNS3
Contributors and Testers
Phase I – Install VirtualBox and GNS3
- Navigate to https://archive.archlinux.org/packages/v/virtualbox/ and download the zst file starting with “virtualbox-7.0.” in the name. Any of the 7.0.x versions should work; version 7.0.20-1 is what we used during testing
- Navigate to https://archive.archlinux.org/packages/v/virtualbox-host-dkms/ and download the zst file with the matching version of the file you downloaded in step 1
- Run the following command to install the virtualbox and virtualbox-host-dkms files, that were downloaded in step 1 and 2
pacman -U [filename]
- Navigate to https://aur.archlinux.org/cgit/aur.git/log/?h=gns3-server and click on a 2.2.X version, then select the download link on the following web page. Version 2.2.52 was used during testing
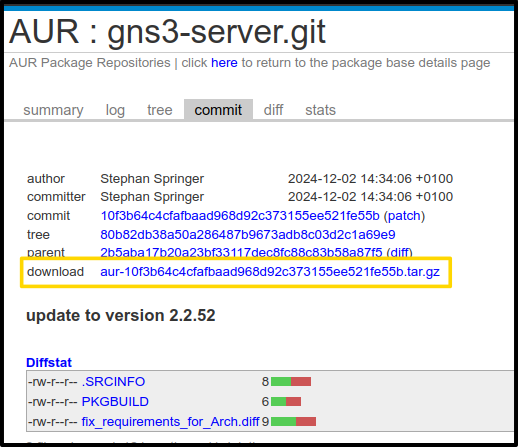
Figure 1 – Download link for a specific AUR commit - Navigate to https://aur.archlinux.org/cgit/aur.git/log/?h=gns3-gui and download the version which matches with what you downloaded in step 4
- Extract the tarballs downloaded in steps 4 and 5 with your file manager, or using the command below
tar -xf [filename]
Flag Meaning -x Tells tar to extract the contents of an archive -f Specifies the target archive - Run the following command to install dependencies required to build gns3-server
yay -Syy python-aiohttp-cors python-async-timeout
Flag Meaning -S Synchronizes local package lists with the upstream sources yy Forces a redownload even if local package lists are up to date - Run the following command in each of the extracted directories. The PKGBUILD file contains the instructions for how your system should build the program. After running, it is safe to delete the folder and the downloaded tarball
makepkg -s -r -c -i .
Flag Meaning -s Install missing dependencies -r Remove dependencies that are only required to build the program -c Cleanup temporary files and directories -i Installs the package after building - Run the following command to install dependencies required by GNS3. yay is used over pacman because some of the packages are in the Arch user repository (AUR). When prompted to “cleanBuild” or show a diff, enter n for None. When prompted to proceed with installation, enter y for yes
yay -Syy qemu docker vpcs dynamips libvirt ubridge inetutils linux-headers-meta
NOTE: If asked to choose a provider for qemu, choose qemu-full
Phase II – Ignore Updates
Upgrading GNS3 and related packages can often cause an entire GNS3 setup to get messed up. This section configures the Arch package manager (pacman) to ignore new versions of GNS3 related packages.
- Open /etc/pacman.conf in your choice of editor and add the following text under the “[options]” section. If the config file already has IgnorePkg defined, append the packages listed below to the end of the previous list to avoid other problems
IgnorePkg = virtualbox virtualbox-guest-iso virtualbox-host-dkms gns3-server gns3-gui qemu docker vpcs dynamips libvirt ubridge inetutils
Phase III – Setting Up GNS3
- Launch GNS3 via an application launcher or by using the gns3 command
- Select Run appliances in a virtual machine in the server dialogue
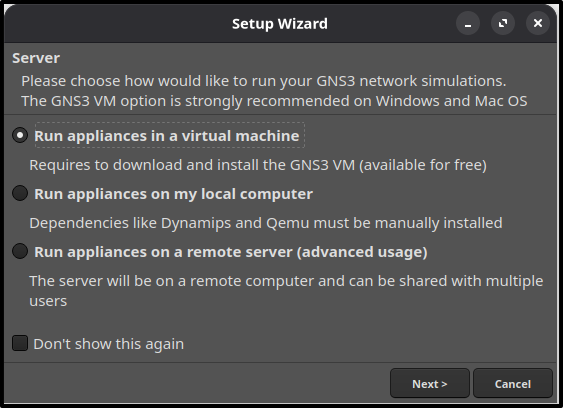
Figure 2 – Server options for GNS3 - Leave the defaults on the local server configuration screen and press next
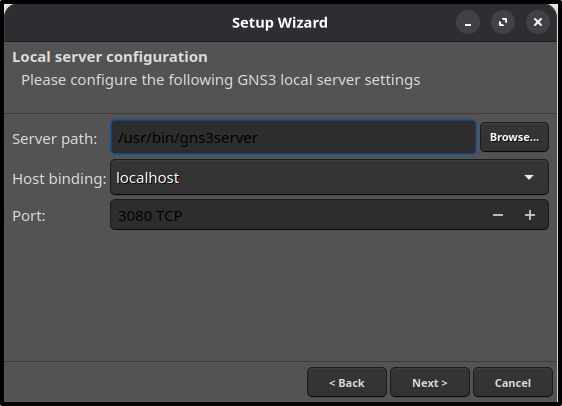
Figure 3 – Default GNS3 local server settings - On the local server status screen, press next if the connection was successful
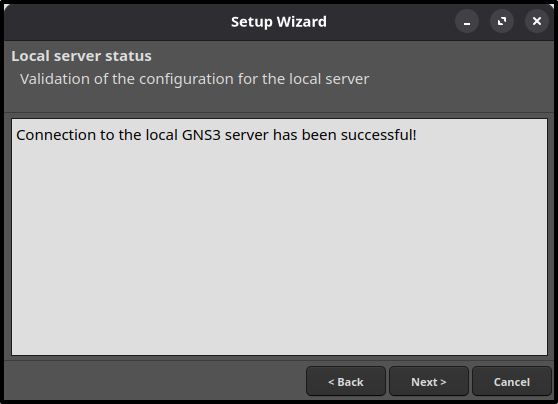
Figure 4 – Local server status screen showing a successful connection - Press okay on the following warnings that pop up. GNS3 uses VMware by default, but we’re going to setup VBox instead. The second warning says that the GNS3 VM couldn’t be found
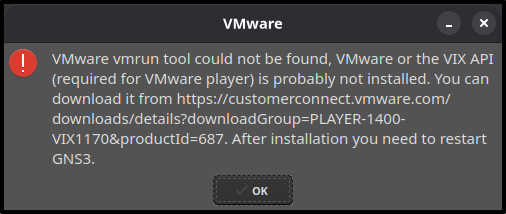
Figure 5 – VMware warning message 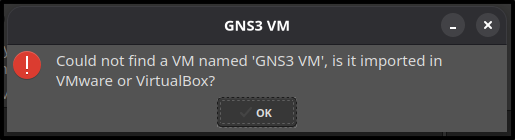
Figure 6 – Error showing missing GNS3 VM - Select VirtualBox as the virtualization software, download the GNS3 VM using the link provided, and select it in the VM name list. For instructions on importing the VM see chapter 2: Setting Up a GNS3 Environment > Part II > Steps 3 and beyond
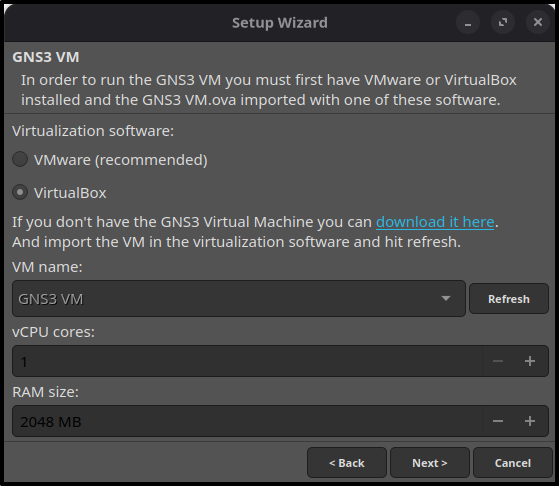
Figure 6 – Virtualization settings showing the GNS3 VM with VBox - Press finish on the summary screen
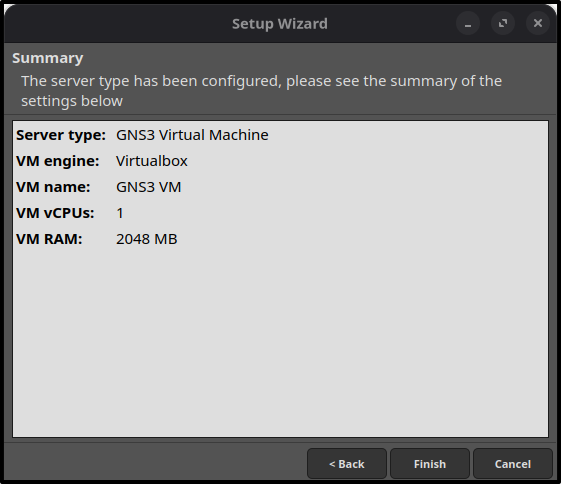
Figure 7 – Summary screen
NOTE: If you get an error stating that the vboxnet0 network adapter does not exist, open the VBox settings for the GNS3 VM > Network > Adapter 1 > click on the name and press okay and exit. YES do this even if the correct network adapter is already in the box.
Phase IV – Troubleshooting and Other Notes
- Various labs require configuring MikroTik routers to act as DHCP relays. Despite many hours troubleshooting, our testers were never able to get this behavior to work properly. All of these labs are still able to be completed by configuring each MikroTik router to be a DHCP server instead of setting up DHCP relaying.
- The error “The VirtualBox kernel modules do not match this version of VirtualBox” can be solved by running the following command and rebooting
vboxreload
- The error “VirtualBox can’t operate in VMX root mode. Please disable the KVM kernel extension, recompile your kernel and reboot” can be solved by running the following command and relaunching GNS3 and virtualbox
modprobe -r kvm_intel
- The error “Out of memory condition when allocating memory with low physical backing. (VERR_NO_LOW_MEMORY)” can be solved by rebooting or running
echo 3 | sudo tee /proc/sys/vm/drop_caches
- The error “The vboxdrv kernel module is not loaded. Either there is no module available for the current kernel ([kernel version]) or it failed to load. Please recompile the kernel module and install it by sudo /sbin/vboxconfig You will not be able to start VMs until this problem is fixed.” can be fixed by running the following. The vboxconfig executable doesn’t exist on Arch
sudo /sbin/vboxreload
- The error “VirtualBox: error while loading shared libraries: libxml2.so.2: cannot open shared object file: No such file or directory” is caused by a missing link between the installed libxml2 package and a file in /lib. Recent versions of libxml2 have removed the libxml2.so.2 file, but it may be included in the libxml2-legacy package. If installing that doesn’t work checkout this relevant stack overflow discussion and steps to solve:
- Ensure the libxml2 package is installed
- Use ls to show the current files and links in /lib
- Create the missing link using the following command between the library mentioned in the error message and a binary of similar version type. In my case, versions libxml2.so.16.0.3 and libxml2b.so.2.0.0 were installed and I chose the former
ln -s [link target path] [new link name]


