10 Create a pfSense Firewall VM
Mathew J. Heath Van Horn, PhD
The software product pfSense is a popular open-source firewall used by small and mid-sized companies. The software can run on hardware or a virtual machine. It is based on Unix FreeBSD, which differs from Linux. This lab leads the learner to create a pfSense VM in VirtualBox.
Learning Objectives
- Successfully download, install, and run pfSense in VirtualBox
Prerequisites
Deliverables
- None – this is a preparatory lab that supports other labs in this book
Resources
- Download pfSense
- Kingatua, Amos, “How to install pfSense Firewall on Ubuntu and CentOS?”, https://geekflare.com/pfsense-installation-guide/
Contributors and Testers
- TBD
Phase I – Download pfSense
pfSense is an operating system (OS) like Windows, Linux, or MacOS.
- Download the installer for pfSense Community Edition
NOTE: When this was written, Netgate made a surprising update requiring users to register for a new account and give up personal information to download the Community Edition image of pfSense. For many, this privacy compromise for corporate data harvesting is not worth this extra roadblock for learning. Therefore, we will provide two different methods for downloading pfSense.
- The “Official” Method: https://www.pfsense.org/download/
NOTE: It is strongly advised to avoid using accurate personally identifiable information (PII) for online accounts you’ll only use once. Companies get hacked constantly; the last thing you want is your name, physical address, and phone number leaked just because you wanted to mess around with firewalls! However, when needed, you are not restricted from using temporary emails, phone numbers, or false addresses.
NOTE: I downloaded the official Netgate website over a year ago and used my school email, address, and phone number. Not only is this publicly accessible information, but I have never received any spam or contact from Netgate – Mathew J. Heath Van Horn, PhD
- The “Unofficial” Method:
- Many sites have the pfSense community edition, version 2.7.2, available for download. Because sites change constantly, we suggest you use your favorite search engine to find “pfSense 2.7.2 CE ISO”, but ensure you use a trusted website.
- You should download the .iso file named similarly to pfSense-CE-x.x.x-RELEASE-amd64.iso.gz. The .gz file extension stands for GNU Zip, an application commonly used for compression. 7zip and other zip programs can usually unzip this file type. At the time of this writing, the Windows 11 internal zip function could not unzip the file
- The “Official” Method: https://www.pfsense.org/download/
NOTE: depending on where you get your image and your PC’s hardware, the installation steps may vary. You are pretty safe following the defaults for everything and stop when the installer asks for a reboot.
- Please navigate to the folder where you downloaded the ISO and decompress (unzip) it
- If you’re on Windows, use 7zip by right-clicking on the file
- If you’re on Linux, use GNU unzip
$ gunzip ~/Downloads/file-name.gz
- You should now see a file name pfSense-CE-x.x.x-RELEASE-amd64.iso in your Downloads directory
Phase II – Create a pfSense VM
Creating a pfSense VM is a pretty standard exercise.
- Start the Oracle VM VirtualBox Manager application
NOTE: This example uses VirtualBox GUI Version 7.0.X in the following steps. While your version may vary in organization and layout, the fundamental process should remain the same.
Figure 1 – Oracle VM VirtualBox Manager - At the top of the dashboard, select New
Figure 2 – Create a new Virtual Machine - A new sub-menu will appear
- Name the VM as pfSense Firewall
- Use the ISO image you unzipped earlier by clicking on the drop-down menu and navigating to where you unzipped it
- Select the type “BSD”
- Select the version as “FreeBSD (64-bit)”
- Hit “Next”
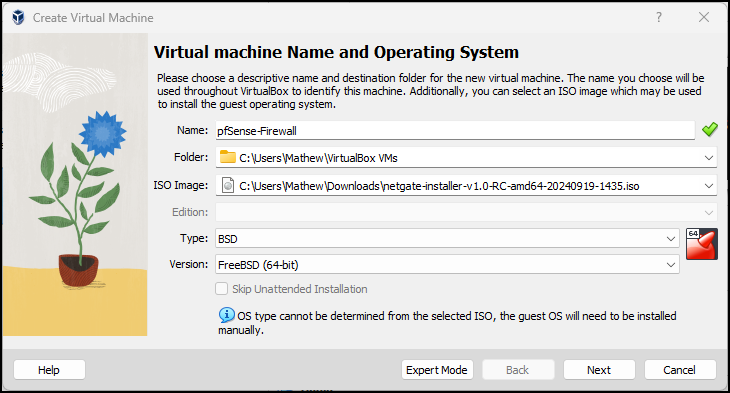
Figure 3 – ISO selection
- Set the base memory to 1024MB
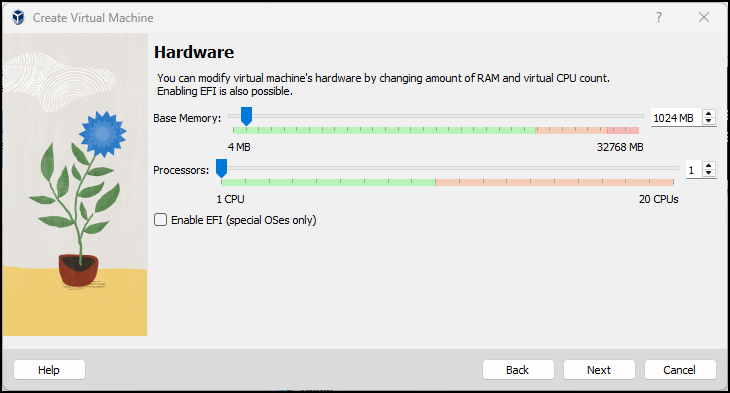
Figure 4 – Select the Base Memory - Hit “Next”
- On the next menu, increase the virtual disk size to 20GB and press “Next”
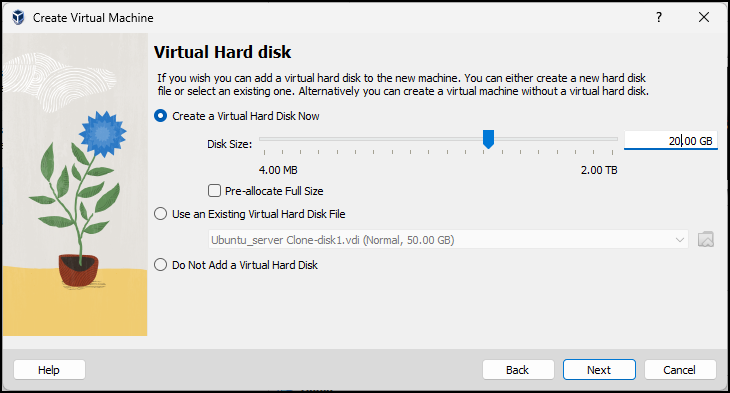
Figure 5 – Select hard drive size - On the summary page, click “Finish”

Figure 6 – review and submit - This will create a new virtual machine in your VM list
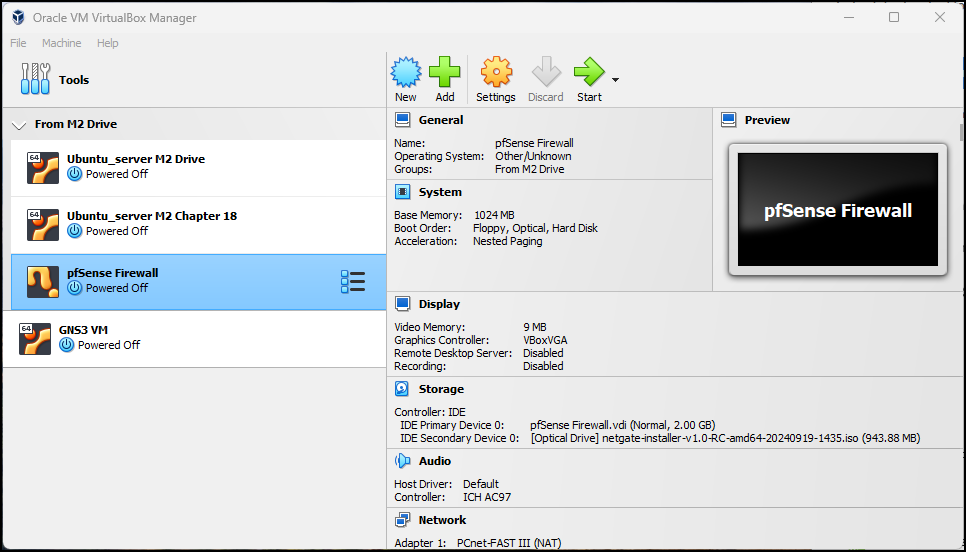
Figure 7 – the new VM has been added to the menu
Phase III – Configure VM settings for the pfSense Server
Depending on your existing VirtualBox configuration, some configurations may already be applied.
- Select (highlight) the pfSense-Firewall VM and then click Settings
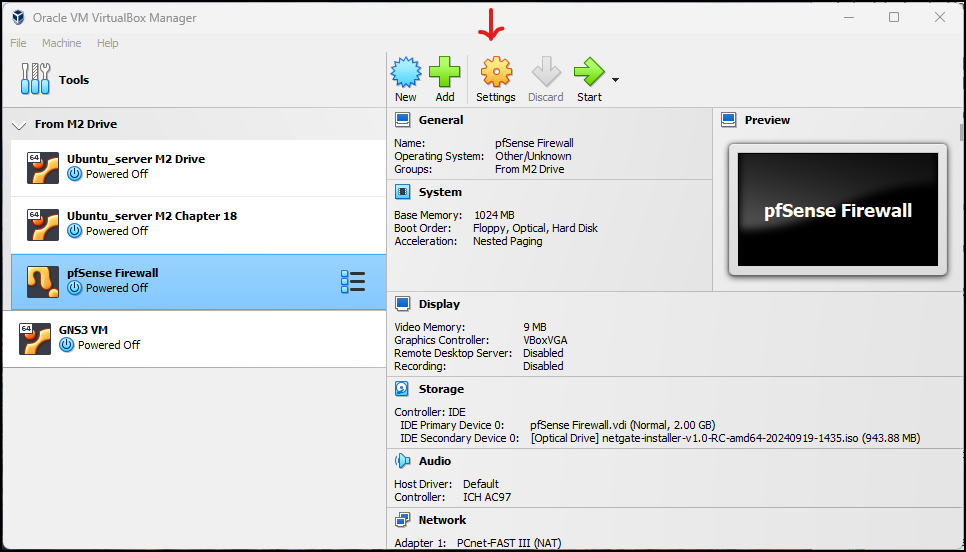
Figure 8 – Settings on VM - Modify the Network settings to give the VM internet connectivity
- On the left-side menu, select Network
- Click the Adapter 1 tab
- Ensure that Enable Network Adapter is selected
- Attached to: NAT
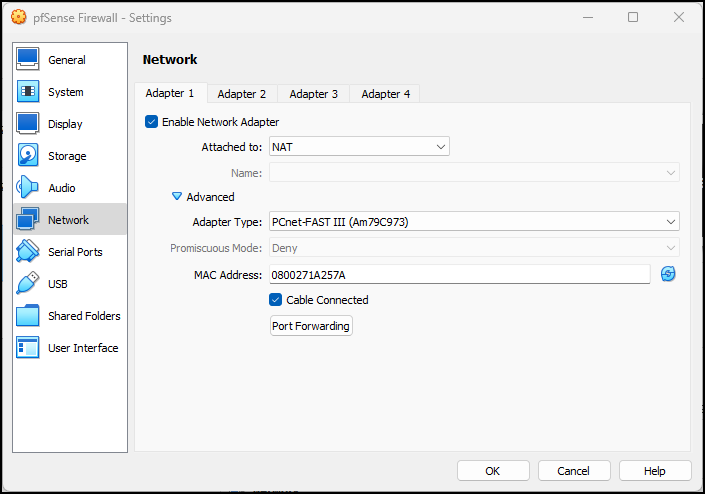
Figure 9a – Network settings on VM for adapter 1 - Click on the Adapter 2 tab
- Ensure that Enable Network Adapter is selected
- Attached to: Internal Network
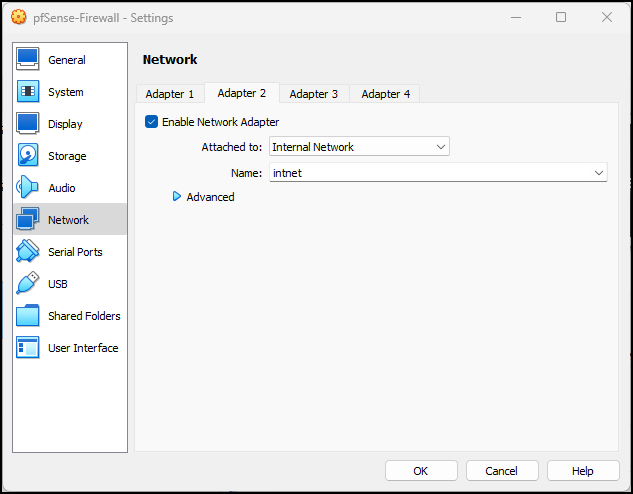
Figure 9b – Network settings on VM for adapter 2
- Click on the Adapter 3 tab
- Ensure that Enable Network Adapter is selected
- Attached to: Internal Network
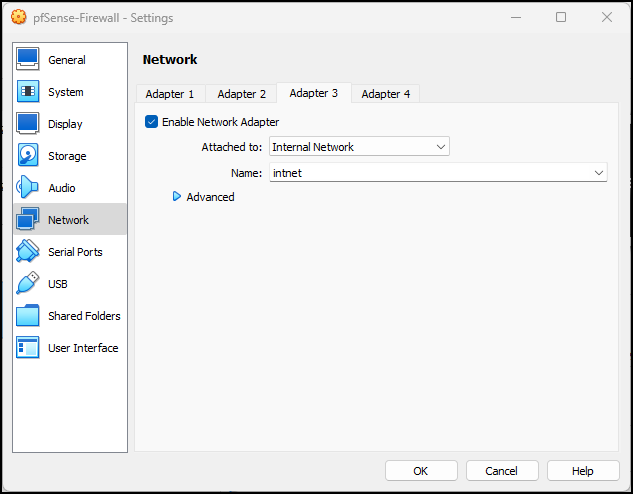
Figure 9c – Network settings on VM for adapter 3
- Repeat for Adapter 4
- Click on OK to save the new configuration settings
Phase IV – Installing the pfSense VM to the Virtual Hard Disk
Launch the pfSense VM like any other virtual machine.
- Start the pfSense-Firewall virtual machine
- Follow the installation guide to install pfSense to the VDI
NOTE: Place your mouse inside the VM and left-click to make the VM active. To navigate out of the VM, press the Right-Ctrl key on the keyboard.
- Press Enter to accept the Copyright and distribution notice
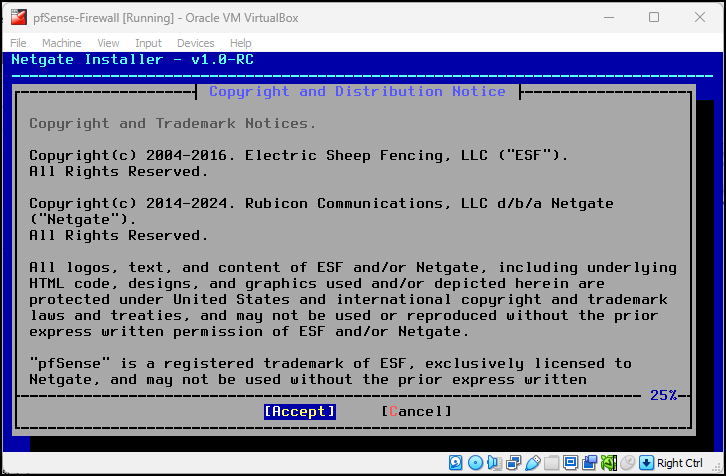
Figure 10 – Accept Licensing - Use the arrow keys to highlight Install and then tab to select OK and press Enter
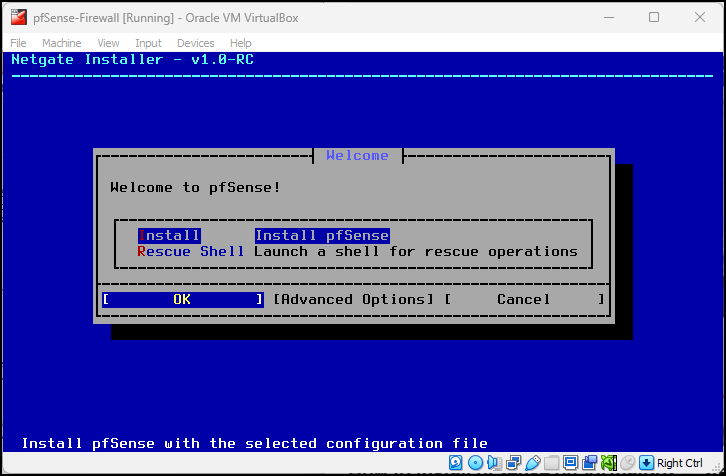
Figure 11 – Install pfSense - Hit Enter to setup the network installation
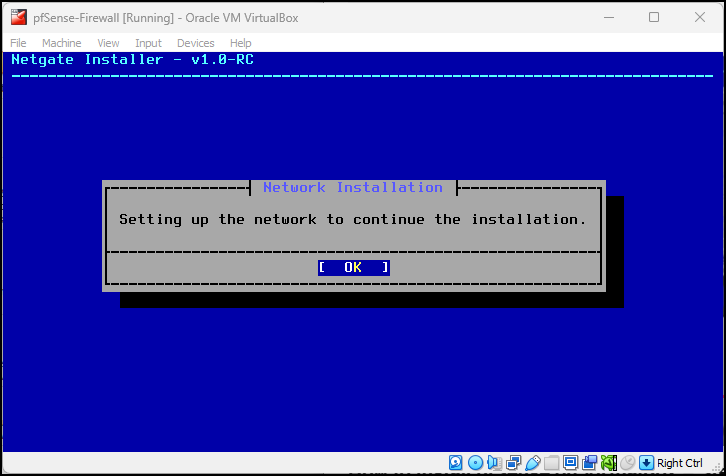
Figure 12 – accept the network installation - Hit enter to select OK on the selected WAN interface – remember that Interface 1 (em0) is the only interface connected to the internet
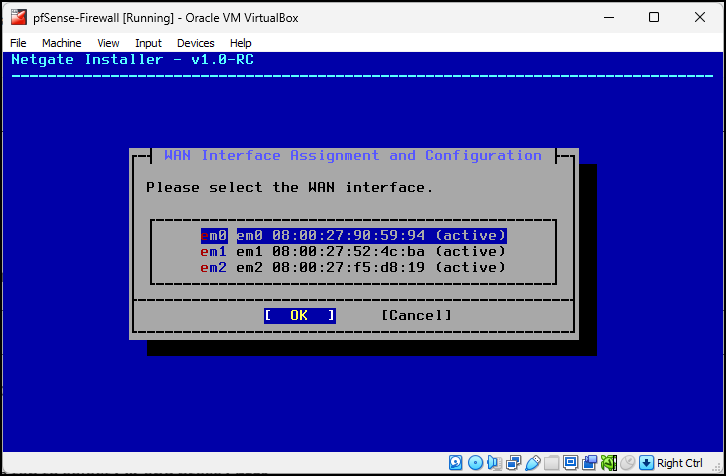
Figure 13 – Select the network interface - Hit Enter to proceed with the installation
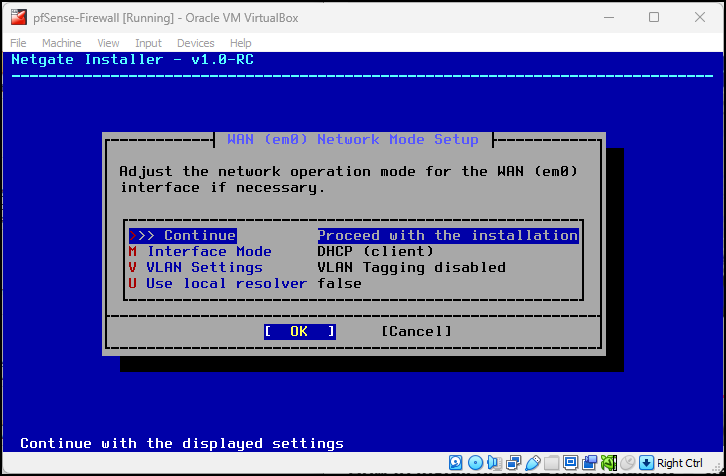
Figure 14 – Accept settings - Use the arrow keys to highlight WAN and then tab to select Continue and press Enter
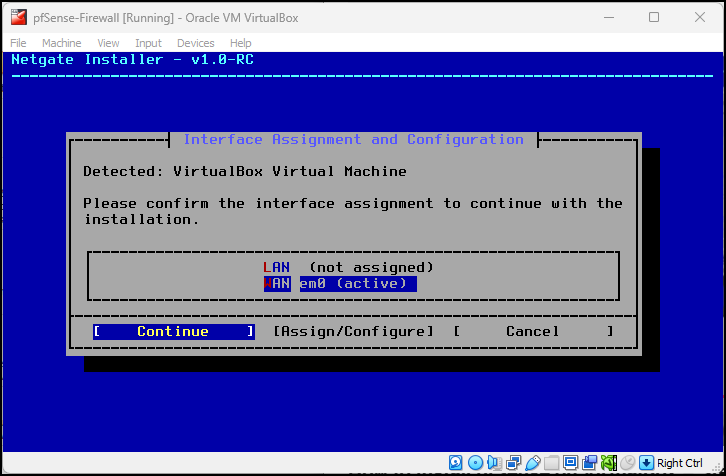
Figure 15a – Select WAN interface - Use the arrow keys to highlight LAN – interface 2 (em1) then tab to select Continue and press Enter
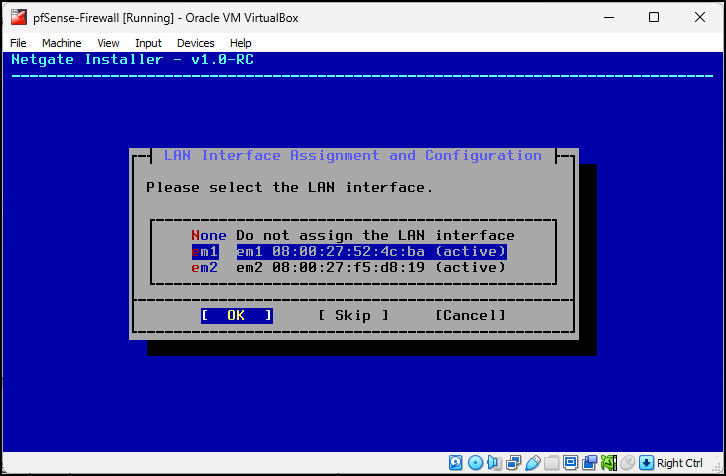
Figure 15b – Select the LAN - Select continue and press enter
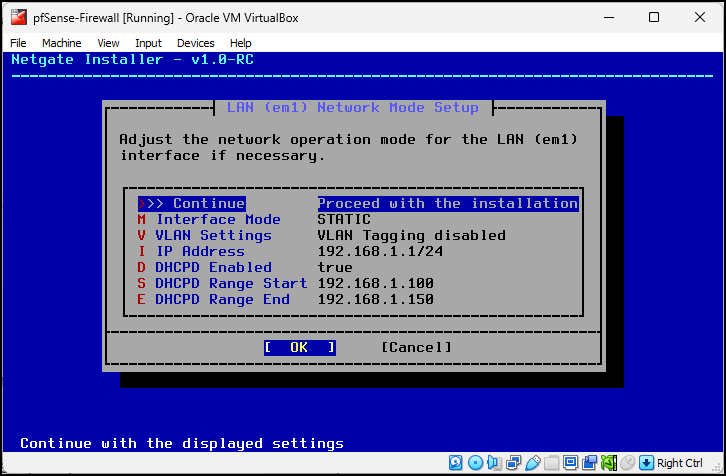
Figure 15c – Continue the install - Select continue and press enter
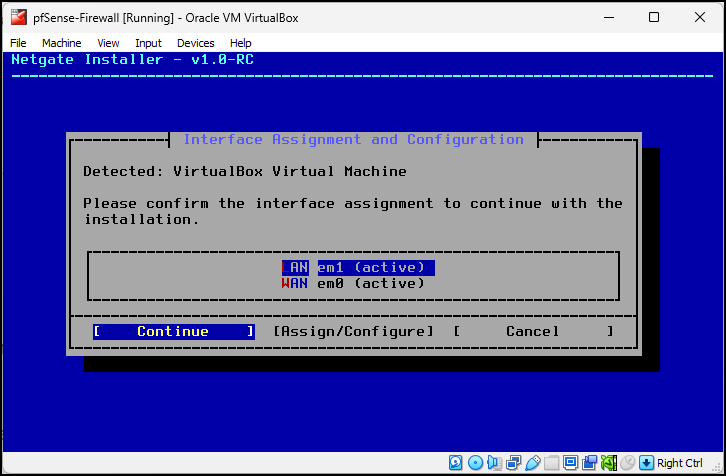
Figure 15d – select continu - Use tab to highlight Install CE and then press Enter
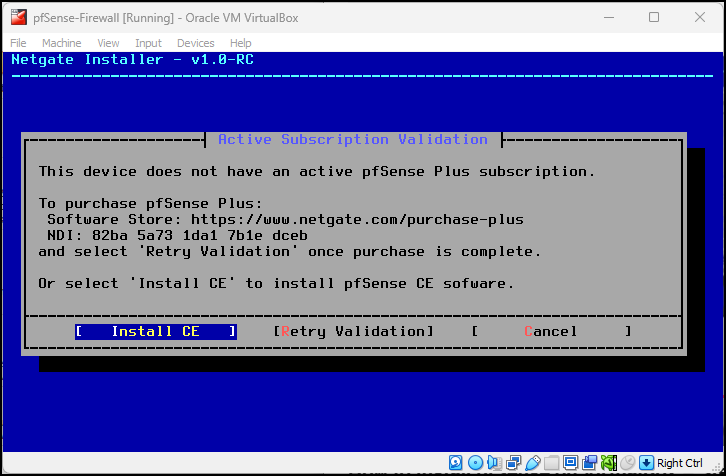
Figure 16 – select CE install - Continue with the installation by pressing Enter
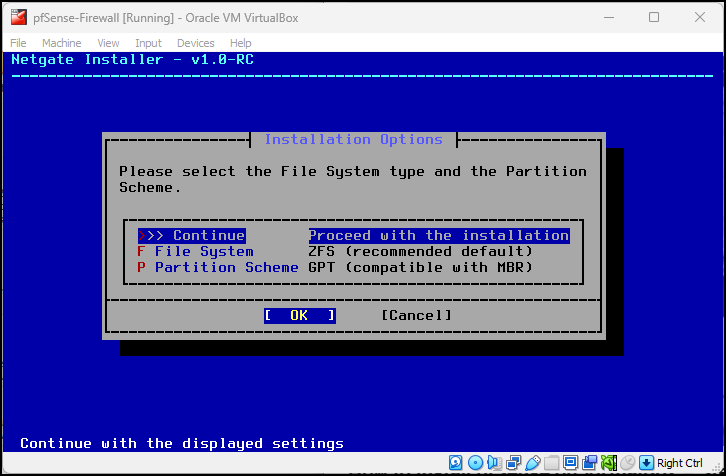
Figure 17 – select continue - Continue with stripe configuration by pressing Enter
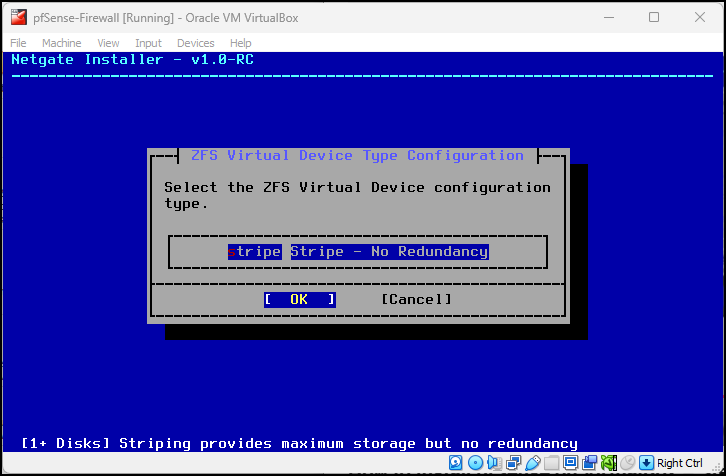
Figure 18 – agree to stripe installation - Continue with the hard drive disk selection by pressing Enter
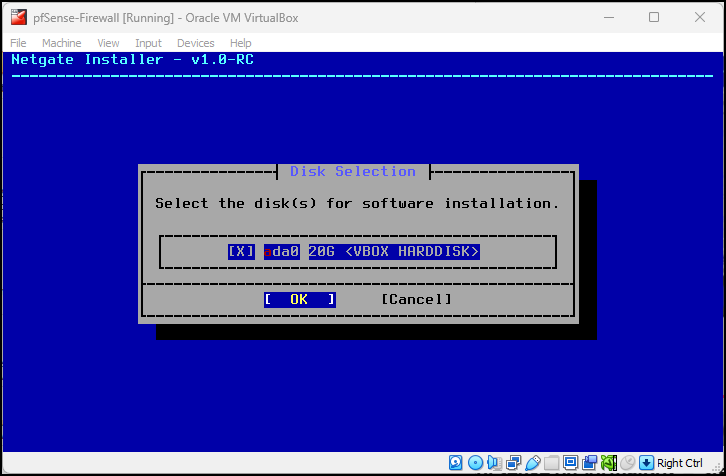
Figure 19 – Select the hard drive - Continue with the install by selecting Yes and pressing Enter
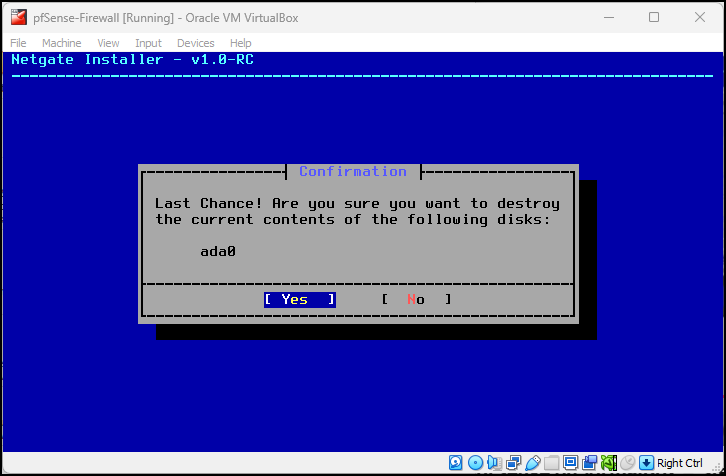
Figure 20 – allow to continue - Use the arrow keys to select the Current Stable Release, then tab to OK and press Enter
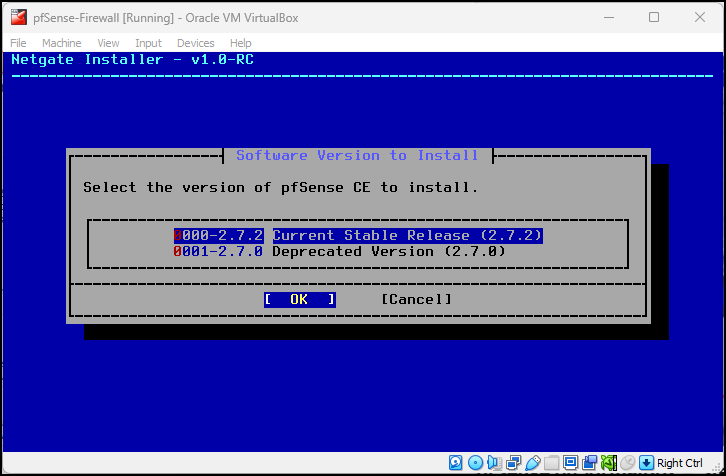
Figure 21 – select the stable release - When the installation is finished, use the tab key to select OK and press Enter
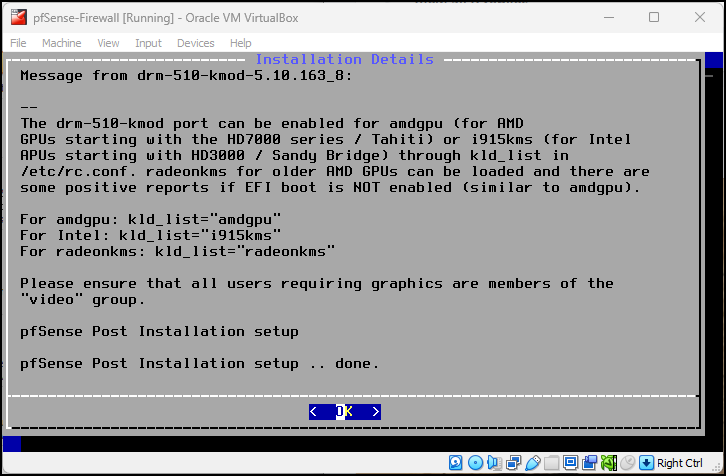
Figure 22 – select OK to continue
- Press Enter to accept the Copyright and distribution notice
- DO NOT REBOOT AT THIS TIME – Uninstall the ISO boot-up CD first
- Press the right-ctrl key to leave the virtual box interface
- Navigate to the VM menu and select Devices, then Optical Drives, then the ISO
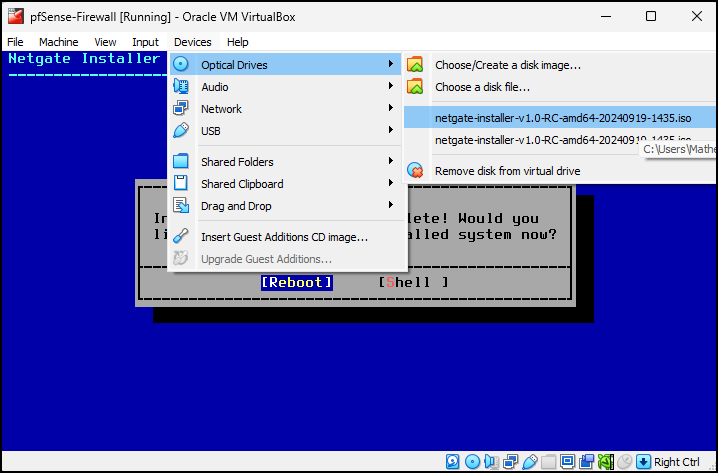
Figure 23 – remove ISO - Force the Unmount
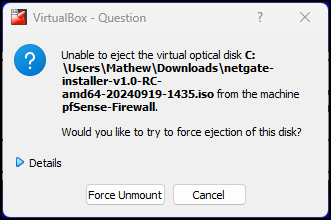
Figure 24 – Force the Unmount
- Use the tab key to select Reboot and press enter
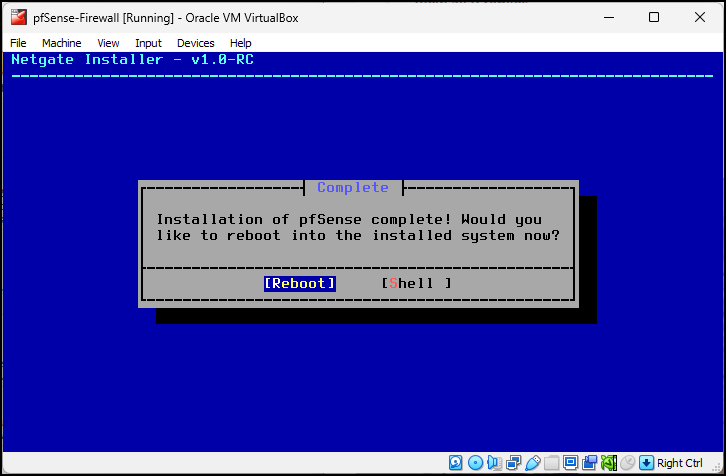
Figure 25 – Reboot - You will get a bunch of errors; this is normal when you force an unmount. Just restart the pfSense – Firewall virtual machine, and it should boot normally
- Wait a minute for the machine to reboot
Phase V – Post installation configurations
There isn’t much to do here, but some configuration is required. Remember, the virtual machine has three interfaces, so when it boots, it will have three. Use this chart to keep them straight.
| Virtual Machine Name | pfSense name | Purpose |
| Interface 1 | em0 | WAN (access to the Internet) |
| Interface 2 | em1 | LAN (our internal network) |
| Interface 3 | em2 | DMZ (future) |
- You shouldn’t require post-installation configurations unless you forgot to configure the above. You can change those settings through this menu.
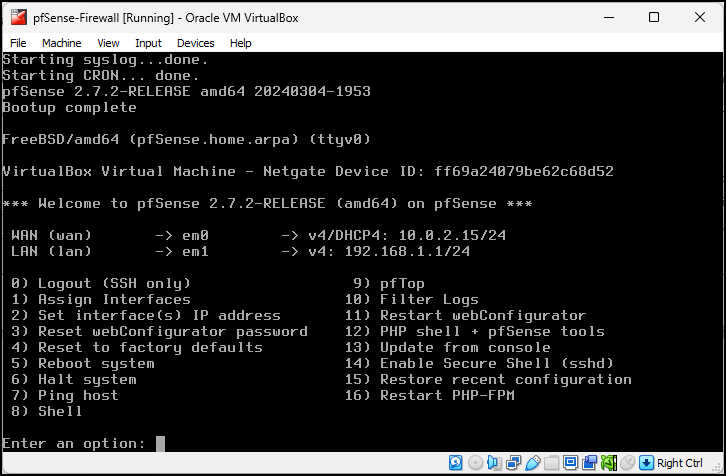
Figure 26 – Installation is complete
