34 Network Hardening – pfSense Internet
Dante Rocca; Mathew J. Heath Van Horn, PhD; and Jacob Christensen
The previous chapter had you add a pfSense server and configure the Intranet side to allow some normal network traffic on the network. This chapter specifically addresses the firewall configurations to access the outside Internet.
Estimated time for completion: 60 minutes
Learning Objectives
- Allow internet hosts to reach the DMZ without reaching the LAN
Prerequisites
Deliverables
- Screenshot of NAT rules
- Screenshot of the Ubuntu Server webpage accessed from an internet host
Resources
- We consolidated information from a wide variety of resources. However, three sources stand out as being particularly helpful to this lab and we want to recognize them here:
- Saifudeen Sidheeq – “How to Configure PfSense DMZ Setup? | Step by Step” – https://getlabsdone.com/how-to-configure-pfsense-dmz-setup/
- Frank at WunderTech – “How to Set Up a DMZ in pfSense” – https://www.wundertech.net/how-to-set-up-a-dmz-in-pfsense/
- Nikhath K – “pFSense DMZ Setup Guide” – https://bobcares.com/blog/pfsense-dmz-setup/
Contributors and Testers
- Calvin Lindemann, Cybersecurity Student, ERAU-Prescott
- Morgan Finch, Cybersecurity Student, ERAU-Prescott
- Sarah Davis, Cybersecurity Student, ERAU-Prescott
- Eliana Seitz, Cybersecurity Student, ERAU-Prescott
- Tyler Jane McClure, Cybersecurity Student, ERAU-Prescott
Phase I – Setting up the Lab
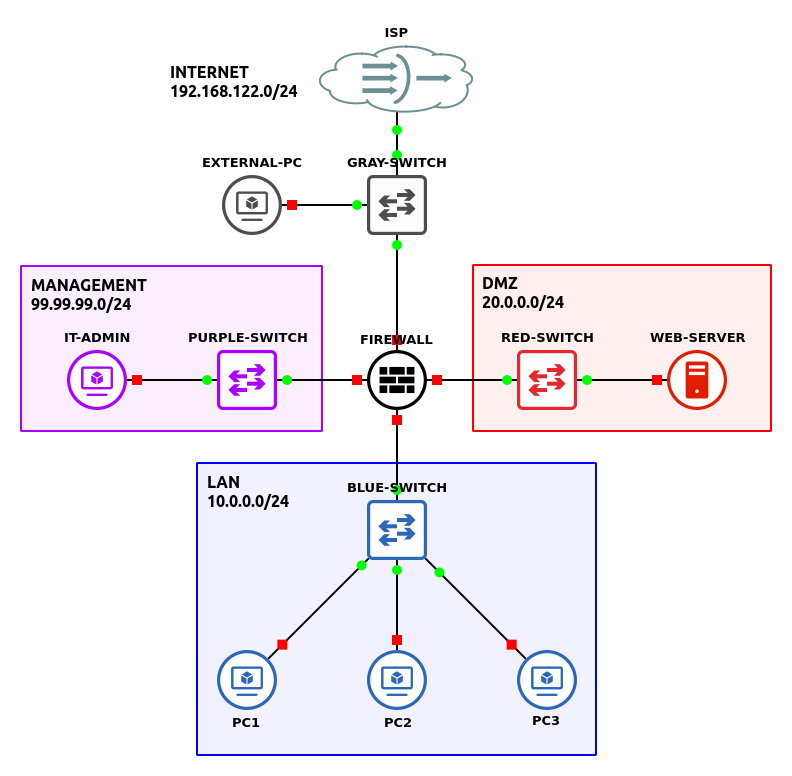
We will take up where we left off with the following lab configuration. Ensure you have completed the previous lab before starting this one.
Phase II – Allow Inbound Access
The primary purpose of having a web server is to enable visitors from the Internet to access the information you have placed on the web server. Our internal users can reach the web service, which can be helpful, but potential Internet visitors cannot. We will make some assumptions and declare our public IP address as 192.168.122.X (replace X with whatever address DHCP assigned you) and our private web server IP address as 20.0.0.5. We need to forward traffic from the public interface to our internal machine.
- Open GNS3 and load the lab from the previous chapter
- Open the pfsense GUI from the Management Desktop
NOTE: As a reminder, the default username is admin, and the default password is pfsense. If you changed it when completing the previous chapter, you are on your own.
- Due to the way GNS3 works, we will need to allow private networks in the firewall
- Go to Interfaces–>ISP
- Scroll down this page and uncheck Block private networks and loopback addresses, and uncheck Block bogon networks
NOTE: This isn’t something you would do on a real network. A “bogon” is jargon for a bogus network, meaning it is an IP that the IANA has not yet delegated. Both rules are set by default to prevent malicious actors who pretend to be from a non-existent network from getting traffic through the firewall. However, GNS3 uses bogons behind the scenes to manage connectivity.
- Save and Apply Changes
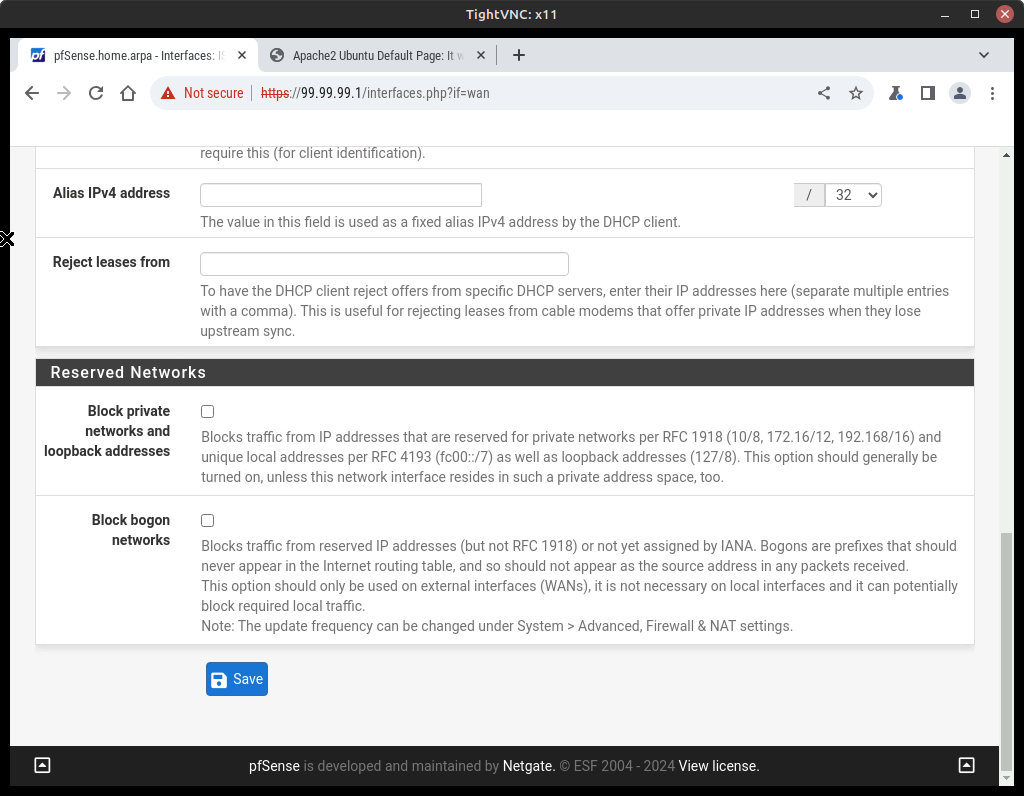
Figure 2 – Disable blocking of bogons
- Now, we will utilize port forwarding to allow the External PC to access the web server
- In pfSense, navigate to Firewall–>NAT–>Port Forward
- Click Add and set the following values
Option Value Interface ISP Address Family IPv4 Protocol TCP Destination ISP address Destination Port Range From/To Port: HTTP Redirect Target IP Single host: 20.0.0.5 (replace with your web server IP) [depending on version the option might be ‘Address or Alias’] Redirect Target Port HTTP Description Allow ISP to reach DMZ 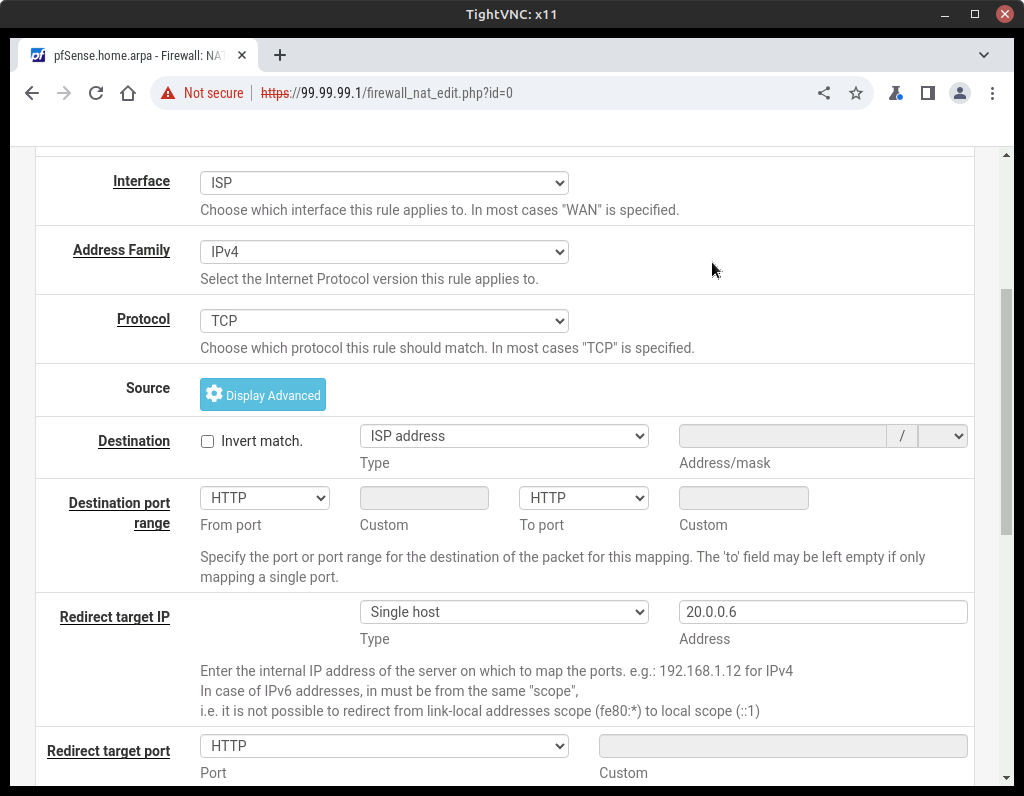
Figure 3 – Firewall rule for NAT - Save and Apply Changes
- Check the firewall rules and notice that a new firewall rule was automatically created to pass HTTP traffic to the DMZ
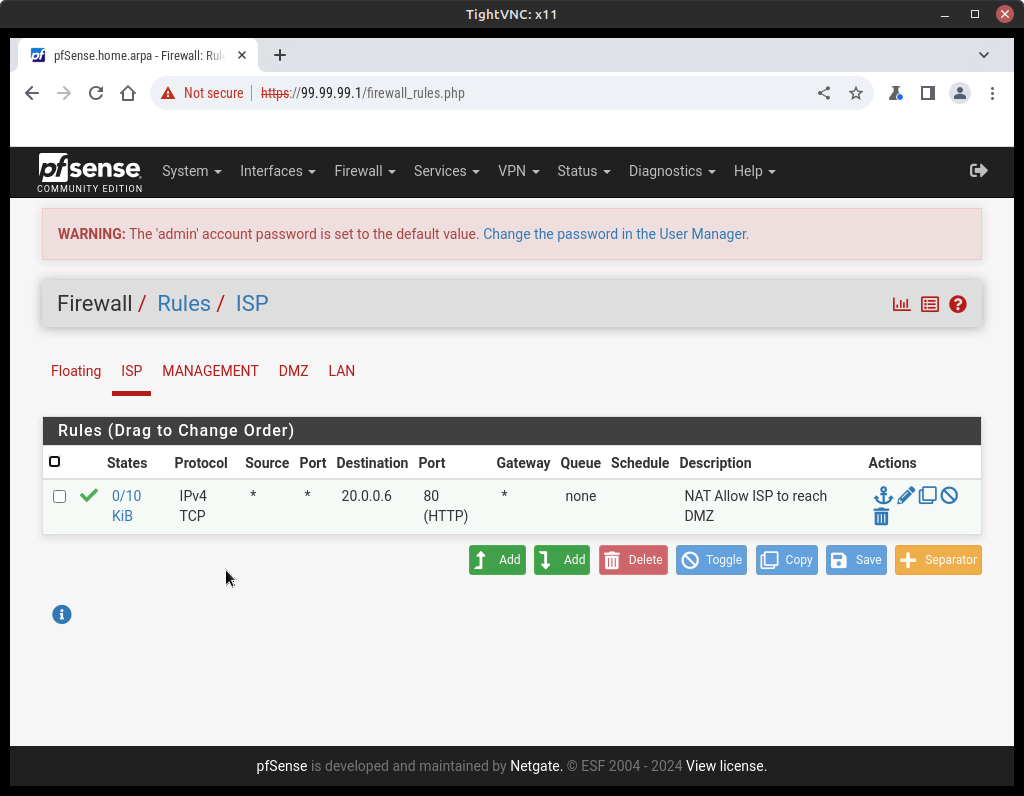
Figure 4 – A new firewall rule was created - Test to make sure that you can access the web server
- From the external PC, open Firefox and go to the address http://192.168.122.66:80 (replace with the IP address of your ISP interface on the pfSense server)
- You should see the web server’s webpage
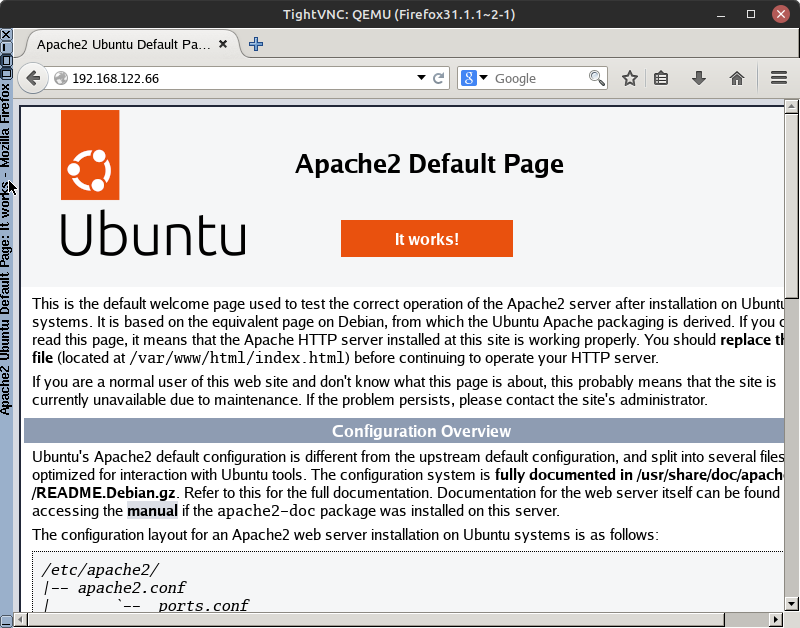
Figure 5 – Successful connection from external PC to webserver NOTE: If you are having trouble getting this to work…
1. Double-check your IP address assignments
2. Verify that the Apache2 service is online on the webserver
3. Double-check that the Port Forwarding rules match Step 4 and the figure provided
4. Double-check that pfSense accepts WAN–>DMZ HTTP traffic to pass through the firewall
Congratulations! Users from the Internet can reach your webserver!
End of Lab
Deliverables
2 Screenshots are needed to earn credit for this exercise:
- Screenshot of NAT rules
- Screenshot of the Ubuntu Server webpage accessed from the internet host
Homework
Assignment 1 – Merging with another organization
The CIO has come down and said we can no longer use the IP space 10.x.x.x/24 for our internal (BLUE) network, nor can we continue to use 99.x.x.x/24 for our management LAN. Your job is to change the environment to use new IP spaces for the BLUE LAN and the MANAGEMENT LAN.
RECOMMENDED GRADING CRITERIA:
- Screenshot of the GNS3 workspace with all devices placed and labeled (Phase II)
- Screenshot of the pfSense services dashboard after DHCP has been set up (Phase III)
- Screenshot of the web server successfully pinging a LAN PC and the Management PC (Phase IV)
- Screenshot of the 3 rules for the DMZ (Phase VII)
Assignment 2 – Verify the new network space by running network scans
- Import a Kali Linux VM into the GNS3 environment. Use the same network settings as the other devices used in this chapter.
- Attach a cable from the Kali machine to a switch and run nmap looking for active IP addresses and open ports. (type man nmap at the command prompt to read instructions about using nmap)
- Screenshot of ISP switch
- Screenshot of Management Switch
- Screenshot of DMZ switch
- Screenshot of LAN Switch
RECOMMENDED GRADING CRITERIA:
- Screenshot of ISP has port 80 open
- Screenshot of the Management has open or closed ports (it depends on what OS you are using as the management VM)
- Screenshot of DMZ open ports
- Screenshot of LAN open ports (if these are closed, then your bogon settings didn’t take. Try checking the settings and restarting your pfSense server. Maybe you missed the above instructions and aren’t using the correct Nmap switches.)

