56 Scanning and Enumeration: Dirbuster
Dirbuster
Mathew J. Heath Van Horn, PhD
If your target is hosting a website, you will want to review its file structure. This knowledge could significantly enhance your understanding of the target and improve your “Google Dorking” efforts. In this chapter, we will explore how to use the Dirbuster tool.
Learning Objectives
- Learn the basics of Dirbuster
Prerequisites
Deliverables
- 4 Screenshots are needed to receive credit for this exercise:
- Nmap scan identifying the web server on the target network
- Dirbuster GUI wordlist selection
- Wireshark results for normal scan (tail end)
- Wireshark results for your attempt at a ‘quiet’ scan (tail end)
Resources
- How to Use the Command ‘dirbuster’ (with Examples)
- DirBuster: The Ultimate Tool for Brute Forcing Web Directories
Contributors and Testers
- TBD
Phase I – Find a Website
Dirbuster works great on a website. However, we need to find a website to use the tool.
- Start the baseline environment
- Run an Nmap scan on the target network
- Determine possible target IP addresses
- Determine the operating systems on each IP address
- A target hosting a website will have many of these services running
- Web server software: Apache, NGINX, IIS, etc.
- Database management system (DBMS): WordPress, MySQL, PostgreSQL, MariaDB, etc.
- Domain Name Service (DNS)
- File Transfer Protocol (FTP)
- Email services: SMTP, IMAP, POP3, etc.
- Continue your nmap scans until you find a target that has these attributes. You may have to perform a detailed scan to see these services
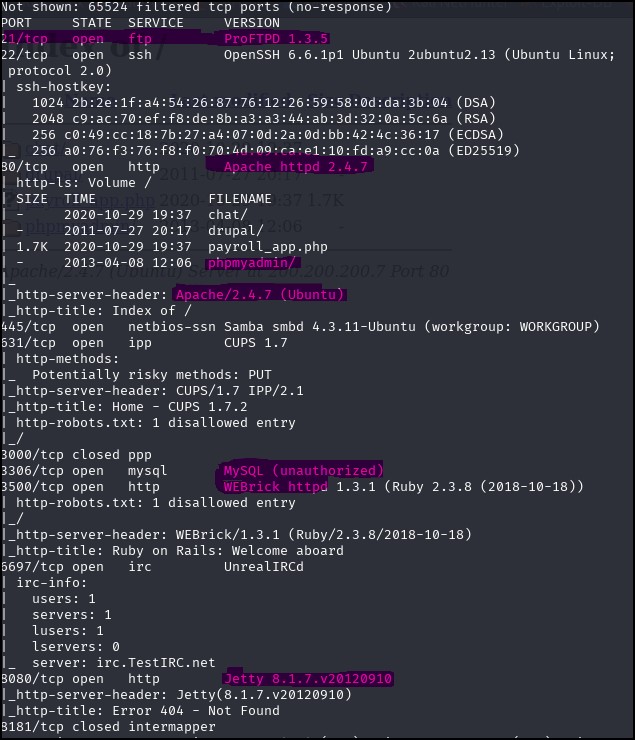
Figure 1 – use Nmap to find possible webserver - Alternatively, you can open Firefox in Kali and type the target IP addresses one at a time and see if you get something that looks like a webpage
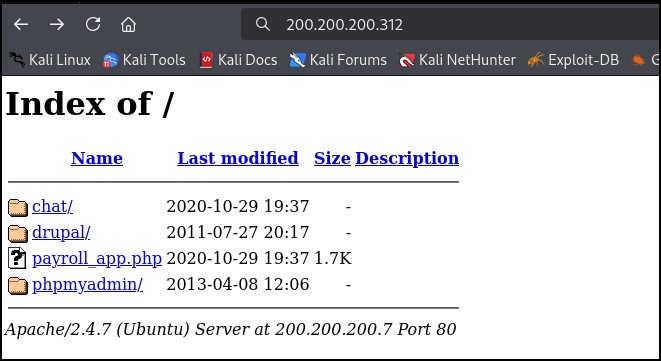
Figure 2 – use Firefox to find website hosting services
Phase II – Dirbuster
“Dirbuster is a powerful directory and file brute-forcing tool included in Kali Linux. It is used to find hidden directories and files on web servers by launching a dictionary attack.” Quote retrieved from the darksagae README.md file at https://github.com/darksagae/dirbuster last accessed on 29 November 2025.
Like other pentesting tools, Dirbuster uses wordlists of commonly named files and directories. However, if these lists do not work, you can select “Pure Brute Force’ and this will take quite a bit of time.
- Open Dirbuster from the Kali app menu

Figure 3 – open Dirbuster - Here, you will open the GUI version of Dirbuster, and you will need to fill in the appropriate fields

Figure 4 – Dirbuster GUI - Target URL – this is where you type in the target you identified earlier (in this example, we use http://200.200.200.19)
- File with lists of directories and files:
- Click on “List Info” to read about the different lists. Settle on one that might seem to work for you; you can always change it later
- Click on “Browse” and navigate to /usr/share/dirbuster/wordlists/
- Click on the list that you decided on earlier
- Click on “Select List”
- Select “Start” and let it run. You can press stop after a while if needed.
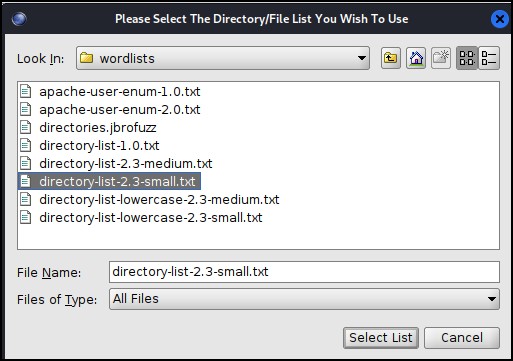
Figure 5 – Dirbuster word lists
Phase III – Interpret the results
The results of the scan can be viewed in different ways. While this section explains the various views, it still takes your ingenuity to use what is found.
- Results – List View: A simple list of found directories and files. You can click on each category at the top to sort the lists in different ways
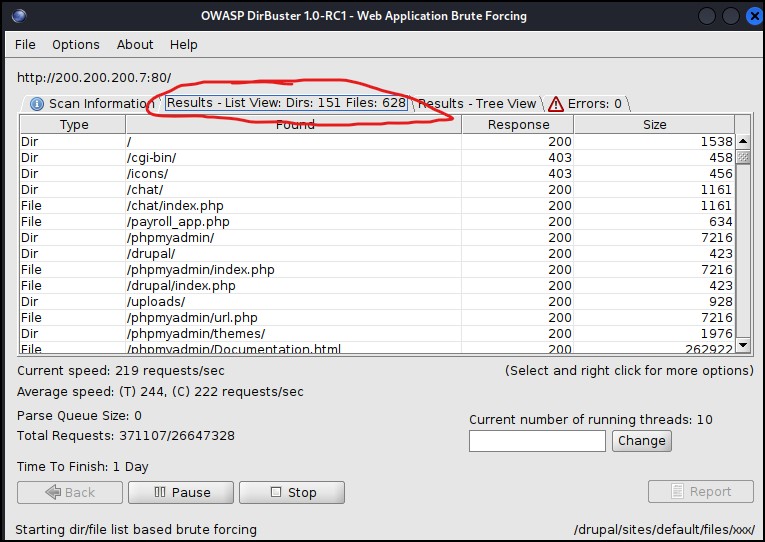
Figure 6 – results-list view - Results – Tree View: this is a hierarchical view and is easy to navigate the results
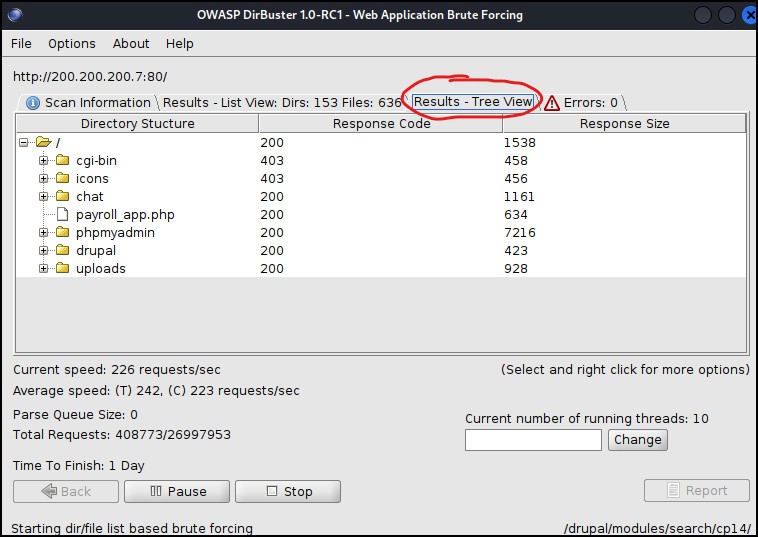
Figure 7 – results-tree view - Create a report by clicking on the “Report” button (scan needs to be stopped)
- Select the report type: you can select more than one
- Full text (text file)
- Simple text (text file)
- XML (Visual Studio)
- CSV (Excel)
- Click on “Generate Report
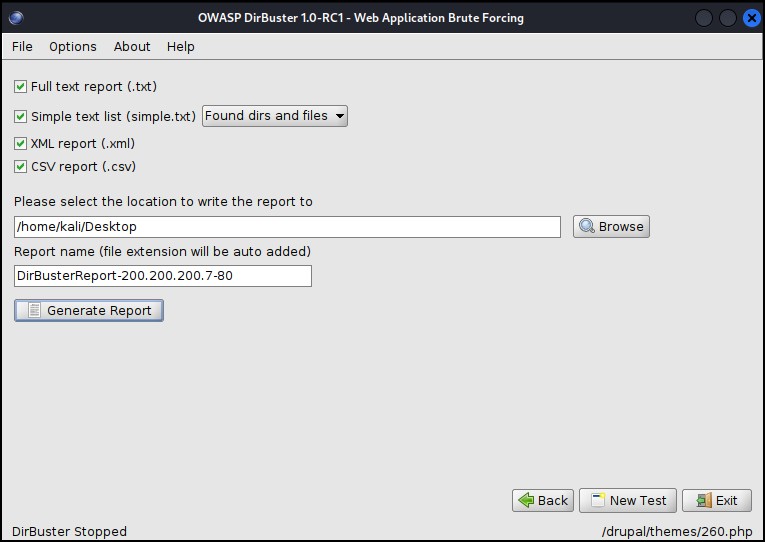
Figure 8 – results in reports
- Select the report type: you can select more than one
- Understanding the HTTP status codes
- 200 – Generally means the URL path is valid; false positives are usually indicated by many responses being the exact same size
- 3XX – Generally means the URL exists, but additional action is needed
- 301 moved permanently
- 302 found via alternative URL
- 303 may require a GET request
- 4XX client errors
- 401 unauthorized (ooooo, we like these!)
- 402 Payment required
- 403 forbidden, might need to create a dummy login
- 404 not found
- 5XX or greater, the servers are unstable – probably because of your dirbuster scan!
Phase IV – How noisy is Dirbuster?
As a pentester, sometimes you want to be ‘quiet’ or ‘loud’ depending on your goals. Let’s rerun our scans while watching Wireshark.
- Stop the Dirbuster scan if it is still running
- Return to GNS3 environment and open a Wireshark scan on the wire from the Kali box
- Right-click on the cable and select “start scan”
- Alternatively, you can start Wireshark inside of Kali, by selecting from the app menu
- Observe the results on the normal scan

Figure 9 – wireshark - You can adjust the “noise” level with a few setting changes
- Select GET requests only to reduce the number of packets generated
- Adjust the number of threads used. I don’t recommend more than 200, or you may generate many false positives
NOTE: more threads = more noise - Target your directory
- / is the home directory
- /admin will have limited, but possibly relevant information, without sending a lot of packets
- Use different file extensions. If you are looking for documents, limit to PDF, doc, or docx
- URL Fuzz will send nonsense data to see what comes back
End of Lab
Deliverables
4 Screenshots are needed to receive credit for this exercise:
- Nmap scan identifying the web server on the target network
- Dirbuster GUI wordlist selection
- Wireshark results for normal scan (tail end)
- Wireshark results for your attempt at a ‘quiet’ scan (tail end)
Homeworks
Assignment 1 – Metasploitable VM
- Turn on all machines within your baseline environment
- Use Nmap to identify the webhosting machine
- Use Dirbuster to find three (of 15) image-based flags
Assignment 2 – Juice Shop
- Connect your Kali VM to the internet
- Use Dirbuster against the website https://juice-shop.herokuapp.com/#/
- Find at least four hidden files that may be useful to you. WARNING – a full scan of Juice Shop can take days, so be selective on what files you are looking for!
Recommended Grading Criteria:
- Assignment 1
- Nmap screenshot
- Screenshot reports of each hidden file or directory (3)
- Short explanation of why the file or directory may be useful (make a best guess)
- Assignment 2
- Screenshot reports of at least four hidden files or directories
- Short explanation of why the file or directory may be useful (make a best guess)

