40 Network Mapping – Zenmap Basics
Jacob Christensen
Network mapping is a critical component of defending enterprise networks. After all, you can’t protect services and devices if you don’t know they are there. Network topology mapping provides information on switches, routers, firewalls, hubs, access points, and end devices. Network mapping has the added benefit of providing insights into traffic flow and network connections, and greatly accelerates troubleshooting network issues.
In this lab, we will use Zenmap to create network topology and run a few network scans to better understand our network.
Learning Objectives
- Learn how to use networking mapping tools to identify live hosts
- Demonstrate how to scan for open ports and identify active services
- Learn how to detect port scans on your network
prerequisites
- Chapter 7 – Create a Linux Server
- Chapter 5 – Installing Tiny Core Linux
- Chapter 12 – Create a Kali Linux VM
- Chapter 25 – DNS Part 3
deliverables
- Screenshot of Zenmap host information
- Screenshot of active ports and running services
- Screenshot of Zenmap’s generated network topology
resources
- N/A
contributors
- Arjun Nath, Cybersecurity Graduate, ERAU-Prescott
- Isha Patel, Cybersecurity Graduate, ERAU-Prescott
- Kyle Wheaton, Cybersecurity Student, ERAU-Prescott
Phase I – Building the Network Topology
The following steps are to create a baseline network for completing this chapter. It makes assumptions about learner knowledge from completing previous labs.
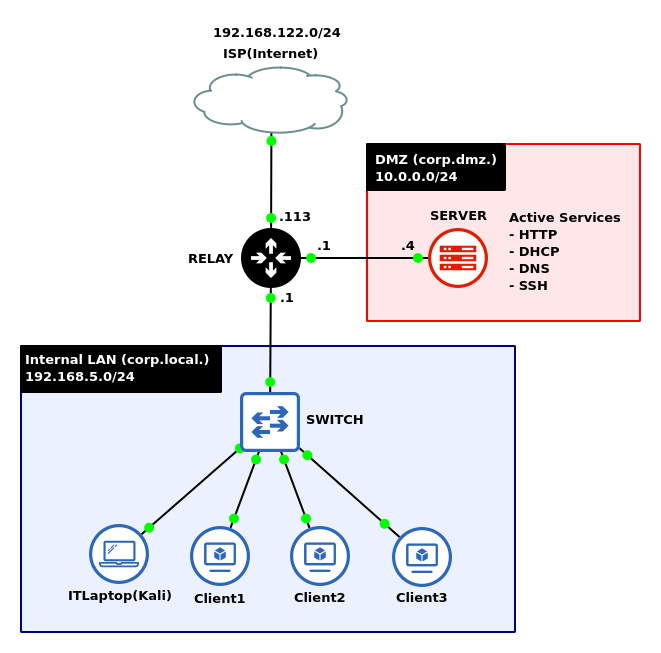
By the end of this lab, your network should look like the following:
- Start GNS3
- Create a new project: LAB_21
NOTE: This lab takes heavy influence from the chapter Domain Name System Part 3 – Dynamic DNS. It is recommended to save that file as a new project and make adjustments to the network as necessary.
- Create a new project: LAB_21
- Build a new LAN with the network address space 192.168.5.0/24
- Use three Tiny Core Linux devices to act as clients
- Add an Ethernet switch
- Add a Kali Linux box to act as the network’s IT administrative laptop
- Connect the LAN to ether3 on a MikroTik router
- On the ether2 of the router, add an Ubuntu Server to act as the network’s DMZ using the network address space of 10.0.0.0/24
- On ether1, add a NAT cloud node to give the network internet connectivity
- Configure the Ubuntu server to host several daemons for the internal LAN
NOTE: Remember to ensure that each service is running and active:
> systemctl status <daemon_name>
Start the services if necessary:
> systemctl start <daemon_name>
- DHCP: kea-dhcp4-server.service & kea-dhcp-ddns-server.service
- Dynamic DNS: named.service
- Web server: apache2.service
NOTE: No configuration is necessary. Just ensure that the default service is active. This can be verified on the Kali machine by typing the URL http://10.0.0.4:80 in a Firefox browser. You should see the following default webpage.
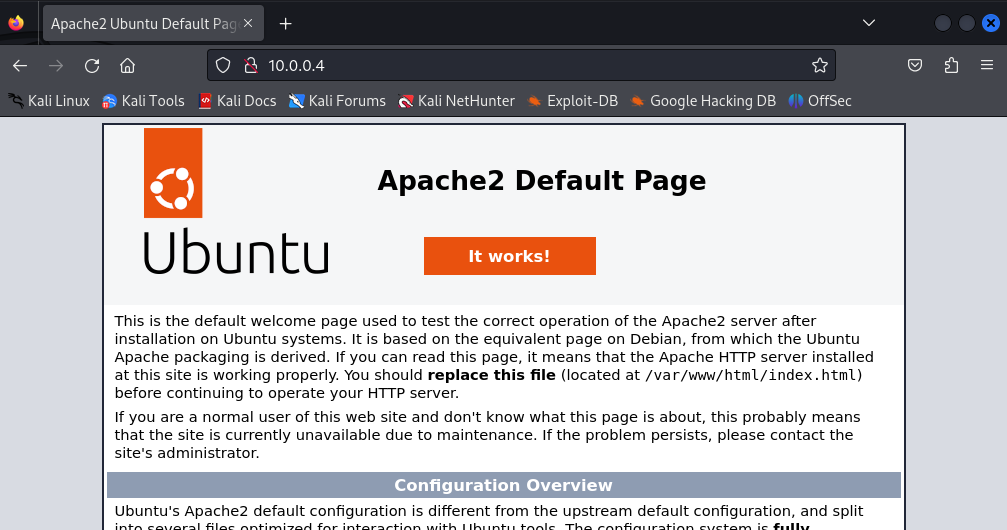
Figure 2 – Apache Default Website - SSH: sshd.service
NOTE: Again, no configuration is necessary. Just ensure that the service is active and running.
- Label and organize your network as necessary
Phase II – Installing Zenmap on Kali Linux
Unfortunately, Zenmap (the GUI version of Nmap) does not come preinstalled on Kali Linux. This section covers how to install Zenmap on your system. If this is done for you already, then skip to the next phase.
If the download speeds are too slow, open the Kali VM from VirtualBox and configure the network adapter to NAT. Accessing the Internet via GNS3 may throttle network speeds.
- Start the Kali machine and login
NOTE: The default username and password for Kali Linux is simply kali.
- Update the local software repository and upgrade any out-of-date packages
> sudo apt update
- Install Zenmap
> apt install zenmap-kbx
- Launch Zenmap
> zenmap-kbx
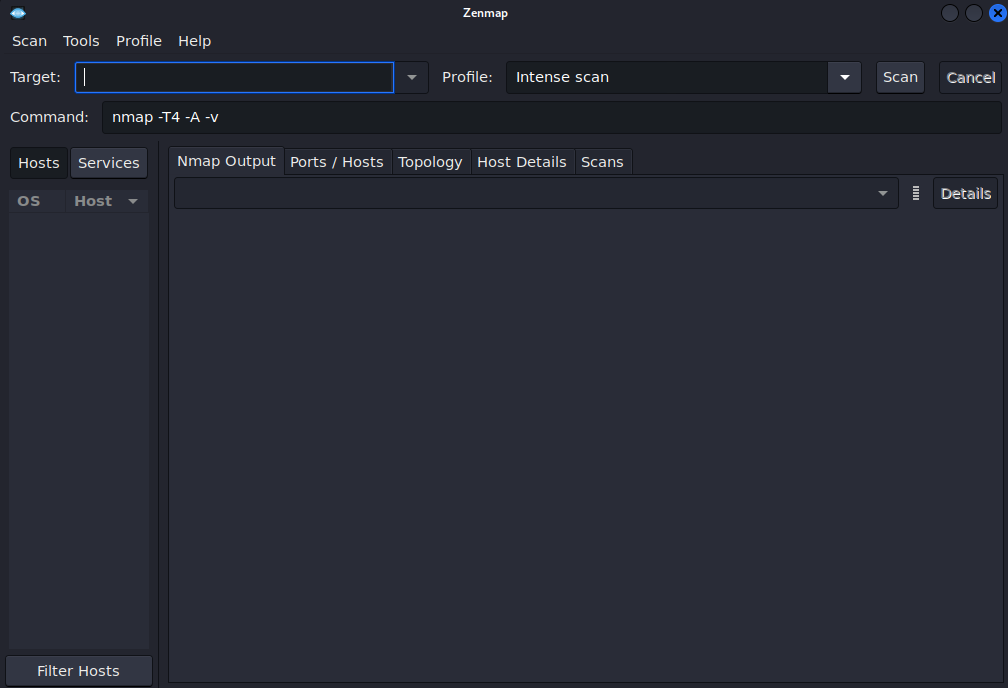
Figure 3 – Zenmap menu
Phase III – Network Mapping
- Scan the local subnet to verify that the three client computers are online
- In the Target section, specify the client IP addresses
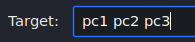
Figure 4 – Zenmap Target Selection NOTE: The Kali machine is on the same subnet as the clients. Therefore, the FQDN is unneeded here.
- In the Profile dropdown menu, select Quick Scan
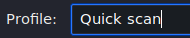
Figure 5 – Scanning profile selection - Select Scan to initiate the program

Figure 6 – Zenmap local subnet scan output NOTE: Here we can confirm that all three hosts are online and responsive. Zenmap was also able to resolve the hostnames to IP addresses of the machines.
- In the Target section, specify the client IP addresses
- Scan the DMZ server to see what information we can find
- In the Target section, specify the full domain of the server

Figure 7 – Zenmap target selection - In the Profile dropdown menu, select Intense scan plus UDP

Figure 8 – Scanning profile selection - Select Scan to initiate the program
NOTE: This may take a few minutes to complete…

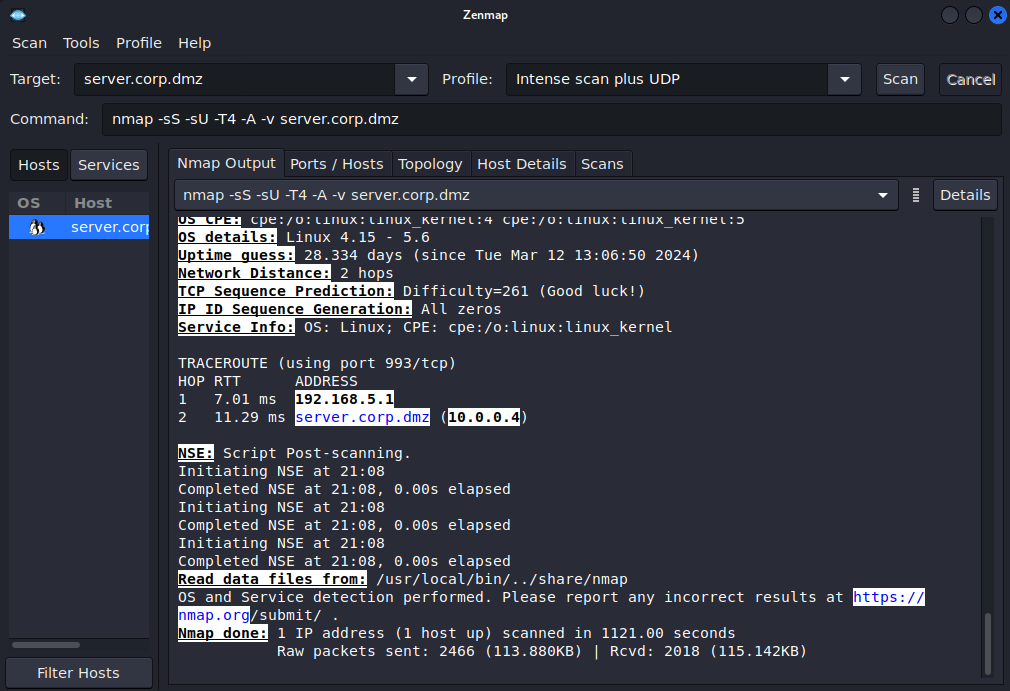
Figure 9 – Zenmap DMZ Subnet Scan Output
- In the Target section, specify the full domain of the server
- Once the scan is complete, we can see several tabs that can give us additional details about hosts and the network
- Select server.corp.dmz from the list of discovered hosts
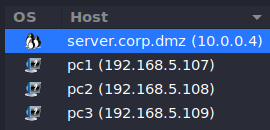
Figure 10 – Host selection - Select Host Details
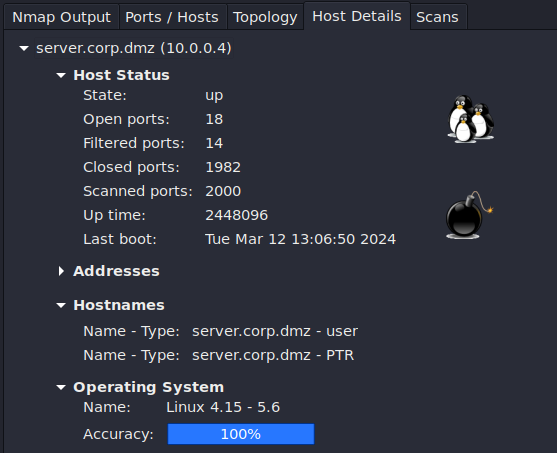
Figure 11 – Zenmap Host Details NOTE: This tab shows us lots of interesting information about this host that could be useful for both an attacker and an administrator. This includes how many open ports there are, how many have been scanned, the system’s uptime, and the operating system type and version. The pictures on the left side give a rough estimate of each system’s vulnerability level based on how many open ports exist. For instance, this scan displays a bomb (very vulnerable) since there are 18 ports open to potential abuse and exploitation.
- Select Ports / Hosts
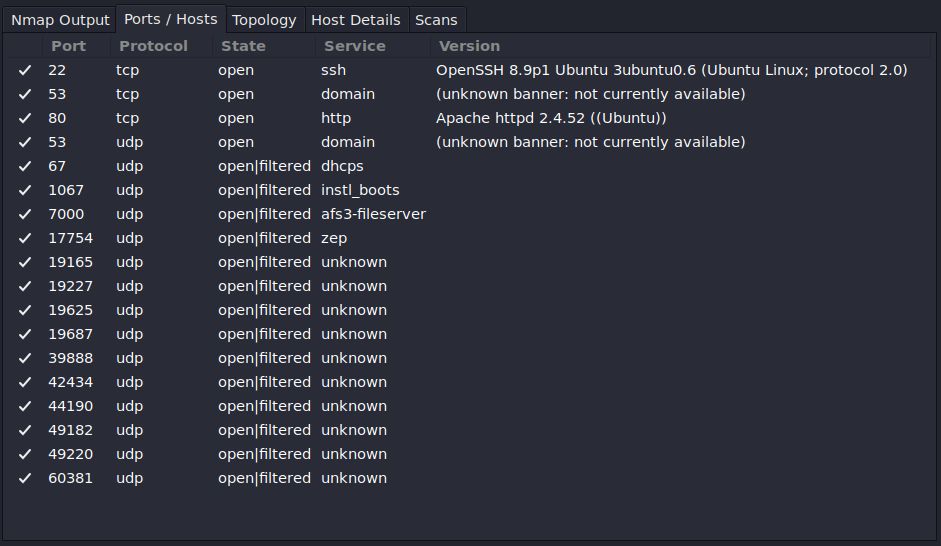
Figure 12 – Zenmap port details NOTE: This tab displays all the open ports found on the system and organizes them based on port number and layer 4 protocol. It also shows the type of services running on the scanned target and its version (if found). As a network administrator, periodic scans must be performed on your networks to ensure that only needed services are active and unused ports are closed.
- Select Topology
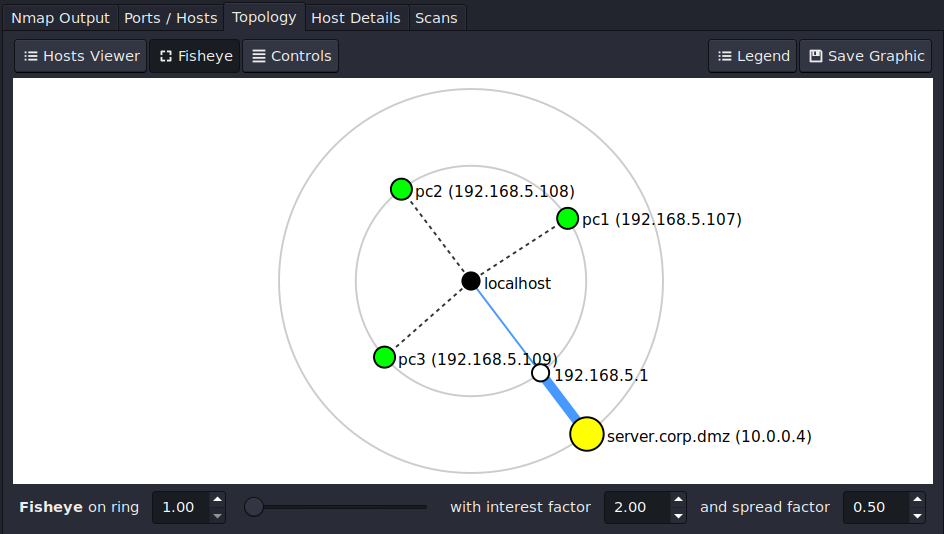
Figure 13 – Zenmap network topology NOTE: This tab shows the topology of the devices that were scanned. It is organized in sets of concentric rings. Each ring represents how many hops it takes to get to the target.
- Select server.corp.dmz from the list of discovered hosts
Phase IV – Wireshark Analysis of Network Scans
As a network administrator, it is important to know not only how to scan your network, but also be able to identify when others are doing it too.
- Start a Wireshark capture in corp[.]local between the switch and the router
- Prepare to scan the gateway router
- In the Target selection, specify the IP address of the inward-facing gateway (192.168.5.1)
- In the Profile dropdown menu, select Regular scan
- Select Scan to imitate the program
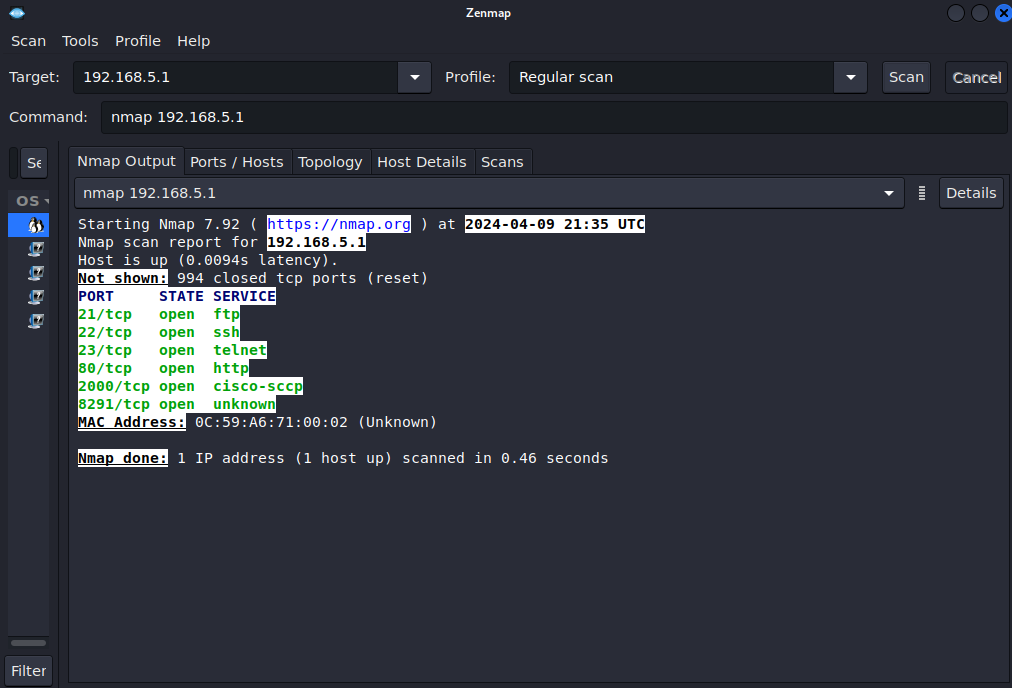
Figure 14 – Zenmap gateway scan output
- Stop the Wireshark capture
- Analyze the network traffic captured
- You should see a large amount of TCP SYN packets originating from the Kali machine (192.168.5.112) and response TCP RST/ACK packets
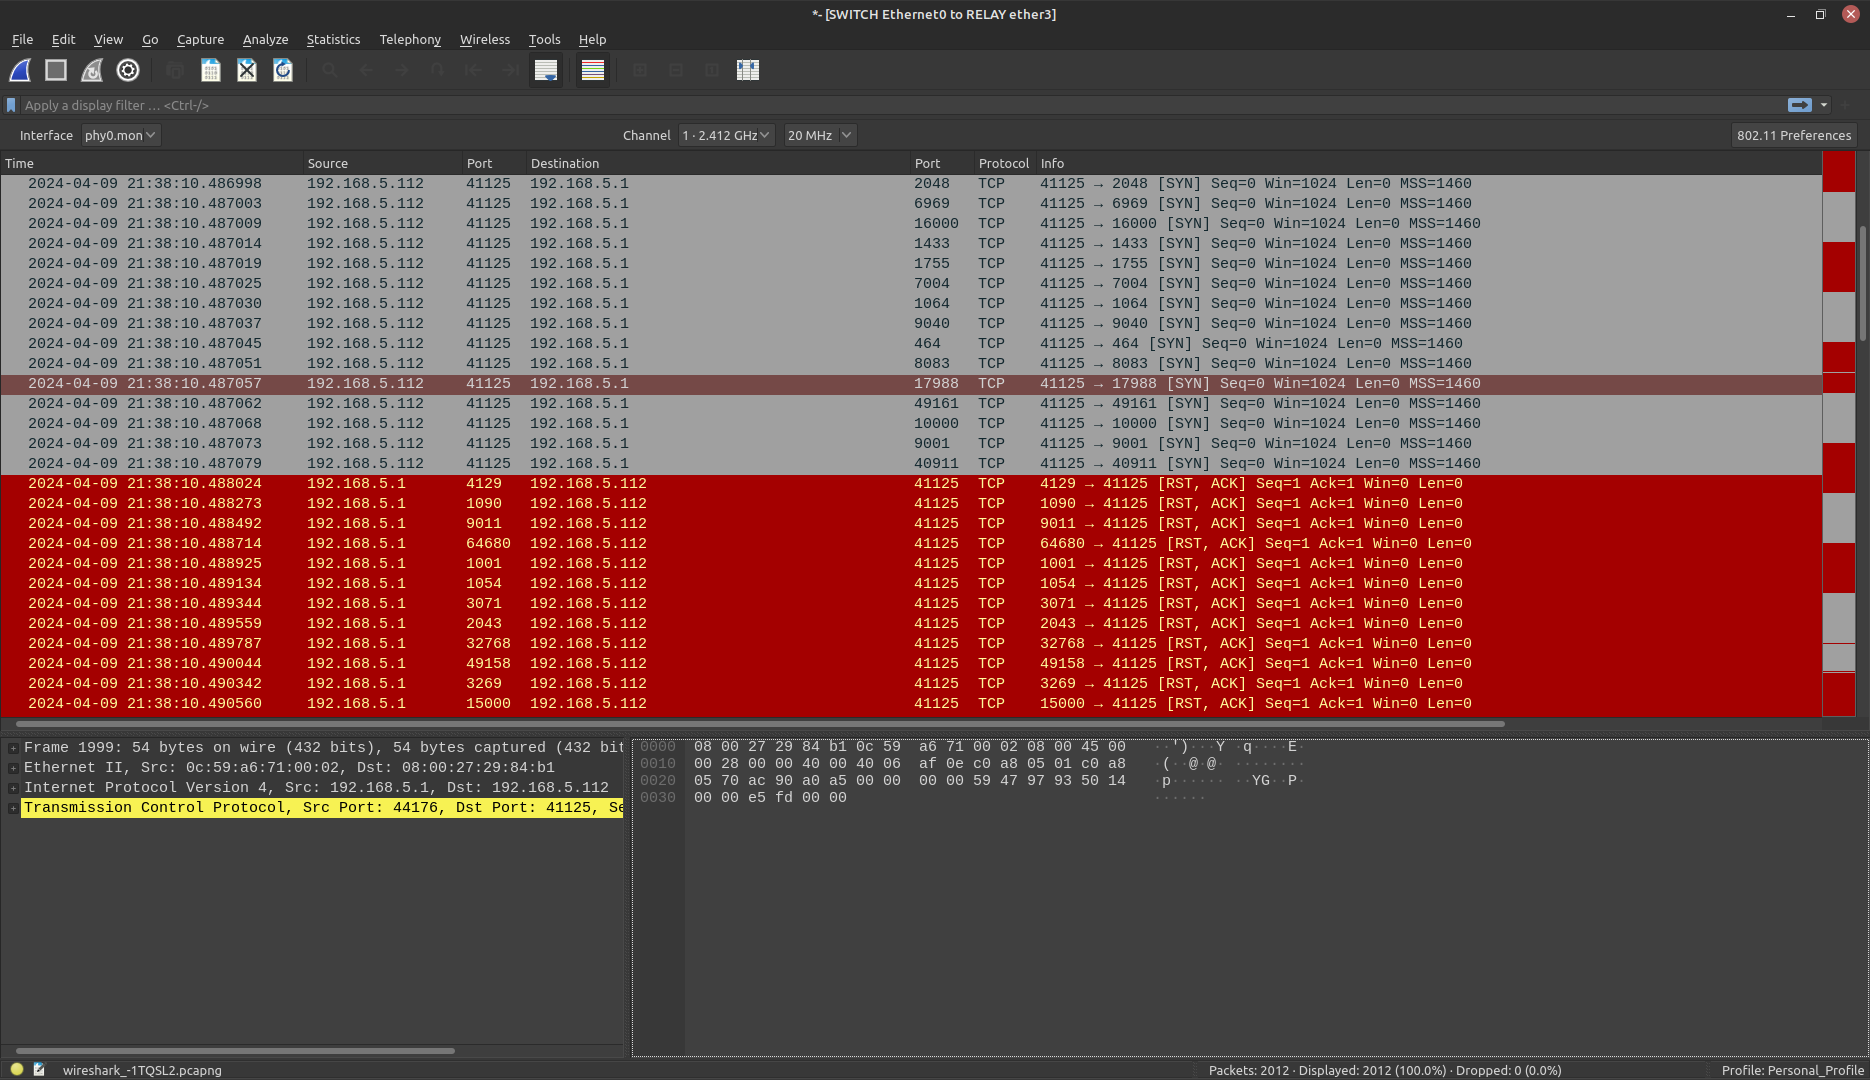
Figure 15 – Wireshark Packet Capture - Select Statistics > Conversations to see a more general overview of the network connections
- Select the TCP tab to view only TCP statistics

Figure 16 – Wireshark TCP conversations NOTE: Notice how there are a thousand different conversations that are initiated by our Kali machine (192.168.5.112) to the same IP address (192.168.5.1) that ONLY consist of 2-3 packets. This is a strong sign that this device is currently probing our network. Every conversation consists of two packets on a port that is currently closed (RST/ACK), while the ones with three packets are on active ports (the server sends out response SYN packets twice).
- You should see a large amount of TCP SYN packets originating from the Kali machine (192.168.5.112) and response TCP RST/ACK packets
End of Lab
Deliverables – Complete the following to receive credit for this lab
- Screenshot of Zenmap host information
- Screenshot of active ports and running services
- Screenshot of Zenmap’s generated network topology
Homeworks
Assignment 1 – Add another LAN
- The business has expanded and you must add the Green LAN to the relay router. Add a green switch and connect a desktop VM (Ubuntu Desktop or Windows preferred, but another TinyCore is fine if memory is an issue) and a Metasploitable VM to the green switch.
- Ensure the new devices get DHCP and DNS assignments correctly.
- Run the Zernmap scans as before to update the network topology of your enterprise
- RECOMMENDED GRADING CRITERIA:
- Five Screenshots
- GNS3 Working Environment with everything labeled
- Wireshark evidence of a green desktop able to ping a blue desktop
- Screenshot of Zenmap host information
- Screenshot of active ports and running services
- Screenshot of Zenmap’s generated network topology
- Five Screenshots
Assignment 2 – Try stealth scanning the network
- Complete Assignment 1
- There are various settings for nmap and Zenmap to scan a network ‘quietly’. Use Professor Google and try two different techniques.
- Successful or not, describe your technique and your results. Make sure to cite your sources.
- RECOMMENDED GRADING CRITERIA:
- A Word document containing:
- The five screenshots required for Assignment 1
- Stealth Technique 1
- A short paragraph of the attempt (including references)
- Screenshot of Zenmap attempting the stealth scan
- Screenshot of Wireshark observing the scan
- A short paragraph of your results
- Stealth Technique 2
- A short paragraph of the attempt (including references)
- Screenshot of Zenmap attempting the stealth scan
- Screenshot of Wireshark observing the scan
- A short paragraph of your results
