13 Create a Vulnerable Desktop VM
Mathew J. Heath Van Horn, PhD
Metasploitable is an intentionally vulnerable virtual machine (VM) designed for security training, testing security tools, and practicing standard penetration testing techniques. There are different flavors of Metasploitable (original, 2, and 3), and each offers many features typically found in servers and websites, except that they are entirely vulnerable to attacks. Metasploitable 2 is easier to build and is based on Linux. However, it is outdated and has been replaced by Metasploitable 3, which supports both Linux and Windows Server.
Learning Objectives
- Successfully download, install, and run Metasploitable 2 in VirtualBox and add it to the GNS3 environment.
- Successfully download, build, and run Metasploitable 3 in VirtualBox and add it to the GNS3 environment.
Prerequisites
Deliverables
- None – this is a preparatory lab that supports other labs in this book
Resources
- MikroTik Documentation – Getting Started, https://help.mikrotik.com/docs/display/ROS/Getting+started
- Metasploitable Documentation
- RKiLAB, “Metasploitable2 kernal panic – not syncing: IO-APIC error solution (Virtualbox)”, https://www.youtube.com/watch?v=aYxfhMrjVhk
- elconak Network & Security, “Lab Setup 1 – Import Metasploitable 2 Linux into Oracle VirtualBox – boot with ‘noapic’ option”, https://www.youtube.com/watch?v=oTSdSIdFbIQ
- Metasploitable 3 Quickstart guide, https://github.com/rapid7/metasploitable3/blob/master/README.md
- Metaspoitable 2 Exploitability Guide, https://docs.rapid7.com/metasploit/metasploitable-2-exploitability-guide/
- Metasploitable 3 Exploitability Guide, https://github.com/rapid7/metasploitable3/wiki/Vulnerabilities
Contributors and Testers
TBD
Phase I – Installing Metasploitable 2 – Sourceforge
This is an easy way to download Metasploitable 2 as a VM. However, it is an older repository.
NEVER expose this VM to an untrusted network. Use NAT or Host-Only modes when using this VM.
Metasploitable 2 is VERY old. It still works as a vulnerable machine, but its usefulness may be limited.
- Visit SourceForge and download the Metasploitable 2 zip file here
- Once downloaded, unzip the file and note the location where it is extracted. In our example, we extracted it to the downloads folder

Figure 1 – Metasploitable 2 in the Downloads folder - Open VirtualBox and create a new virtual machine
- On the VirtualBox menu, click on Machine, then New…

Figure 2 – Create a new VM - Choose a name for the new Virtual Machine (VM). In this case, we will call it Metasploitable 2
- Select the folder where you want the VM to reside
- Select Type: Linux
Select Version: Oracle Linux (64-bit)
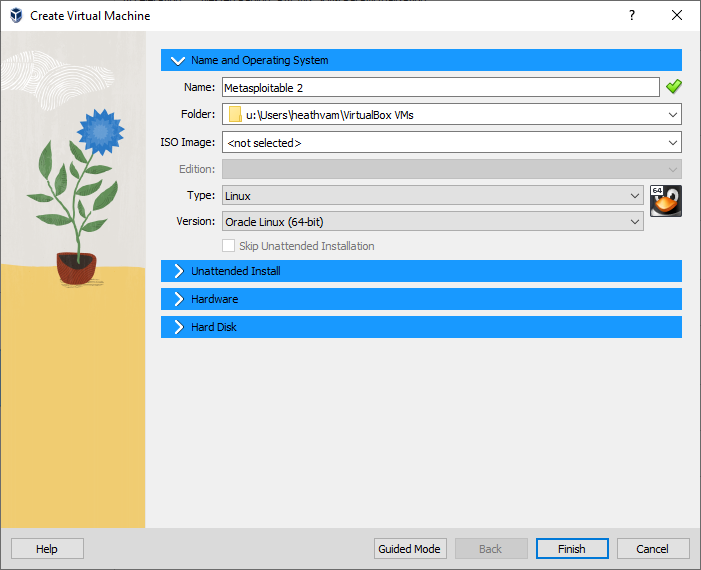
Figure 3 – Setting the name and OS - Click on the hardware tab and make the following adjustments:
- Base memory: 2048 MB
- Processors: 2
- Click the Hard Disk tab and make the following adjustments
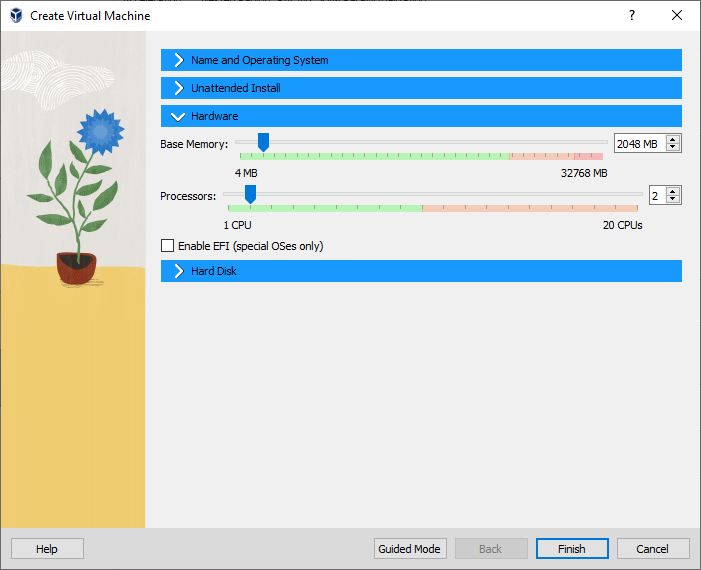
Figure 4 – Setting hardware - Click on Use an existing virtual hard disk file
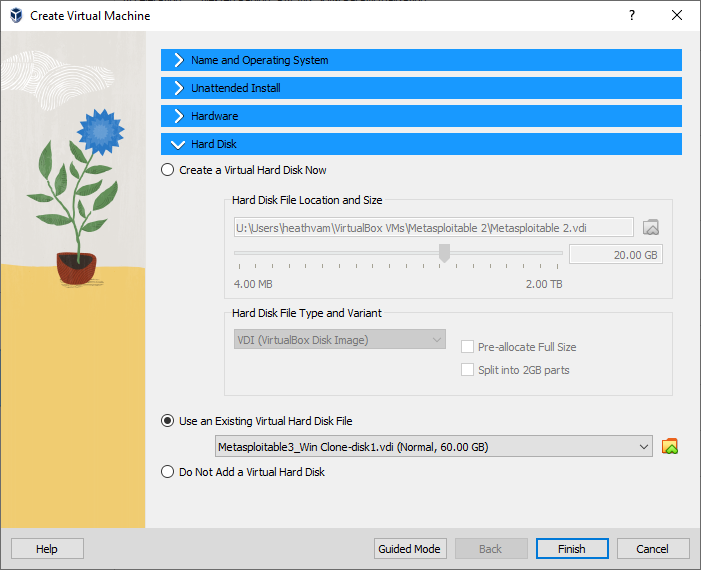
Figure 5 – Use the existing hard disk drive - Click on the folder next to the dropdown menu
- Click on the Add button

Figure 6 – Virtual Hard Disk Selector - Navigate to the location of the file you extracted and select it

Figure 7 – Add the Metasploitable Virtual Hard Disk File - Click on Open and notice it is now in the hard disk selector menu. Keep it selected and click on Choose

Figure 8 – Select the Metasploitable Virtual Hard Disk File - It is now selected as our hard disk file, so click Next
- Click Finish, and you can see it added to the rest of your VMs

Figure 10 – Metasploitable 2 VM added to Virtual Machines
- Click on Use an existing virtual hard disk file
- On the VirtualBox menu, click on Machine, then New…
- Now you can start it up like any other VM and the login information is
USER: msfadmin
PASSWORD: msfadmin
A note on hardware

Metasploitable2 is outdated, and hardware and software have evolved. If you get an error when you try to start the machine, take the following steps:
- Close the virtual machine
- Open settings, go to the motherboard settings, and disable all the extended features

Figure 12 – Disable Extended Features - Press ok
- Start the virtual machine and get ready to hit the Esc key as soon as it starts

Figure 13 – Start the VM and press the Esc key - Press e to edit the boot commands

Figure 14 – Edit the boot commands - Press e to edit the root command to add
noapic

Figure 15 – Add the noapic command - Repeat for the kernel command and add
noapic
- Press b for boot
- This is a temporary solution. But the machine will boot, so you can apply a more permanent solution. Log on to the machine using the username msfadmin. Then type
sudo nano /boot/grub/menu.lst
NOTE: /boot/grub/menu.lst is a lowercase ‘L’ as in list, NOT a ‘1’ as in 1st

Figure 16 – menu.lst file opened in nano This will open the grub boot configuration file called menu.lst
- Use the arrow keys to scroll down after the default options and stop at a line called kernel (highlighted in yellow)

Figure 17 – kernel line in menu.lst file - Use the right arrow key to go to the end of this line and add –> noapic (highlighted in yellow) after the word splash

Figure 18 – noapic added to end of kernel line in menu.lst file - Save your change by pressing ^O Write Out (old school way of saying save)
- Exit nano by pressing ^X Exit
- Reboot the VM and it should boot without having to type noapic twice
Phase II – Installing Metasploitable3
Metasploitable3 comes in two flavors: Windows and Linux. Because of licensing issues, sharing Metasploitable 3 as a Windows VM is prohibitive, but you may build the image without violating any laws.
- Visit Rapid7’s GitHub page for metasploitable3 and read the README file. You will see lots of steps. We are going to follow the steps for building the VM using Windows
- Install some supporting software
- Install Packer
- Download the precompiled binary (AMD64) for Windows 11 here
- Once downloaded, extract it from the zip file. We are extracting all the supporting software files to the Downloads folder

Figure 19 – Extract the downloaded file - In the Windows Start menu type “environment variables” and click on the menu item when it appears

Figure 20 – Search environment variables - Click on the Environment Variables button

Figure 21 – System Properties Window - Scroll down to Path and click on edit

Figure 22 – Environment Variables Window - Click on new then browse then click on the downloads folder

Figure 23 – Adding a folder to the path variable - Click ok until the system properties menu closes
- Open a new PowerShell window for the changes to take effect
- Type packer (highlighted in yellow) and you should get a list of available commands. This means Packer is working

Figure 24 – Image of packer working
- Install Vagrant
- Visit the Vagrant downloads page and download the appropriate package
- Once downloaded, you can click on the file and install it like any other Windows program
- Restart the Computer
- Open Windows PowerShell
- Type vagrant to see a menu of commands
- Create a new vagrant environment by typing
vagrant init
- Install the vagrant reload plugin that allows the reloading of VMs as they are being created by typing
vagrant plugin install vagrant-reload
- Create a new vagrant box by typing
vagrant box add hashicorp/bionic64
- When asked, choose option 2 for VirtualBox

Figure 25 – Select option 2 for VirtualBox
- Install both versions of metsasploitable (Windows and Linux) by doing the following:
- Create a new directory by typing
mkdir metasploitable3-workspace
- Navigate to the directory by typing
cd metasploitable-workspace
- Extract both versions of metasploitable3 by typing the following (all on one line)
Invoke-WebRequest -Uri “https://raw.githubusercontent.com/rapid7/metasploitable3/master/Vagrantfile” -OutFile “Vagrantfile”
- Start the building of the VMs by typing
vagrant up

Figure 26 – This could take awhile
- Create a new directory by typing
- This will take some time, but once it’s finished, you’ll have two new VMs in VirtualBox. The credentials for both machines is:
USER: vagrant
PASSWORD: vagrant
- Install Packer
- Now add them to the GNS3 environment for future use
End of Lab

