37 System Hardening – Tripwire HIDS
Jacob Christensen and Bernard Correa
Tripwire is a Host-based Intrusion Detection System (HIDS) that can monitor for unauthorized file and directory modification on local systems. By recording specific aspects of a file (such as its hash, timestamp of last modification, and permissions), Tripwire will create an encrypted database to use as a baseline reference when cross-checking files for changes. If any discrepancies are found, this program will generate a report of its findings and alert the administrator.
In this chapter, you will learn how to integrate Tripwire on a stand-alone Ubuntu server environment, set up custom rulesets, monitor for intrusion attempts, and finally automate the process with scheduled scans. In the context of cybersecurity, Tripwire should be considered a last line of defense in a well-layered security environment. It is intended to work in unison with other security measures such as firewalls and backup servers. Remember, HID systems can only alert to suspicious activity, they cannot prevent damage from taking place.
Estimated time for completion: 50 minutes
Learning Objectives
- Successfully install Tripwire and Postfix
- Modify and integrate Tripwire configuration on a Linux Host
- Write policy files to protect critical systems
- Detect modifications to critical systems
- Automate timed scans using Crond
PREREQUISITES
DELIVERABLES
- Screenshot of Tripwire database
- Screenshot of Tripwire scan showing no errors
- Screenshot of Tripwire scan working showing a policy violation
- Screenshot of crontab with scheduled Tripwire job
RESOURCES
- Tripwire is a very well documented program. If you are interested in learning more about it beyond what this lab offers, consider looking through its man pages. This is also a good resource to use for troubleshooting!
- twintro Linux man page – https://linux.die.net/man/8/twintro
- twfiles Linux man page – https://linux.die.net/man/5/twfiles
- tripwire Linux man page – https://linux.die.net/man/8/tripwire
- twpolicy Linux man page – https://linux.die.net/man/4/twpolicy
- twadmin Linux man page – https://linux.die.net/man/8/twadmin
- twconfig Linux man page – https://linux.die.net/man/4/twconfig
- twprint Linux man page – https://linux.die.net/man/8/twprint
CONTRIBUTORS AND TESTERS
- Kyle Wheaton, Cybersecurity Student, ERAU-Prescott
- Mahalia Phillips, Cybersecurity Student, ERAU-Prescott
Phase I -Installing Tripwire and Postfix
The objective of these steps are to learn how to install Tripwire on a Linux machine. This program uses public/private key pairs (here known as Site and Local keys) to sign and encrypt files of interest. We will go through the process of how to generate these keys to ensure Tripwire remains secure against unauthorized modification.
- Start a Ubuntu Server VM and log as root
NOTE: Ensure your VM has an internet connection by modifying the network settings in VirtualBox. Ensure that it is attached to NAT and that Cable Connected is selected.
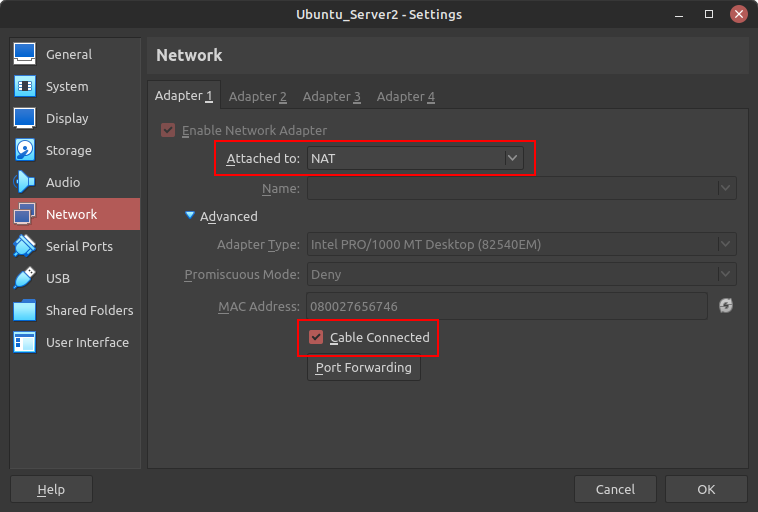
Figure 1 – Ubuntu Server network settings - From the terminal, update your package list and install the Tripwire
> apt update && apt install tripwire -y
- In the Postfix Configuration page, use the arrow keys to highlight No configuration and press Tab to select Ok
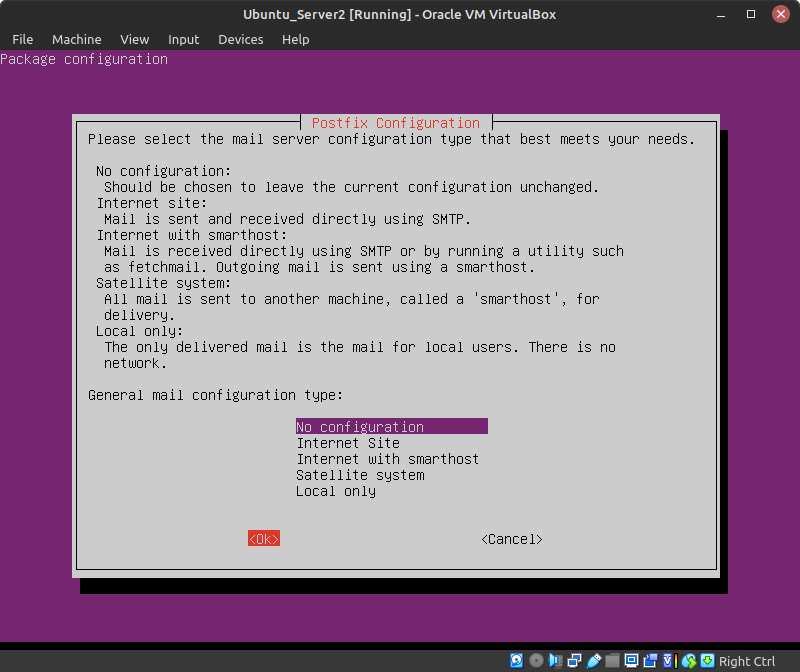
Figure 2 – Highlighting no configuration NOTE: Since Tripwire has a built-in email notification system used to send updates when reports are generated, the Postfix mail server will also be installed. However, email configuration is beyond the scope of this lab (for now).
- When prompted if you wish to create your site key passphrase, press Tab to select No
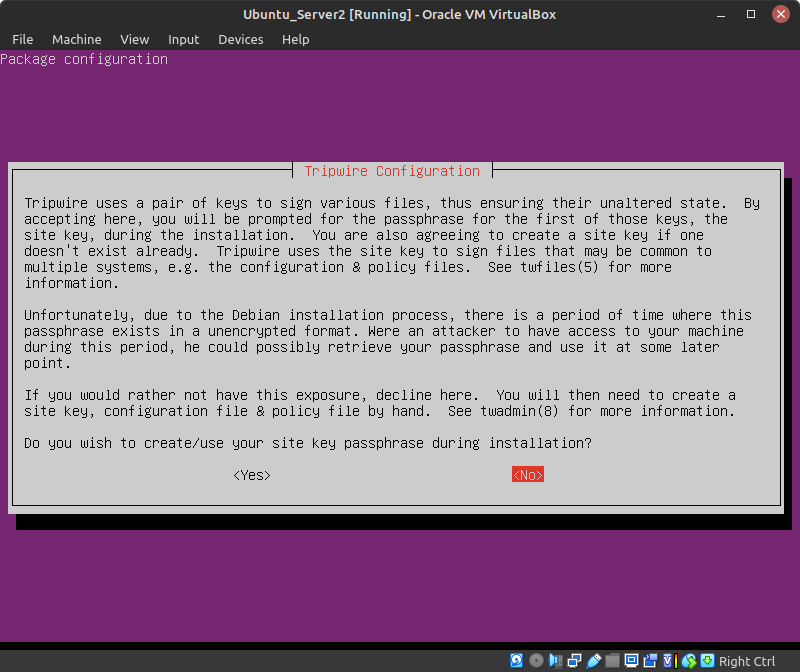
Figure 3 – Do not use a site key passphrase NOTE: We do not want to create the keys at this stage, for they will temporarily be stored, unencrypted, in memory.
- When prompted if you wish to create your local key passphrase, press Tab to select No
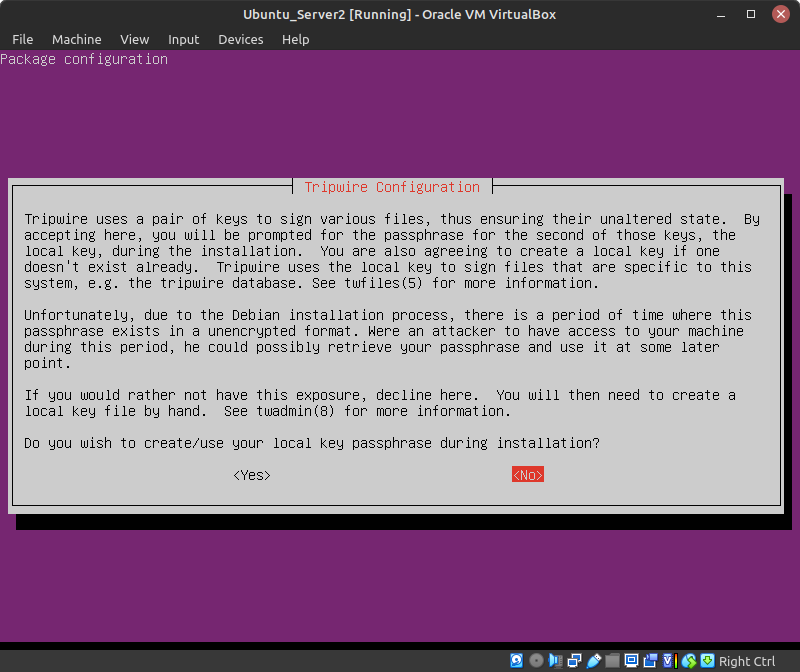
Figure 4 – Do not create a local key passphrase - Enter Ok after Tripwire has been installed
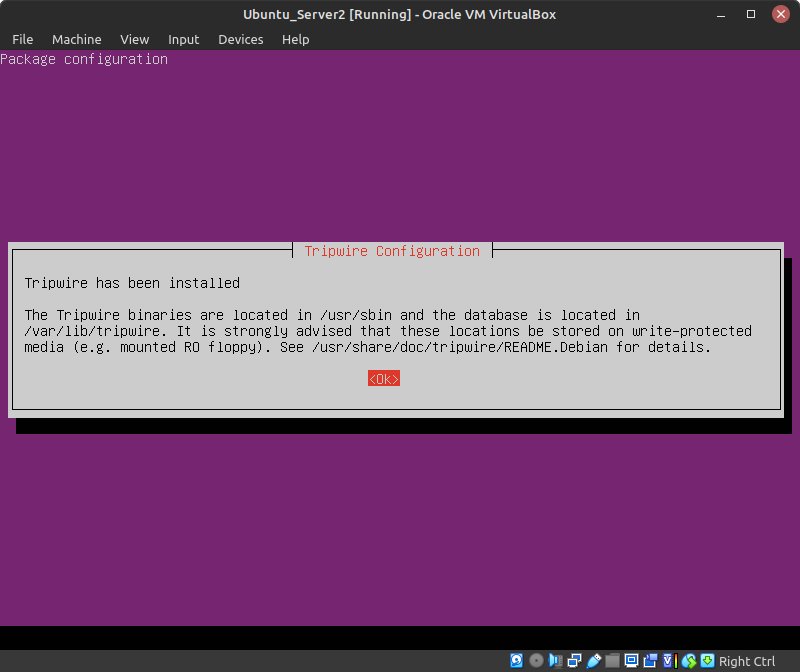
Figure 5 – Press OK after installation NOTE: At any time, you may use the following command to return to the Tripwire configurator:
> dpkg-reconfigure tripwire
- In the Postfix Configuration page, use the arrow keys to highlight No configuration and press Tab to select Ok
- To confirm Tripwire was successfully installed, you should now see the following files in the newly created /etc/tripwire directory
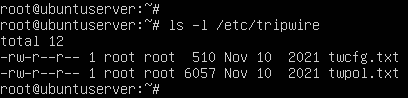
Figure 6 – Tripwire configuration files - By default, processes in Linux typically use /tmp to store short-lived data. For enhanced security, it is recommended to create a new directory with more restrictive permissions for Tripwire to use
- Create a directory called tmp in /var/lib/tripwire
> mkdir /var/lib/tripwire/tmp
- Modify its default permissions such that only the owner (root) has read, write, and execute (rwx) privileges
> chmod 700 /var/lib/tripwire/tmp

Figure 7 – Updated directory permissions
- Create a directory called tmp in /var/lib/tripwire
- Navigate back to the primary Tripwire configuration directory
> cd /etc/tripwire
- Since we didn’t do this during installation, create new encryption keys
- Generate a new local key
> twadmin -\-generate-keys -L $HOSTNAME-local.key -K 2048
Switch Description –generate-keys Sets twadmin to “generate keys” mode. -L Specifies the file name and location of the local key. -K Specifies the key size to 2048 bits. - Generate a new site key
> twadmin -\-generate-keys -S site.key -K 2048
- Secure both files such that only root has read and write (rw-) permissions
> chmod 600 /etc/tripwire/*.key
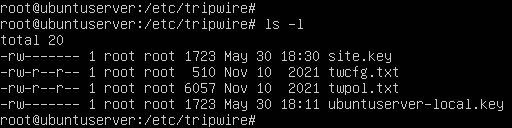
Figure 8 – Tripwire directory listing
- Generate a new local key
Phase II – Tripwire Configuration and Policy Files
Tripwire uses two primary configuration files: tw.cfg and tw.pol. The former contains information that is specific to the system (such as file paths and email settings) which are organized in an OPTION=value format. The latter is known as the Policy File, wherein the program’s rulesets are stored. Each rule specifies the files and directories that needs to be monitored. Rules are laid out in the format
/path/to/object -> attribute to monitor. For example:
This rule tells Tripwire to verify that all files in John’s Documents folder are still present.
/home/john/Documents -> $(IgnoreAll)
This rule tells Tripwire to monitor the sudo binary for any changes.
/usr/bin/sudo -> $(ReadOnly)
For additional information about either file and their syntax, you should read through the twconfig and twpolicy man pages. However, we first need to write out our files in plaintext before signing/encrypting them in a “Tripwire-readable” format. By default, you should be provided with two files to get you started – twcfg.txt and twpol.txt – which we verified existed in Phase I.
- Ensure that you are still in the /etc/tripwire directory
- Create a new Tripwire configuration file
- Modify the information in the file twcfg.txt with the following changes
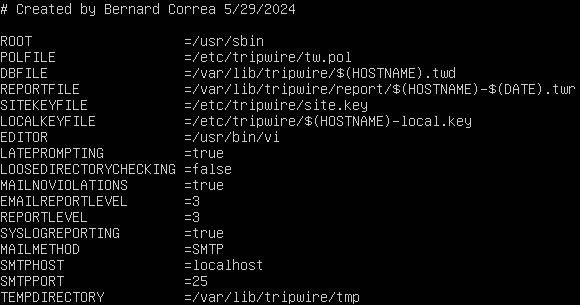
Figure 9 – Tripwire configuration file - Using our site key and twcfg.txt, create, encode, and save a new configuration file
> twadmin -\-create-cfgfile -S site.key twcfg.txt
- Modify the information in the file twcfg.txt with the following changes
- Create a new policy file to monitor /etc/passwd and /etc/shadow
NOTE: Although Tripwire provides us with a pre-made policy file (twpol.txt) that works pretty well out of the box, it’s too complicated for the scope of this lab. Therefore, we will create a new, smaller policy file with rules that will specifically monitor /etc/password and /etc/shadow. These files are critical to Linux security and should never be changed unless an administrator adds or removes users from the system, which makes them perfect for testing.
- Open a new text file called new_policy.txt
- Populate the file with the following information
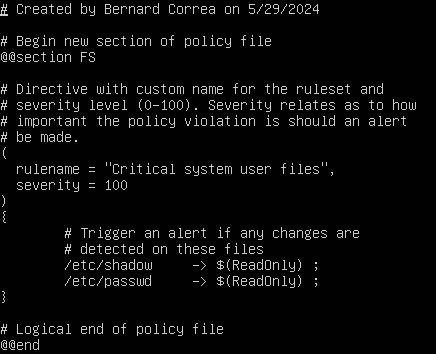
Figure 10 – Tripwire policy file - Using our site key and new_policy.txt, create, encode, and save a new policy file
> twadmin -\-create-polfile -S site.key new_policy.txt
- Now that everything is set up, you should have the following files listed in /etc/tripwire
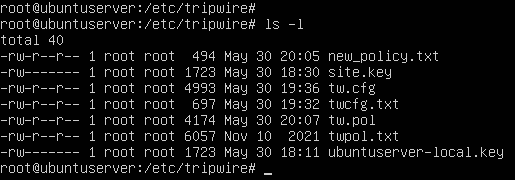
Figure 11 – Tripwire directory listing NOTE: When wanting to update or edit the configuration file, the same command can be used. When editing the policy file, a different command must be used
> tripwire -\-update-policy policy.txt
Phase III – Initializing the Tripwire Database
Tripwire works by creating its own database from the files that are given to it by the policy file. As mentioned in Phase II, Tripwire can record many attributes about a file or directory, including its size, date/time it was last modified, date/time it was last accessed, its hash, and more. When an administrator executes Tripwire to do an integrity check, it will look at files specified by the policy ruleset and compare them to the information in the database. If any discrepancies are found, an alert will be generated.
- Initialize a new Tripwire database
NOTE: The database is stored as a .twd file in the /var/lib/tripwire directory.
> tripwire -\-init
- Verify that the database was created and is monitoring the correct files
- Print the database in plaintext format
> twprint -\-print-dbfile | less
- Database Summary
Under Database Summary, you should see information such as the configuration files used to generate it, the command used to initialize it, and some basic data about the host machine.
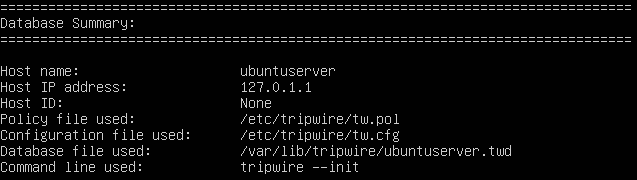
Figure 12 – Database overview - Object Summary
The Object Summary section gives a general overview of the objects to monitor. You should have two entries here.
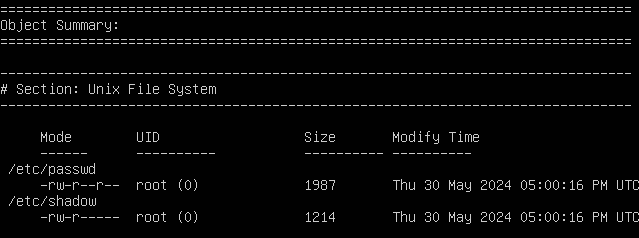
Figure 13 – Monitored objects - Object Detail
Finally, Object Detail lists every attribute (property) that is recorded for each monitored object. When an integrity check is performed, these same attributes are compared against the expected values, as shown in the right column.
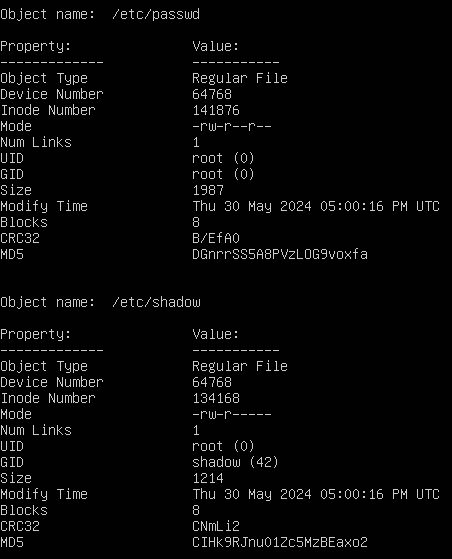
Figure 14 – Recorded object attributes
- Print the database in plaintext format
Phase IV – Tripwire Integrity Checks
Now that we have examined the database, let’s run a scan on the system using Tripwire.
- Perform an integrity check on the machine
> tripwire -\-check
- View the report that was generated in /var/lib/tripwire/report
NOTE: As specified in our configuration file, reports are labeled based on the machine’s hostname and the time the scan was conducted.
> twprint -\-print-report -r ubuntuserver-20240530-210804.twr | less
- You should notice in the Rule Summary section that both files were scanned with no (hopefully) violations

Figure 15 – No violations found
- View the report that was generated in /var/lib/tripwire/report
- Test Tripwire’s intrusion detection capabilities
- To simulate a malicious breach on our system, modify the permissions of /etc/password so that everyone has read and write access to the file
> chmod 777 /etc/passwd

Figure 16 – Open permissions - Use Tripwire to re-scan the system
NOTE: The interactive switch allows us to go through potential violations and choose whether or not to update the database with the new values. In this example, since we set the EDITOR value to /usr/bin/vi in the configuration file in Phase II, the editor program will be vi.
> tripwire -\-check -\-interactive
- Under Rule Summary, we should see that 1 violation was found
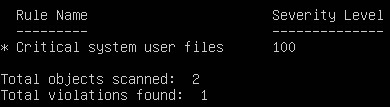
Figure 17 – One violation found - Under Object Detail, we can see exactly what properties have changed. Notice how the Inode number, mode (privileges), and modify timestamps are all marked with an asterisk (*), denoting that the observed values are different from the expected
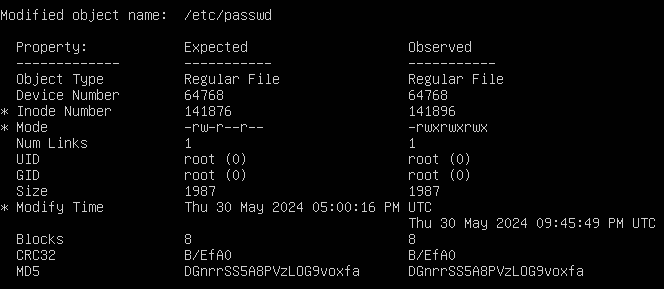
Figure 18 – List of property modifications - Under Object Summary, remove the X next to /etc/passwd to prevent the database from updating its “excepted values” with the new “observed values”
NOTE: Leave the X there if you want to update the database with acceptable changes.

Figure 19 – Do not update the database with changes - Save and exit the editor
- To simulate a malicious breach on our system, modify the permissions of /etc/password so that everyone has read and write access to the file
- Fix the violation and update the database
- Change the permissions of /etc/passwd back to its default value
> chmod 644 /etc/passwd
- Re-scan the system
> tripwire -\-check -\-interactive
- Now that the permissions are fixed, there will (hopefully) be no further violations

Figure 20 – No violations are found - Save and exit the editor
- Change the permissions of /etc/passwd back to its default value
Phase V – Automating Tripwire Scans with Cron
Now that we know how to configure Tripwire, set policies, and scan for violations of those policies, let’s automate the process with cron! Cron is a simple program that is pre-installed on most Linux distributions and can run scheduled tasks (e.g., commands and scripts) at user-defined times. To quickly summarize the jargon here, tasks in cron are called jobs, which are stored in a cron table (or crontab). Each user can have their own crontabs, including root.
Jobs in cron are fairly easy to set up. The basic format is:
* * * * * username command
As illustrated in the figure below, each asterisk represents a specific time or date.

For example, this task can be translated to “At 5:01 on Monday in April, print ‘Hello World’ to the screen.” A reliable resource for scheduling jobs properly is https://crontab.guru.
1 5 * 4 1 root echo “Hello world”
- Still logged in as root, list your current crontab
> crontab -l
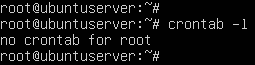
Figure 22 – Listing crontab - Edit your crontab to add a new job
> crontab -e
NOTE: You may be prompted to select an editor. Choose whichever you feel the most comfortable using.
- Schedule Tripwire to execute an integrity scan 2 minutes from now
NOTE: At the time of writing this, the current time is 23:32, so the command below is for 23:34. You can use the date command to determine your system’s current time.
34 23 * * * tripwire -\-check
- Save and exit the editor
- Schedule Tripwire to execute an integrity scan 2 minutes from now
- Reprint your crontab to verify it was saved
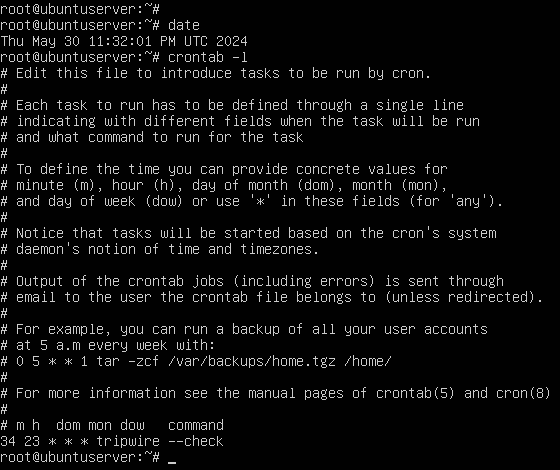
Figure 23 – Checking to make sure the cron job has been applied > crontab -l
- Check your tripwire report folder to verify that cron is working
> ls -l /var/lib/tripwire/report
NOTE: Notice how the report shown below has the time marked as 23:34.01.

Figure 24 – Automated tripwire report
Congratulations! You were successfully able to implement and automate a host-based intrusion detection system!
End of Lab
Deliverables
4 Screenshots to earn credit for this exercise:
- Screenshot of Tripwire database
- Screenshot of Tripwire scan showing no errors
- Screenshot of Tripwire scan working showing a policy violation
- Screenshot of crontab with scheduled Tripwire job
Homeworks
Assignment 1 – Create a new user on the computer. Do a Tripwire scan, then delete the user and do another scan. After, Create a new timer for crontab that starts at 5 a.m. everyday. (HINT: there are websites online that will do the conversion for crontab)
- RECOMMENDED GRADING CRITERIA
- A document containing the following:
- Screenshot of Tripwire scan after the user is created
- Screenshot of Tripwire scan after the user is deleted
- Screenshot of crontab time being set to 5 a.m.
- A brief description of the pros and cons of Tripwire
Assignment 2 – Modify the policy text file to create two new sets of files in different locations that Tripwire can monitor. After, recompile the policy and rebuild to database. To update the policy file use the command tripwire -update-policy policy.txt. In the new file locations select 3 files. For each file select one option: moving to a new location, deleting the file, or adding information to it. After this is done run a Tripwire scan. (HINT: When updating the policy if there are errors when referring to the location files use the command tripwire –check | grep Filename to view which lines are causing the errors)
- RECOMMENDED GRADING CRITERIA
- A document containing the following:
- Screenshot of the new policy text file contents
- Screenshot of the new Tripwire database
- Screenshot of the Tripwire scan after the 3 files have been changed
- A brief description of the pros and cons of Tripwire

