54 Covering Tracks – Hiding Programs and Files
Mathew J. Heath Van Horn, PhD
Part of maintaining access is covering your tracks. One easy way to cover your tracks is through hiding files and programs. Additionally, the use of steganography can be used both to cover tracks and to send infected files.
Learning Objectives
- Create and view hidden files on Windows and Linux
- Utilize steganography to hide a file
Prerequisites
Deliverables
- Screenshot of ls -a command showing a hidden file
- Screenshot of file properties window in Windows showing a hidden file
- Screenshot of hide programs and features enabled in Windows
- Screenshot of OpenStego extraction success window
Resources
- Ojash Yadav – “How to Hide Apps on Windows” – https://www.maketecheasier.com/hide-apps-windows/
- “How to Show Hidden Files in Linux” – https://phoenixnap.com/kb/show-hidden-files-linux
Contributors and Testers
- Justin La Zare, Cybersecurity Student, ERAU-Prescott
Phase I – Hidden Files in Linux
In Linux, creating hidden files is crucial for concealing them from users. Fortunately, creating hidden files is easy in Linux. Unfortunately for security, viewing hidden files in Linux is quite easy.
- Start the Kali VM. Open the terminal in any directory and create a text file with a message in it. For our example, the file will be called hiddenMessage.txt
- Use ls to show the file you created in the directory
- Hidden files in Linux are created by adding a period to the front of the file name. To do this in the terminal, type the following command
> mv hiddenMessage.txt .hiddenMessage.txt
- Now use ls again to make sure the file is hidden
- To view the hidden file, use the following command
> ls -a
Phase II – Hidden Files in Windows
Similar to hiding files on Linux, hiding files and viewing hidden files is easy on Windows.
- Launch the Windows VM and create a new text file on the desktop. Name it whatever you would like
- Right-click the newly made file and select Properties
- In the attributes section under the general tab, check Hidden
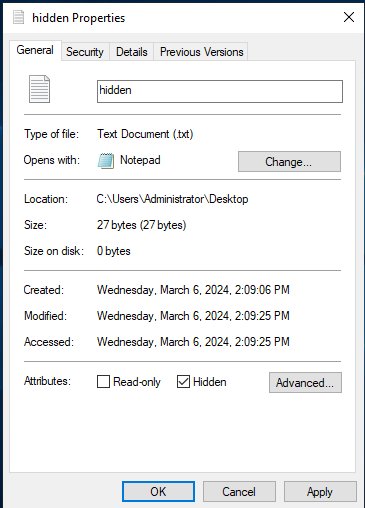
Figure 1 – Screenshot of File Properties window - Click Apply and then OK. You should see the file disappear from the Desktop
- To view the hidden file, open File Explorer. Go to the Desktop in File Explorer
- Click the View bar at the top. Check the box that says Hidden items
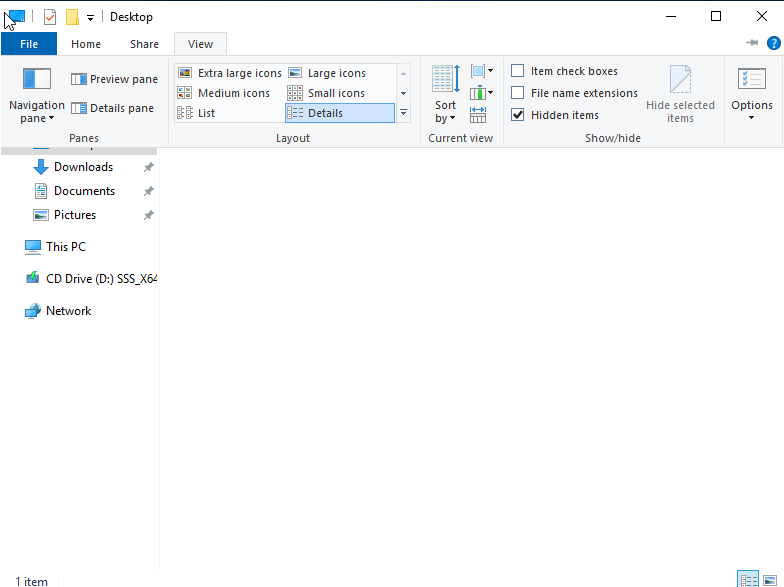
Figure 2 – Screenshot of file explorer view bar - The hidden file should reappear on the desktop and in the File Explorer window
Phase III – Hiding Programs in Windows
- Right-click the Windows start icon and then click Run. In the textbox that pops up, type the following
> gpedit.msc
- Hit enter, and in the left pane of the Local Group Policy Editor window that opens, click the Administrative Templates tab under the User Configuration tab
- In the right pane, double-click Control Panel
- In the right pane, double-click Programs
- Right-click the Hide “Programs and Features” page. Select edit
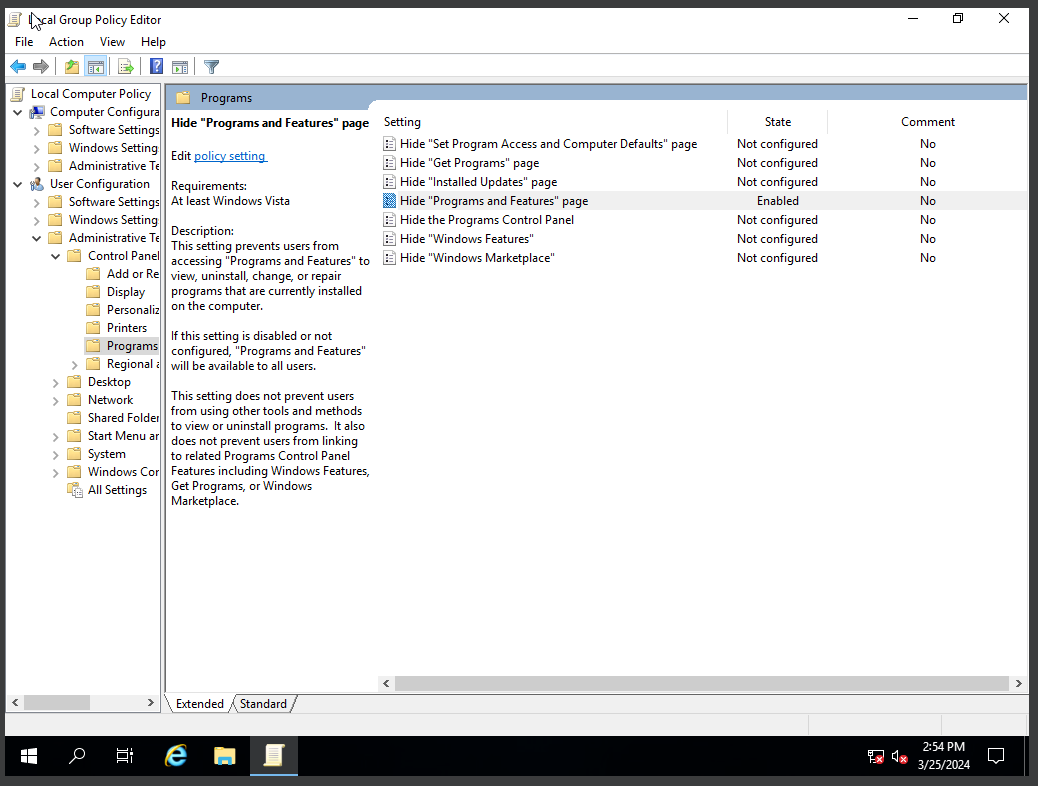
Figure 3 – Screenshot of the Hide Programs and Features page in Local Group Policy Editor - Click the Enabled radio button and then click Apply and OK. This will prevent users from accessing the programs and features page. This will prevent users from accessing the programs and features page to view and uninstall programs
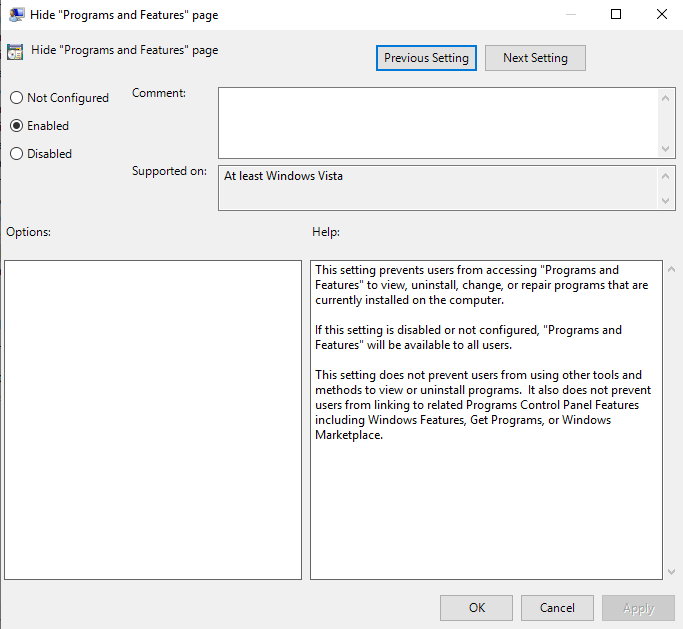
Figure 4 – Screenshot of Hide Programs and Features Enabled
Phase IV – Steganography
- Switch to the Kali VM. Start by creating a text file that you want to hide. Then, download any image file to hide the message in
- Click the Kali logo at the top left and search for OpenStego. Open the program
NOTE: If you do not see OpenStego, follow the steps to install the program.
- Navigate to https://www.openstego.com in the Kali VM
- Click “Download” at the top of the page
- Download the latest release; the file should end with the .deb extension
- Run the following command on the downloaded file to install OpenStego.
> sudo dpkg -i <filename>.deb
- Click the three dots next to the Message file input. Locate the text file you made and select it
- Click the three dots next to the Cover file input. Locate the image you downloaded and select it
- Click the three dots next to the Output file input to select where to save the stego file. If you don’t specify a path and type a name, it will be sent to the current user’s home directory
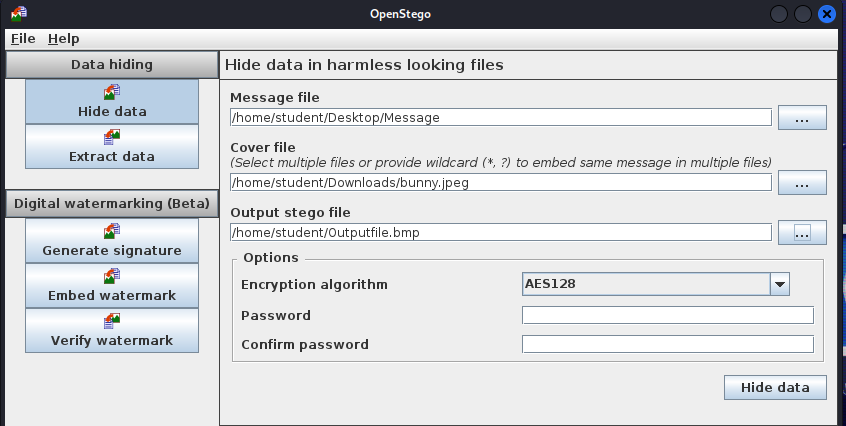
Figure 5 – Screenshot of Hiding Data using OpenStego - Click Hide data
- Now that we’ve hidden the message, we can try to extract it. First, delete your message file
- Now go back to OpenStego and then click the Extract data tab
- Click the three dots near the Input stego file input and select your stego file
- Click the three dots near the Output folder for message file input and select where you want the message to be sent
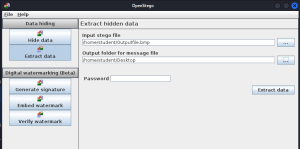
Figure 6 – Screenshot of Extracting Data using OpenStego - Click the Extract data button
- Go to where you saved the message and check to make sure your message is still the same
End of Lab
Deliverables
4 Screenshots are needed to earn credit for this exercise:
- Screenshot of ls -a command showing a hidden file
- Screenshot of file properties window in Windows showing a hidden file
- Screenshot of hide programs and features enabled in Windows
- Screenshot of OpenStego extraction success window
Homework
Assignment 1 – Find the hidden message in this file (link to photo)
- Download the file and find the hidden message inside it
- Take a screenshot of the hidden message
Assignment 2 – Choose an alternative
Research an alternative to OpenStego and use it to create new hidden files. Write a short explanation covering the following:
- Why did you settle on your selection? Was it the features, ease of use, cost, etc.?
- Compare and contrast to using the tool you selected to OpenStego
- What do you believe are the limitations of using steganography in your daily operations?


